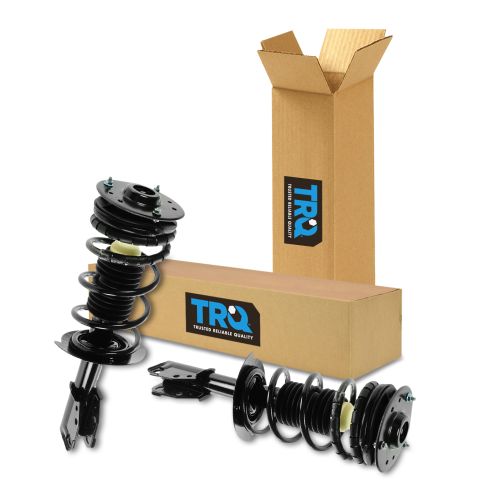
1ASFK00039-2000-05 Chevrolet Cavalier Pontiac Sunfire Front Driver & Passenger Side 2 Piece Strut & Spring Assembly Set TRQ SCA56941

Replaces
2000-05 Chevrolet Cavalier Pontiac Sunfire Front Driver & Passenger Side 2 Piece Strut & Spring Assembly Set TRQ SCA56941

Product Reviews
Loading reviews
5.00/ 5.0
13
13 reviews
Preloaded struts
February 2, 2017
The struts I ordered were at my house within3 days I installed them in about an hour and a half thanks to your excellent installation video great price easy to find on your website definitely will recommend to friends rating A - 1 thanks
Super Quality
April 22, 2017
The struts I ordered were of super quality and at a great price, not to mention easy to install. The video A1 shows on installation was very informative. The shipping was very fast. I will be shopping with A1 in the future. Going to try the rear struts next.
EASY any1 can do self repairs!
October 30, 2017
These front strut assemblies came fast, my only dislike about shipping was boxes came ripped and torn with the product hanging out in spots... these came rather fast and it was SIMPLE to install these! I'm no mechanic by any means but this was a snap! Thanks for making such a "user friendly" product to help the little guy do self repairs to save money! Also would like to mention your repair videos are AWESOME and HIGHLY informative!!! Many, MANY Thanks!
Strut and Spring assembly- front pair
March 30, 2018
This was my first order on line with A-! Auto. Being 74 years old, I'm not very good with a computer but your site was so easy to visit and negotiate through from identifying the part, ordering, arranging payment and checking out. The parts arrived in 3 business days as promised and was exactly what I ordered. The price was reasonable and very affordable. Would recommend A-! to everyone.
A very satisfied customer.
SHOCKS/STRUTS
December 26, 2018
Ordered these for the rear of a Pontiac Sunfire 2004, fit perfectly and used the video to assist with the install. After completing I ordered a pair for the front which is a bit more challenging but watching the video made the install possible. Ordering to receiving to the installation went very well, highly recommend replacing front and rear on your Sunfire if this old, made a big difference in performance and height lol.
Perfect Fit and Performance
February 24, 2019
I have an 01 Cavalier Z24, so finding the right strut to keep the proper ride height and handling was extremely important. These struts worked perfectly. Bolted in easily, about 25 minutes per side, and after a drive they settled just like stock. No modifications of any kind were needed. This might have been the best "direct fit" purchase ever!
March 17, 2020
Struts fit perfectly. Very easy to install. Very pleased with everything from 1AAuto.
Struts
August 20, 2020
Good struts fit perfect. Looked well built
December 9, 2021
Great product! Fast delivery and easy to install.
Front struts
April 25, 2022
They were easy to install and they are awesome
Chevy Suburban
May 19, 2022
Excellent!
My Chevy Suburban Handles, Drives and Brakes like New. Perfect Fit!
smooth ride
November 26, 2023
Was easy to install and handle like a new car .
October 24, 2024
Perfect replacement, like for like.
Customer Q&A
Does this come with 2 struts or 1?
February 26, 2018
10
This listing is a for a pair of these items. Thank you!
March 6, 2018
Adam G
10
2
March 30, 2018
James S
10
2- IT COMES WITH THE PAIR
March 30, 2018
Albert B
10
2 complete struts
August 20, 2020
Jason B


