Replaces
2007 Chrysler Town & Country Rear Semi-Metallic Brake Pad & Rotor Kit TRQ BKA37942
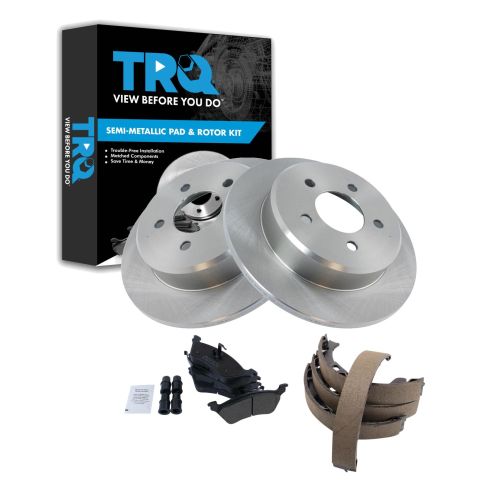

BKA37942
In Stock
This part doesn’t fit a . Select from parts that fit.
Specify your vehicle's year, make and model to guarantee fit.
Orders must be placed by 2pm ET
You may also like
Semi-Metallic Performance Brake Pad & Rotor Kit
$109.95
4 Piece Brake Rotor Set
$152.95
Semi-Metallic Brake Pad & Rotor Kit with Calipers
$168.95
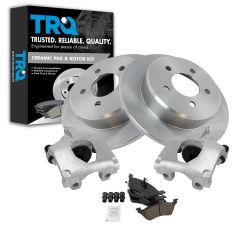
Ceramic Brake Pad & Rotor Kit with Calipers
$175.95
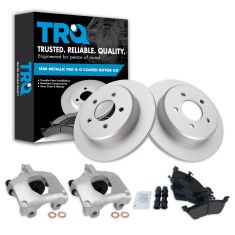
Semi-Metallic Brake Pad & Rotor Kit with Calipers
$176.95
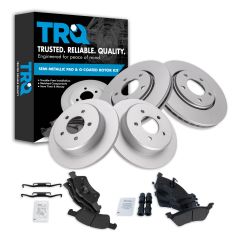
Semi-Metallic Brake Pad & Rotor Kit
$188.95
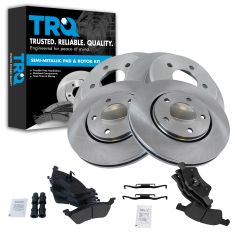
Semi-Metallic Brake Pad & Rotor Kit
$190.95
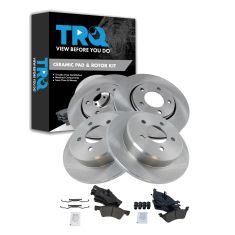
Ceramic Brake Pad & Rotor Kit
$204.95
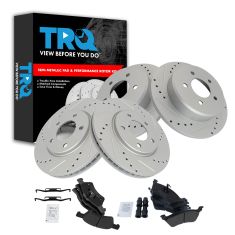
Semi-Metallic Performance Brake Pad & Rotor Kit
$219.95
Part Details
- Brake Pad Bonding Type: Premium Posi
- Brake Pad Friction Material: Semi-Metallic
-
Kit Includes:
(1) Rear Semi-Metallic Brake Pad Set with Contact Point Grease & Hardware
(1) Rear Parking Brake Shoe Set
(2) Rear Brake Rotors
Specification
- Rear
TRQ brake kits are designed to restore your brake system to like-new performance. TRQ brake pads are positive molded, thermal scorched, chamfered, and utilize a multi-layer shim for enhanced performance and service life. TRQ rotors have a non-directional finish that reduces the break-in period for new rotors as well as reducing vibrations throughout the rotor’s lifecycle. All products are fit and road-tested in our Massachusetts R&D facility to ensure we deliver on our promise of Trusted Reliable Quality.
Product Features
Item Condition:
New
Attention California Customers:
![]() WARNING: This product can expose you to chemicals including Lead and Lead Compounds, which are known to the State of California to cause cancer, and birth defects or other reproductive harm. For more information, go to www.P65Warnings.ca.gov.
WARNING: This product can expose you to chemicals including Lead and Lead Compounds, which are known to the State of California to cause cancer, and birth defects or other reproductive harm. For more information, go to www.P65Warnings.ca.gov.
Lifetime Warranty
This item is backed by our limited lifetime warranty. In the event that this item should fail due to manufacturing defects during intended use, we will replace the part free of charge. This warranty covers the cost of the part only.

Created on:
Tools used
- Loosen the lug nuts with the vehicle on the ground Raise the vehicle with a floor jack Secure the vehicle on jack stands Remove the 19mm lug nuts Pull off the wheel
- Remove 13mm bolts from the brake caliper Pull the ABS wire out of the brake hose brackets Set the caliper aside Push in the caliper piston by turning it with needle nose pliers Pry the brake pads off with a flat blade screwdriver Remove 18mm bolts from the brake caliper bracket Pull off the brake caliper bracket Pull the rotor off
- Clean the hub with a wire brush Apply grease to the caliper slides Clean the brake pad slides with a wire brush Apply grease to the brake pad slide mating surface with grease Press the brake pad tabs into place Apply copper anti-seize to the hub Clean the rotor with brake parts cleaner Attach the rotor to the wheel hub
- Put the caliper bracket back into place Start the bolts by hand Tighten the bolts to 74 foot-pounds of torque Install the new brake pads into the bracket Put the caliper on Thread 13mm bolts by hand Tighten bolts to 26 foot-pounds Attach the ABS wire to the brake hose bracket
- Slide the wheel into place Start the 19mm lug nuts by hand Tighten the lug nuts preliminarily Lower the vehicle partially to the ground Tighten the lug nuts to 100 foot-pounds in a crossing or star pattern
Hey, friends. It's Len here at 1A Auto. Today we're working on our 2012 Dodge caravan and I'm going to be doing rear brakes. It's going to be super easy. I can do it. You can do it too. If you need these or any other part, you can always check us out at 1aauto.com, thanks. Okay, so we've got the vehicle raised and supported off the ground safely and we're going to remove all five of these lug nuts.
Give it a little bonk, break it free. So this big area right here with the rust plates on it is the rotor. This outer area right here is your outer pad and this where you can barely see is where your inner brake pads should be. As you can tell it's worn down. That is literally metal to metal up against the rotor by the look of it from here. So once we get this apart, we'll be able to tell for sure what's going on and we'll be able to move along.
Okay, so you've got a little rubber boot here. You can just use whatever you've got in your hand to pop it off and this is called your bleeder screw. Underneath this is where the brake fluids going to come out from inside your caliper come bubbling up through here. If there's any air, of course it will come up to because this is the highest point in the caliper.
When you go to push back your caliper, some people like to open up their bleeder screw and have a catch bucket so it can collect any fluid that will come out and it gets recycled and then you push back the caliper piston and you don't have to worry about fluid going up through the lines and making its way the wrong way through the system. Other times people will just push it back without doing any of that because they don't want to get any air in there or break the bleeder screw, which is very possible. A lot of times these break. So we'll just leave it up to you. We'll say it's your prerogative, you do you booboo.
So we've got our caliper, you've got your slider right here. This basically is a pin that slides smoothly inside the bracket. A lot of times they'll get jammed up and you'll notice that your slider pin doesn't slide anymore. Once we get this apart, we'll take a look and see if this comes out and the same thing for the upper one, but to remove it and to get to the point, we're going to hold this end with our pliers. And then we're going to use our 13 millimeter on this end. And this is just a short bolt that just screws into right here. We'll take that out, look at it, put it back in a couple threads and we'll do the same to the top one.
Let's try and get this off of here. So that's what our bolt looks like. Sometimes you'll see these with some thread locker on them. It's your prerogative, if you want to use thread locker. If you do just use a dab. I'm going to put it in a couple threads like I said I would. Now I'm going to do this one. The reason for putting the lower one in, like I just did, was so when I go to loosen this, the caliber doesn't come flipping up and potentially hurt me. 1A auto, we strive for safety, so I'm going to get out my pliers, get them on there, and get my ratchet ready. We'll break that free. There's our second bolt. It looks exactly the same as the first. Grab that out of there. Here we are. We can set the pair of these aside and we'll continue.
So before we go ahead and take our caliper off of here, we're going to get our ABS wire taken off of the brackets that are connected to the brake hose. Grab it, pull them right out. The hose just has these little hooky do clips. Essentially they look like this and these just slide in like that. So you just pop it out. There you go. Now we have our ABS wire nice and far away. So when we take our caliper off of here, we don't have to worry about the ABS wire getting a tug and potentially breaking.
I'm going to grab my pry bar. Just go like this. You want to be careful when you're doing this, just in case it does actually break free on you and come flying down and potentially hurt you. Obviously we don't want anybody getting hurt. Once it breaks free, this is what you're looking at. You've got your e-brake cable, which connects right here. You've got your brake hose, which connects right here. And then of course the ABS wire, which should be completely separate, but it does get moved around while you're doing this. Here's the piston. This is a twist end type of piston caliper. Generally speaking with a regular caliper, you'd be able to grab it with some caliper pliers and squeeze it and the piston will go in. This one actually has a little groove here and one over there, and that tells you when you try to push this in, you need to twist at the same time.
So you're going to twist and push and that'll in turn push the piston into here and it'll force fluid up through the system or through your bleeder screw at that point. So we're just going to take the caliper like this. Take one of our bolts. I'm just going to bring it over it just like that. This is just so I can put my pliers in here and I'm going to try to turn that piston and see if I can get it to twist while I push and drive this piston.
So I'm taking my needle nose pliers or long nose pliers. I'm going into the grooves on the caliper piston there. Hopefully. Yeah. I'm going to attempt to twist and push at the same time and what I'm trying to do is get the piston to make its way inside. So we're just going to keep doing this until we get the piston back as far as we can get it.
Okay, now that we've got the caliper pushed back all the way, we're just going to take our little screwdriver and check along the boot. You just want to make sure it didn't get twisted as we were turning that in. A lot of times the boot will stick to the lip inside of the piston there. If it is, you just take your small pocket screwdriver and just try to lift the boot out of its little groove that it's in there and work your way around and the boot should straighten out. Once it is, it'll look pretty much like this. That looks really great. We can continue.
Okay, so we've got two mounting bolts for the caliper bracket. You've got this one right here. It's an 18 millimeter head and then there's one located up in the top portion of the bracket. It's also an 18. So I'm just going to use my ratchet, my 18 millimeter socket. Break this one free. I'm going to leave it in there for now. My socket off of there of course. We're going to do the upper one. Now that both of these are free, you can remove whichever one you want. There's our caliper bracket bolt. Do the same thing to this one. We're holding the bracket so it doesn't fall. There's going to be nothing holding it in now. There's both our bolts, caliper bracket with the pads. These are your sliders. I'll show you how to clean those up and relubricate them and we'll get the pads out of there as well.
So now what we're going to do, we're just going to grab our rotor. We'll take it off of here. We can set this aside. If for some reason yours was stuck on there and it doesn't want to come off, I would just do something like this. I would grab a lug nut. Start it on here, throw on my safety glasses, grab my hammer, and just give this a couple of loving bonks along the edges here. Assuming you're not reusing the rotor, which this rotor is garbage and you don't do a brake job and not replace the rotors anyway, or at least most people don't. But assuming the rotor's garbage, you're not going to be reusing it. Bonk, bonk, bonk, bonk, bonk, bonk, rotor comes loose, the lug nut keeps it from coming off and hurting you. Take off your lug nut, take your rotor, compare it to your new rotor, and then cycle this.
So we have our caliper bracket with the sliders, like I said before, and we have our brake pads or what's left of them. This is all I do. I just kind of bonk them out of here. Falls out. The pad's absolutely garbage as you can tell. Do the same to this one. That one out of there. So obviously there was an issue with the pad sticking inside the bracket, where you can see that the inner pad is not only worn down to metal to metal, but it's also worn at an angle, where this side over here has a fair amount of tread. I would still say that it's garbage, but this side over here obviously warrants it to be replaced. I mean that's just the metal part of the pad grinding on the inner part of the rotor there.
So here we are friends. A quick product comparison for you over here. We have our rear brakes, which is the rotor and the pads from our 2012 Dodge caravan. And over here we have our brand new quality 1A Auto parts. These parts are created equal. They're the same size. Okay? It's very important to make sure you have the same size diameter of rotors. We'll get the pads out of the way. We'll show you the rotors first real quick. By diameter, I mean if you put them over each other, they're the same. Okay. Going all the way around just like this. That's super important. If you have one that sticks out quite a bit further, you have the wrong rotor. It happens. It could be human error.
Secondly, what you'd want to do is turn the rotors over like this and take a peek to make sure that these lineup like this. That tells you that the index is the same or the hat depth is the same. That's this area right here, that's equal. To move along, we'll go right to the pads. We have our original pads, which are completely garbage and our brand new quality 1A Auto pads. As you can tell, you're looking at quite the difference in the amount of meat on these pads. Obviously the 1A Auto pads are new so they're going to have more. I don't need to explain that to you, but the main part that you want to pay attention to on the pads will just be the backing. To make sure that the length here is the same, the width along here is the same, and of course the tabs where they mount into the brackets is the same. As you can tell, these are the same. We'll set this stuff aside.
With all that said, I don't see any reason why these wouldn't be quality parts to install into the vehicle, so I'm going to go ahead and do it and as always if you need these or any other parts, you can always check us out at 1aauto.com, thanks.
So before we go ahead and start mounting our new stuff onto our caravan, just want to show you the pad, once again. This right here is the metal portion of the pad, and there should be a nice amount of meat on them, like our 1A Auto here. Okay? All meat is gone off of these pads right here. So it's metal to metal and it's rubbing directly into the braking surface of the rotor, which is going to cause a grind, lots of noises and overheating problems and it's very unsafe. If for some reason you're doing a brake job and your pad looks like this, there's no question on if you should replace the rotors. This rotor is garbage. If I was to try to replace just the pads and put on our brand new quality 1A Auto pads here, these are going to be wearing into the garbage-ness of the braking surface on this rotor and it's going to deteriorate our pads at a much quicker pace and it's probably going to make a lot of noise.
That would make no sense to go ahead and put pads on a garbage rotor. It only costs a little bit more. You can get a whole kit just like this, pads and rotors. Throw it on, down the road you go. I just wanted to show you those real quick. Let's move along.
Okay, so we're back over at the vehicle and here we have the hub. This is where the rotor is going to sit on to, obviously. You remember because you took it off. These areas where there looks like there's rust are actually raised areas and you need to make sure that those are clean. Okay? If there's any big flakes on there, it's going to offset your rotor and you're going to have a brake pulsation. So you need to have those areas as clean as possible with no large flakes. There's a few ways you can go about doing it.
You could use a brush like this and spend some time. If you've got all day and you've got nothing else to do, here you go. Or you can use something like this. Both of these tools are available at 1aauto.com and what this is, is you hook it up to an air hose, it's got a little sanding disc on here and you just give it a little and it'll clean up nice. I'll show you what both of them do real quick and you can make your own decision either way. 1aauto.com and of course either one you do decide to use, you want to make sure you're wearing eye protection and hand protection. Okay? Super important.
All right, so I'm going to start with the fun one. We're just going to take it. We're going to go right along this edge right here and I'll show you what I'm talking about. As you can you tell, that looks beautiful and it took hardly any time. That's the tool. Like I said before, there's also this tool which is also going to come in handy because using the other tool there, the sanding tool, you won't be able to get in between here and that's where something like this will come in handy. It gets it pretty clean, you could spend a little bit more time and get it better than that. If you don't feel any raised edges or areas that are bumped up at all, then I would say it's probably good enough. As long as it doesn't look like this, where there's a whole bunch of crud sticking up, you're doing all right. So I'll just show you along the edge, right along here, right there, what the difference would be if I just use this brush.
So there we are. I used the brush. I used the cleaning wheel. You choose whatever you want to do. This one right here, I'm going to have to spend a little bit more time and maybe even a screwdriver or chisel of some sort because I can feel a lot of raised areas on this and that's going to cause issues. All right? I'm going to continue with the sanding wheel. Okay, so we finished up the outer ring. We did as much as we could on the inner ring there with this tool. So we'll just continue with our brush and just go right in between the lug studs and the hub area right here. The area where that wheel couldn't get into. We'll get all five of these areas as good as we can and we'll be able to move along.
So we've got the front clean. This all looks really great. We did a good job there. We need to think about some other stuff along the backside of the bearing here. We've got some pretty large flakes going on. So it's always a good idea to try and get off as much of this crud as possible just because you don't want it to fall down and get stuck in between the rotor and the bearing or in between the rotor and the pads down the road. It's going to cause noise, it's going to cause issues and it's already apart so might as well. I'm just using a small pry bar here. You can also go with your little wire brush if you still got that out. It doesn't have to be perfect. I'm not looking for shiny metal or anything nice like that. I just want to get off the very large flakes coming along the bearing along here.
Okay, so let's say we got that all nice and clean. We can pay attention to the backing plate. It's got a lot of crud on there too. I should probably mention it's not a great idea to breathe in brake dust, so obviously you don't put your face down low like that while you're doing this, just keep your face away. You could use a little bit of parts cleaner if you wanted to. It's your prerogative. This looks pretty great. I don't see any big flakes coming off anywhere. I think we're doing all right. Let's move along.
Okay, so we have our bracket. We've got a nice pad to work on here. First, what we're going to do is we're going to take out the sliders. I'll grab right along the boot and pull the whole boot right off of the caliper bracket just like that. This boot actually comes off of the slider itself. There we are. Sometimes these sliders are different inside the caliper bracket, so always a great idea to make sure you remember where you put stuff and do the same thing over here. Twist, pull, grab that, pull it off, and set that aside.
Now we have our caliper bracket without the sliders attached to it. We'll just take a look at the sliders real quick. Both these sliders look exactly the same. Sometimes right along here you'll have a little rubber bushing. This one looks fine. We don't have to worry about mixing these up, but we're still going to keep them separate so we remember where they're supposed to go. These little clips right here, these are actually shims and what they do is they create a barrier in between the brake pad and the bracket and they just help with vibration dampening. They help keep things moving freely because they're a much smoother surface, especially once they're clean than the bracket itself. All right, so you can either take these off now and then clean them or you could do just a nice small brush. As you can tell, it's been used quite a few times. There's really nothing special about it and while these tins are on the bracket, it's going to be a great time to just go ahead and clean up this side of them.
Big difference. If you notice there's large chunks on there that don't want to come off with this, just go ahead and scrape them. Do whatever you got to do to make it happen. Okay, I'm going to do all four of them just like this, and then I'll show you how to take the tins off and we'll clean the backsides.
Now I'm just going to use a pocket screwdriver, or you can use whatever you have. You're just going to try to pry these up. That's what they look like.
They've got a little tab and a little tab there. And so when you go to put it on, you're going to put on the little tab first just like this, and you're just going to bring it over and then this side is going to hold it on. So we'll just get that back off of there. If you can't remember where they go or you're worried about remembering where they go, you can just try to set them up accordingly.
So there's our a bare caliper bracket. We have no sliders or boots. We have no tins, just a plain old caliper bracket, so now we're going to clean up the bracket where those tins were. To do that, just continue with our little brush here. If you were so inclined and you didn't want to spend all day using this, you can go ahead and use this. Just give a little along here, right up along there and then do the same to the other side. I'm going to continue with the brush. It's working pretty good on this and you need to make sure you get up any big chunks that are on this. If you have large chunks that won't come off with your wire brush, use whatever you've got and try to flake them up and get them out of there. If you have any big chunks in between here and where your tin is supposed to be, it's going to lift your tin up and that's going to hold your pad so it won't be able to slide around, so you need to make sure these are as clean as possible.
Along here it's nice and clean. That's where the tins are going to ride. And then the pads going to sit right in the tens and we need those pads to be able to move around. Right in here is where your caliper sliders are going to ride. Essentially, there'll be inside just like this, and as you step on your brake, they move a little bit just like that. You step on the brake, release, step on it, release--it's going to move around. It needs to be able to slide. That's why there's a lot of lubricant on here, but to be sure we know what's inside this in case there's any debris or gunk or moisture, I'm just going to use a little bit of parts cleaner. Got my safety glasses on still of course. Basic board brush. It's just a wire brush on a drill. Very basic. This is just to clean any crud that's inside there out or at least loosen it up.
Of course, we're doing this over our recycling receptacle so we can dispose of any chemicals properly. We're going to spray this. Of course when we spray in, stuff's going to want to come out, so keep your face out of the way and your mouth closed. You can see you in there. Looks like it's nice and clean. It's also important to pay attention to along the edges. Right along here, there's a lip along the edge and that holds the boot. If you have any large buildup along this edge, maybe it's rusted and flaking, you need to make sure you clean that up because your boots going to sit right inside that groove right there and if there's flakes of rust--it's going to prevent it from making a good contact and you're going to get moisture in there and your sliders will freeze up and they won't be able to move and your caliper won't function properly. You're going to wipe out your brand new quality 1A Auto pads.
With that said, we'll make sure this is empty as much as possible. Take a quick peek at it. If there's anything else you see that needs to be cleaned up, maybe along here or there or even along inside here, if your particular application has any debris that's hanging off of it, just clean it up. This one looks really good. We're going to set it aside and we'll continue with the other stuff real quick.
All right, so we've got our bracket done. Let's move along to the sliders. Just take your rag or whatever you happen to have, cleaning cloth of some sort. I'm taking my thumb and I'm trying to press inside this group with the rag and clean out all inside there. At the same time, I'm holding a rag on the rest of the slider and I'm trying to clean it off. So essentially clean your slider. So there's that one. It's nice and clean. That's what it looked like originally, pretty much. There's no big raised areas on this. It's not rusted and rotted. This looks like it'll be reusable. You want to make sure you have a nice smooth surface, so when this is going in and out of your caliper bracket, it's not going to get caught on anything. This groove right along here, it's super important to make sure that that's clean, just like on your bracket because your boot is going to ride right inside there and it needs to make a good seal to keep moisture out.
Once you know that looks good, we'll set it aside. Do the same thing to the other slider of course. Very simple. Just clean it up. You don't have to take all day do you want, it doesn't have to be anything too special. You just essentially need to make sure it's nice and smooth and there's no big buildup areas. This one right along here, you can kind of see that it does have a little bit of crowd buildup. Just use our brush. That looks good right along there. That looks pretty decent. I would say it would be usable. Wipe it off one more time. Set it aside.
Now we're going to move on to the caliper slider boots. To clean your caliper slider boots, you're just going to take your rag, take it by a corner. Just a little twist. Now just take your slider boot, give it a nice little roll right on that rag, spread it out so that it's not all compressed like an accordion. You want it to be as spread as possible so we can try to get out as much of this cruddy grease as possible. That looks really good. We'll set this one aside and do the other one. Same way. That one's nice and clean. Set that aside.
We're going to move on to these tins. These tins, there's two different ones. There's four, but there's two different tins. Okay? And that's because of these ears on the back and also because on the tins there's a long side or a thick side and then there's a side that kind of like comes out and then bubbles up. So if you had this one and this one, they're the exact same and they're diagonal from each other. So it's pretty easy to figure that out. But when it comes time to putting them in, I'll just make sure I show you exactly how it goes.
I'm going to take this one right here. We already cleaned the the pad facing side. Now we need to clean the bracket facing side. We're going to do the same thing. Use our little brush. I'm going to try and get along the edge right here. Does it need to be perfect? It doesn't need to be perfect. Would I like for you to make it perfect? Yeah, I'd like for you to make it perfect. But am I going to get mad at you? No. That looks pretty decent. It doesn't look like this. There's a big difference there. This one right here, if you left it like that, maybe I would get a little mad at you and be like, "What are you doing? You don't leave it like that." You need it like this, but I'm not mad at you. I'm happy. It's a good day. We're going to do them all so they look nice and clean and we'll continue.
Okay, so we have all our tins all cleaned up. And let's say that you cleaned them and I don't know, you mixed them up. What are you going to do? I'm going to set them aside. We're not going to worry about them. We're going to come over with our bracket. I have some caliper lube, which is just grease. It's actually black. It's not just very dirty. We got black, so whatever. I'm going to put a teeny bit along the I guess you'd say mounting areas for those tins. Go up along this edge right here and then inside the groove right there. The reason for this grease is partially because, of course it keeps moisture out.
So you won't have rust and rot building up in between there and making your pads get stuck, but also for vibration dampening and noise reduction. So, it's super important. Does it have to be a special kind of grease? Does it have to be caliper specific grease? No, it doesn't have to be. It just has to be something that once your brakes heat up, the grease won't liquefy and then just go, "Oh, I'm out of here. I'm done. I had enough heat for the day." This is going to stick around for a long, long time and it's going to help keep moisture out of there. So with that on there, what we're going to do now is we're going to grab these tins.
They're all mixed up like I said, I'm not worried about it. What we need to do, is you've got your little hooky do flippy thing there. Okay. That needs to go facing out away from the rotor. So I'm going to go just like this. We've got this little end or edge, sorry, this little edge that comes up right here that goes up along the top. That part that we lubricated. Okay? So we remember we got the flippy do facing out away from the rotor and the nice flat edge up along the top. We're going to start with the inner portion, which would be where the road is going to ride, right along in here. I'm going to squeeze that and then I'm just going to grab this and squeeze it in. If you were to grab the wrong one. Let me grab the wrong one. Of course I grabbed two of the right ones. Awesome. Okay. You grabbed the wrong one. You go to put it on. You're like, "Oh, I got my hooky-do facing out," and you put it on like this. Obviously that's not sitting right. You can tell. It's not even covering the lube area. If that's the case, just pop it out of there. You can set it aside. Grab the correct one. We've got our hooky-do facing out, flat edge facing up, squeezing from the center and then out.
That's the way it's supposed to look. I'm not going to explain the other side to you. We can take our sliders, take a little bit of lube. We'll put a little bit more on in a second, but what I'm doing here is I'm coming up along this edge right up inside that groove. I'm going to take my boot, bring it right up, slide it over, give it a couple of nice spins. I'm sure you can imagine what this is doing. It's spreading the grease inside that groove and it's going to help keep moisture from getting inside here. We want no water moisture getting inside there. Go with a little bit more lube here. Can't go wrong. I'm just going to go like this, right up along here. Try to get it along that groove on the caliper bracket, now. Take it, twist it as you go. You don't necessarily have to twist it. I just do it because it helps spread the lube around. Just like this. We've got plenty of lube up along there. I can see it.
I'm going to press it and the boots going to sit right inside my groove. Just like that. I'm going to give the boot a couple twists, spread my lubricant around in there. Give my slider a couple of pulls. That feels great. The boots definitely situated on both those grooves so it's not hanging off of there. There's no way for moisture to get inside here. We're going to do the same to the other side. Give it our tug, like what we did before, a nice little spin. That feels great. We'll have no moisture in here. We've got everything lubricated.
All right, so the next thing we're going to want to do, we're going to use a little bit of copper seize and I'm just going to go right along the hub of the bearing, along where the rotor is going to sit and this is just going to help make it so that the rotor doesn't get stuck on there. Later on down the line, maybe moisture gets in, rusts up and it adheres to the bearing. It's just going to make it so everything comes off easier and it's also going to help with vibration dampening and noise reduction. Does it have to be perfect? It doesn't have to be perfect. This looks pretty great. You don't need to spend 20 minutes doing it. Next, we're going to grab our rotor, put our rotor on here, grab a lug nut, put it on so it holds the rotor and we'll be able to continue.
We've got our quality 1A Auto rotor here. As you can tell, these are cross cut and that's really great for breaking. I'm just going to put this on here. All I did is snug it up and now the rotor doesn't move around very much. That's going to help make it so I don't have to worry about it falling off and potentially hurting me, which is super important to me. It's also going to make sure that no crud gets down in between the rotor and the backing or the the hub back there. If you get anything behind there, maybe a flick of roster, I don't know, anything really. If it gets in behind there, you're going to have an off-kilter rotor and you're going to have a brake pulsation, so just put that lug nut on there. Give it a little snug. That feels good. Now we can continue.
We have our caliper bracket that we have all nice and dressed up. Caliper bracket bolts. You can use a little thread locker if you'd like. It's your prerogative. Come right up here. One bolt up at the top. Try to line up those holes, turn it in. I'm not going to tighten it up until I put in the other bolt. Once I have them bolt started, we can go ahead and snug them up and then we'll torque them down. Okay, so we're going to torque these down to 74 foot-pounds. I'm going to use my 18 millimeter socket with my torque wrench. There we are. The socket loves to stick on there for some reason.
Okay, there it is. So those are both torqued. If you wanted to, you can go back and re-torque them. Something like this, I don't really worry about it. I know they're nice and tight. Some people would say that you should put a little bit of lube right here and right there. That's your prerogative. You do you, booboo. I'm just going to put a little dab just for the purpose of the video. Not too much. I don't need it collecting too much dirt and potentially working its way in between the pad and the rotor. When you're looking at your pads, you'll notice one has what you'd call a squealer. This is a brake pad indicator, so once you're brake pads worn down to that point and it hits up against this, you know you're pretty well worn at that point and you'd want to replace your brakes. This brake pad indicator/squealer needs to be on the inner pad or the side closest to the caliper piston.
I'm going to start one ear in and slide the other ear in. There we are. Same thing for the outer pad. Those went in nice and easy. If you felt like you had to force them in and they did not want to move around like this, you would have to re-clean up your bracket. That means you didn't clean it up enough and that's okay, but you do need to make sure that these can move. Now that the pads are in there, we can continue to adding a little bit of vibration dampening grease to the caliper itself. We're going to go on the ears and we're going to go on the piston.
Take a little bit of that caliper grease right along the piston here, right along in here, and this is just going to go right where it touches onto the pad. It doesn't need to go, let me get this off of here, it doesn't need to go anywhere around here or anything like that. Okay? It's just about right where the caliper touches up against the pad. Take that, slide your caliper right over your pads and over your sliders. If it doesn't want to go, your slider's probably just sticking out. Just push it in. Push that one in. There you go.
We've got our two caliper slider bolts. These hold the Caliper to the sliders and the sliders go inside the bracket. You can use a little bit of Threadlocker if you'd like. We're just going to bottom these out and then we'll torque them down to 26 foot pounds. Using our 13 millimeter socket, I'm just going to bottom these out. If the sliders are spinning while you're doing this, you can easily hold those with your pliers just like when we removed them. Those are snug. I'm going to grab my torque wrench, 26 foot-pounds. One, two: torqued, torqued. The caliper bracket bolts behind here, we know are definitely torqued.
If you opened up your bleeder screw, that's going to be something else you're going to want to pay attention to. Make sure that it's closed and there's no more air in there, and of course, make sure your little covers on there. So we'll just take our ABS wire, slide it back into the little brackets that are on the hoses, make sure that it's secure so it can't flop around and get caught on anything that's moving around or touch up against your exhaust. That looks really good. Aside from that, this looks like it's pretty good to go. We would just pump up the brakes once you complete the other side of the brake job and then down the road you go.
Okay, friends, it's time to get the wheel up on here. Just like that. That one lug nut's started on. So now it's time to bottom out these lug nuts. We're going to go in a star pattern or criss-cross. The reason for that is because if you tighten them down in a circular pattern, it could be off kilter. You think it's tight, you drive down the road, you hit a bump home. Next thing you know your wheels loose again, it's very dangerous. Let's go criss-cross star pattern.
Now that we've tightened those down, we're going to torque these to manufacturer's specifications. I'm going to use my 19 millimeter socket, my torque wrench. We're going to torque these to a 100 foot-pounds. There we are. We'll just go around one more time. Small price to pay for safety. There we are. Easy peasy.
Thanks for watching. Visit 1aauto.com for quality auto parts shipped to your door, the place for DIY auto repair. And if you enjoyed this video, please click the subscribe button.

BKA37942
In Stock
Product Reviews
877-844-3393
Monday - Friday 8:00am - 9:30pm ET
Saturday - Sunday 8:00am - 4:30pm ET
Specify your vehicle's year, make and model to guarantee fit.
This part doesn’t fit a . Select from parts that fit.


