Brought to you by 1AAuto.com, your source for quality replacement parts and the best service on the internet.
Hi, I'm Mike Green. I'm one of the owners of 1A Auto. I want to help you save time and money preparing and maintaining your vehicle. I'm going to use my 20+ years of experience restoring and repairing cars and trucks like this, to show you the correct way to install parts from 1AAuto.com. The right parts installed correctly, that's going to save you time and money. Thank you and enjoy the video.
In this video we'll be showing you how to replace the headlights on a 2007 Toyota Corolla, same as any 2003 to '08. You do have to remove the front bumper cover, which is actually very easy, and we'll go through that. Beyond that, once you remove the front bumper cover - and the bumper cover only takes a Phillips screwdriver and a flat-blade screwdriver to remove - then you'll need a 10 millimeter socket for the headlight itself.
Okay, to remove the front face shield, it's actually a series of screws. Here's one, then obviously there's one just like that on the other side, and then what you do is you pull your shield back and you can see right there, that's two. Underneath, look at the front, there's one there, and then one right there, okay? Then this is a screw here, this little bumper. This is kind of a screw, you can actually just pull the center of this up and then pull the clip out. Obviously another screw. Then there are two connectors. You can use a little screwdriver and pop'em down, reach behind and just pull them out. There are two of them, one there and one there. Once you've gotten all the fasteners out, you just start on the sides. Pull down and pull out, there's a clip here and then just kind of shake it and pull it out. That's free. Do that on the other side and then it pulls right off. Now that the bumper cover is off, it's fairly easy. It's one, two and three 10 millimeter bolts. I'll remove those real quick.
As the bolts are out, you should lift this, you kind of lift up a little bit and the headlight comes out. Once you have the headlight out, the headlights, you kind of pull these back. It's the same thing with this thumb. Insert your thumb or use a screwdriver. I'm just used to doing it, so- Then this last marker light twists and pulls out.
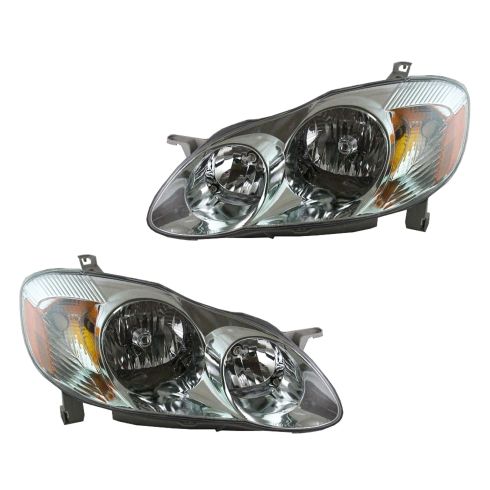
You can see, this is our aftermarket light from 1AAuto on top and the original on the bottom. This car's lights are in pretty good shape. I'm just doing this video to show you, but you can see actually, 35,000 miles, and you might be able to tell with the HD, that this is starting to get a little cloudy, all chipped up. At 75 - 100,000 miles, this new light is going to be a whole lot clearer than the old light. You can just see, our lights, everything, all the mounting plates are all the same, everything is going to plug in. All the headlights and everything are going to plug in the same. Ours will even come with a replacement bulb, although I won't say it's going to come with this bulb every time, but our lights are going to be aftermarket. It's made just like the original. Sometimes they even fix a few of the faults of the original, but it's just going to bolt in there correctly and plug right in and get you back on the road.
As you're placing it back into the car, be cognizant that this wants to go to the outside of the fender, so you kind of lift it up, jiggle it a little bit, that pushes it back down and that locks in place. One -and two actually- just to note: these bolts here have the little flange on them- those are the top ones. Then this one with no little flange on it, is the side one.
Excuse my hair a little bit. We put this one in. Let's flip over here okay. I'm just going to use a wrench real quick, just to do the final tightening. I never use my impact wrench on my air tools to do the final tightening. Now we'll put the bumper cover back on. Here we're just going to kind of speed through putting the front face shield back on, just in the interest of time. If you did want to see this in detail, just look for Front Bumper Cover Replacement on a Corolla in our other videos, and you can see the install in real time.
After you've removed the bumper cover, and just by watching this fast motion, probably you'll kind of get an understanding. You do need to be careful with the bolts up underneath, make sure that you clip everything together first, the plastic goes up above, the face shield but beyond that we hope this helped you out and 1AAuto.com for all your parts needs.
We hope this helps you out. Brought to you by www.1AAuto.com, your source for quality replacement parts and the best service on the Internet. Please feel free to call us toll free, 888-844-3393. We're the company that serves you on the internet and in person.
ope this helped you out and 1AAuto.com for all your parts needs.