Hey friends. It's Len here at 1A Auto. Today we're working on our 2004 Volvo XC90. This is the all wheel drive version. We're going to be replacing a left front lower ball joint. It's going to be super easy. I can do it. You can do it too. If you need this or any other part, you can always check us out at 1AAuto.com. Thanks.
Okay, friends. So just a quick note, we're going to be doing a lot of videos and replacing parts on this particular vehicle. So if you happen to notice in the video that you're watching, all of a sudden a part just is brand new and it wasn't brand new before, odds are we cut out. We were doing another job. We replaced that part. We cut back in and we're just showing you the stuff that you need to know to be able to do your particular replacement.
Okay, friends, so now what we're going to do is we're going to loosen up the wheel. I've got my vehicle supported from the ground, but the wheels still touching so that it can't spin while I do this. I'm just going to use my 19 millimeter. I have a thin wall socket on there so it can squeeze in between the rim and the lug nut. I'm just going to break it free.
That's a tight one. That's the reason for doing it while it's still in the ground. If you try doing this up in the air, the wheel of course is going to spin. Okay, so I've got three out of my five lug bolts out. This is what they look like right here. They screw directly into the wheel bearing. Once you take off this one right here, and then you go to take this one off, there's going to be nothing holding this wheel on. So you need to pay attention to that.
I'm just going to take this one lug here, lug bolt, put it in a couple threads. And that's just so the wheel won't be able to come off and potentially hurt me. Push my wheel up against, just grab it. I'm holding the wheel so it can't fall down at this point. Then we'll just grab it off and set it aside safely. So we're going to take off this lower ball joint nut right here. I'm just going to use a little bit of penetrant. Now I'm going to continue with my 21 millimeter socket and I'm going to remove the nut, safety glasses on hand protection of course.
Here we are. I'm just going to put it right on here just like that. Okay, so I'm going to use my tool here. I've got to pickle fork and I've got my small hammer. I'm just going to slide it in here like this. The purpose of the pickle fork is to essentially be a wedge. And it's going to try to wedge between the lower control arm and the upper part of the ball joint there, and hopefully pull the stud through the control arm. That's my plan.
Okay, I can see it moving. So we know we're going in the right direction here. We'll come over here. We have an 18 millimeter headed bolt. It goes straight up through and then on top. There's a 21 millimeter nut. So I'll just grab my air gun. I'm going to put my 21 up there. Maybe I'll come around from this side. It's a little bit easier to get to. Here we are. And safety glasses, blast away.
There's our nut. Here's our bolt. We'll set these aside. So now we're going to remove these bolts right here. 17 and a 17, that's going to hold in the forward part of the lower control arm. So once we break these free, there's a possibility that this could want to move and do whatever it wants to do. So just make sure you're safe. We've got our nut on here. If you don't have your nut started on there, just go ahead and do it for me please. That's just going to make it so when this does come free, if it does decide it wants to do something, we're going to have a point holding it so it can't fall down and hurt you.
That's what our bolt looks like. Here we are, both the same. We can set these aside. Alright, so let's get our ball joint nut off of here. Set that aside. Let's try to bring this down now. Here we go. Give us just enough room without pulling too much on this because we don't want to separate our axle, right? So we've got the ball joint out. I'm just going to try it out. There we are. Cool. All right, so now I'm going to come in here and I'm going to try to pry that out of there. Come right in between the subframe and the control arm. Here we are. So we're just going to remove these bolts right here. To do that we're going to use a 14 millimeter.
At this point, the only thing holding your ball joint into the knuckle, is just the fact that it's pressed in. It comes up inside this area right here. So to get it out it's going to be much more of a hassle than taking out these two bolts. We're probably going to use an air chisel. Come right along this corner right here, over here, over here, over here, over here, here, here, here, here, here. And then hopefully it'll come out. So I'm just going to come right down onto this lip right here and I'm going to try to air chisel down.
You could try to use something like a hammer and punch, whatever you've got. But the air chisel's definitely going to be my way of trying to get it to come out. I'm just going to give it a try. I've got my safety glasses, ear protection, hand protection. It's breaking free already. That's a really good thing. Super excited about that.
Okay, so I got it coming down from this side. I'm just going to come over here and try to get it to come down as straight possible so I don't mess up this hole. This side is much harder to get into with the angle of everything. Here we are. That came out a lot easier than I was expecting, so I'm super excited about that. There's our lower ball joint. Let's move along.
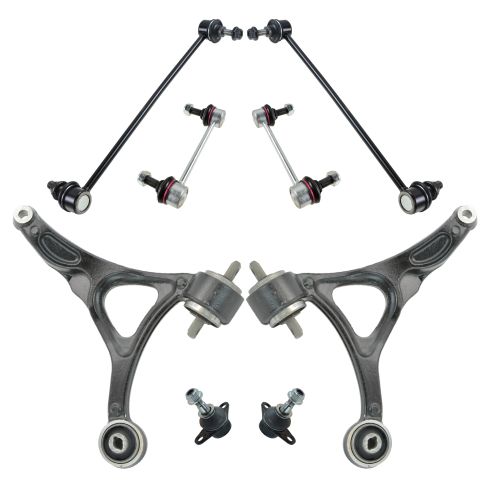
Hey friends, a quick product comparison for you over here. We have our front lower ball joint out of our 2004 Volvo XC90. We just took it out. It was super easy. And over here, we have our brand new quality 1AAUTO part. Both these ball joints are created the exact same. You've got the same mounting holes up along the top. You've got the splined area coming up along here. That's where it presses up into the knuckle. You've got your shaft area, comes with a brand new neoprene locking nut. And it even comes with brand new mounting bolts. With all that said, I don't see any reason why this wouldn't be a quality part to install into the vehicle. So I'm going to go ahead and do it. If you need this or any other part, you can always check us out 1AAUTO.com. Thanks.
So up in here is where the ball joint pressed up into. You can see where all the splines where. It's pretty nasty and cruddy up in there. So you can just use this brush right here, available at 1AAUTO.com. A little bit of parts cleaner, safety glasses of course, hand protection. We're using a chemical. I'm just going to blast this up in there. Use this little brush. Okay, so now we're going to use a little bit of copper never seize up inside this ball joint portion of the hole. We don't need to get it up inside there or inside there. Those are the two mounting holes. The brand new bolts came with brand new thread locker on it, so we definitely don't want to get never seize up inside the mounting holes. We just need it inside where the ball joints going to go.
Here we are. That looks pretty decent. So we'll just take our brand new quality 1AAUTO ball joint, our two brand new bolts that came with it. I'm just going to see if we can get this so what's going up in. I'm going to take my bolt. Just going to see if I can get it to thread in a little bit here. That's just going to help make sure that the ball joint's lined up for the next step, which would be essentially pressing this up and in here. There's going to be several ways we're going to do this. I'm going to snug these up, back and forth, back and forth. See if it'll will press up. When it seems like it's binding up, I'll just give it a couple loving bonks along the side here and just try to help it along.
We need it to go up as straight as possible so you don't just stay on one side, crank, crank, crank, crank, crank, tighten it up. So the whole thing's just going like this and then hope that you're going to do this side. You need to get it to go up as straight as possible. So I'm just going to use my 14. Can tell as I start to draw this up, it's starting to canter a little bit off to the side. So I'm just going to go over to this side just like that. This side. I know what you're thinking. It's crazy to keep having to go back and forth and I get that. But it's super important to just make sure that these are going one, two, one, two, back and forth to make sure this goes up straight.
There we are. So we're going to torque these down to 29 foot pounds. Just going to hit him one more time. Both of those are tight. Let's move along. Okay, so we cleaned up our three bolts here. We've got the thick one. The thick one goes through this, the hockey puck bushing. Then you have your other two that match up. They go through your subframe and then into the screw holes in the control arm. And then of course you got the ball joint hole over here, but that'll be the last thing that we do more than likely. So we'll put down the two bolts that we're not going to be using yet because I'm going to start with the hockey puck bushing. Let me see if I can get this to work its way in there. Just try to get it lined up.
Seconds just to get it lined up perfect, but once you do. All set here. Let's see if that's going in. It feels like it's going in. Make sure we get a couple of good threads going up through there. Oh yeah, I can feel it coming up through the top so I know it's definitely going up. All right. It's all the way up there. We've got our 21 millimeter headed nut. You could use some thread locker on these bolts if you'd like to. We'll say it's your prerogative. I'm going to use my other two bolts. I'm going to come through here. Should want to go right through. It's going to come through this side right into there.
You might have to just wiggle the control arm around a little bit. Here we are. Just going to snug these up using our 17 millimeter. So now we'll just snug up this bolt right here. We're going to use our 21 millimeter wrench on the top, on the nut side, and then an 18 millimeter right here on the bolt side. There we are. All right, let's grab the torque specs and move along. So we're going to torque these two bolts right here to 48 foot pounds with our torque wrench, with our 17 millimeter socket. Just going to hit him one more time.
Tight. So let's torque this a rearward bolt up. We're going to go 77 foot pounds. Once again with my 21 millimeter wrench up top there, I got my 18 on the bottom here. Alright, I'm going to hit it one more time. Tight. And those two are tight. Let's move along. So now what we're going to do, because we can't obviously lift up on this with a strut holding it down to be able to get the control arm over the ball joint stud, we're just going to create a little bit of slack here for the ABS cable.
To do that, I'm just going to grab right here and try to roll it out of here. Just going to try to grab it, get it out of there. We want to make sure we have plenty of slack because what we're going to do is we're going to take out these two nuts, take the bolts out, and we're just going to lift up on the knuckle a little bit. Drop the ball joint, stud into the lower control arm, and then remount all this. It's going to be pretty easy. This just rolls out of here.
Now we've got plenty of slack for in case, God forbid, something happens. Something to remember once we get these out is that we still have the axle attached to the knuckle. And of course the outer tire rod end and stuff and the hose. But anyway, so when you're moving the knuckle around, you want to be careful not to pull too far out because you could separate your axle boot right here. There's a joint in there and there's one up in the outer portion of the axle as well.
So if you pull too far, you could separate it and cause yourself some axle issues down the road, which would be bad. We'll use a 21 and an 18. I'm going to use my 18 wrench to hold it. My 21 on my air gun, safety glasses on hand protection. That's what our nut looks like. That's what the bolt looks like. Let's put them both together. Same thing for this one. Okay, so once I take this out, what's going to be holding it in? The axle and a couple other really not very strong things, so just keep that in mind. All we want to do now is just lift this up and get the ball joint stud, which is right here, to go into the control arm hole, which is up a little higher. There we are. Let's see if I can get this. There we are.
There we are. Get this bar out of here. I used the bar to pry down on the lower control arm and then brute strength to lift up on the knuckle. Now that it's in there, we can continue by relining everything up here. I'm so close. Here we go. Once I get the lower bolt in here, I'll be able to do whatever I want with it. It's just a getting things situated. It's the hardest part here. There we go. It's going in. My bar out of here.
Well, that part right there is going to be your test. I'm sure you can do it. Give it a bonk. There we are. It's your prerogative if you want to use a little bit of thread locker on these. For the purpose of this video, I'm not going to worry about it. I'm just going to go right on here. All right, let's move ahead to the next step. So we're going to take our neoprene locking nut. Just start it right on here. We're going to use our 21 millimeter and I'm just going to bottom this out. Then we'll go ahead and torque it down.
Let's torque it. So here we go. We're going to go ahead and torque this down to 74 foot pounds. There it is. I'm going to hit it one more time. We know this is tight. We know these two are tight. These two are tight, and this is tight. We know that those up there are tight. Everything's tight. Let's move along to the next step. I'm just going to snug this up to 77 and then we'll continue on to the second step. 77 foot pounds, by the way, not inch pounds. Big difference.
There we are. Break it free. This one. There we are. So now, I'll leave that on there, we're going to do, we're going to use an angle gauge and we're going to bring it all the way to 90 degrees. So I'll put this up here and I'll put this kind of like this. I'm going to bring it over. Set it up against here so what's resting. Now I'm going to use my ratchet. I'm going to try to bring this around at 90 degrees.
Here we are. Get my tool out here. Cool. I want just a little bit past because when I first started, the wrench was turning. I zoned holding onto it. So anyway, we'll do the same to the lower one and then off we go. Now that we have those both torqued, we'll get our ABS wire back on here. Just going to slide it through like this, just kind of roll it as I push. IT should want to slide right in. This one right here. I'm going to come from the back side. Get it up on there. Now I'm going to roll it, slide it right in. Give them a nice little tug. Those are going nowhere. We know our abs wire is secured. We can move along to the next step. Okay, so that was a really fun job. We got it all done and we got everything torqued down the way it's supposed to be.
The only thing that's left to do of course is to get the wheel on and get that torque down and of course drive it down the road and make sure everything feels good. Lastly, make sure you get your alignment. Other than that, great job. Down the road, you go. Okay. So now to make it easier to get the wheel up on here where we don't have the lug studs that are sticking out and you put your wheel up on. It just kind of holds the wheel nice and easy for you, you don't have to stand there and hold it forever.
Volvo decided to make it fun and interesting and make you work your muscles a little bit. Well 1A Auto sells this awesome tool. Basically all these are is they're going to give you a lug stud so when you're putting your wheel on, you just slide your wheel right over this and it's going to hold it there so you don't have to sit there and try to muscle at the whole time while you try to line up the holes and put your lugs stud in, or lug bolt. So I'm going to set that aside. I'm going to grab my wheel, bring it right over.
Hold on to one of my lug nuts. Just going to bring this up. Slide it right over that. Boy oh boy, that made it easy. So now we just take our lug bolt. Put our wheel up against there. Start this in hopefully. I should've grabbed one of my sockets. It would've made my life a little easier here. There we are. And even though I was holding the wheel steady that whole time, I didn't have to have my whole body holding it, try to line it up while I'm staring into the hole and put this through. Thank you 1A Auto. So we'll just start all these lug nuts in and then we'll bottom them out, torque them down.
Okay, we've got all the lug nuts bottomed out. Now we'll just bring the vehicle back down so the wheel's touching the ground but without full force of the vehicle's weight on the wheel. And then we'll torque down these lug nuts. So here we are friends, we've got our torque wrench out. It's set to 103 foot pounds. I have my thin wall, 19 millimeter socket because there's limited space to get in between these lug bolts and the wheel. When we tighten these down, we're going to go into star pattern here, here, here, here, here. And then if we decided to go around again, we'll do the same thing.
But anyway, the reason for going in a star is essentially, so as we're going around, if the wheel's cantered it a little bit, it won't get stuck that way. And maybe the torque wrench thinks it's torquing it down to 103 like it's supposed to be, but it's a little bit cocked off to the side. Then you drive down the road, hit a bump or whatever, everything starts loosening up, your lug bolts come out. Long story short, just tighten them in a star pattern. There we are. I always like to go around twice. It doesn't cost me anything. It doesn't hurt me any and it's small price to pay for safety. Okay, all torqued up. Great job everybody.
Thanks for watching. Visit 1AAUTO.com for quality auto parts shipped to your door, the place for DIY auto repair. And if you enjoyed this video, please click the subscribe button.