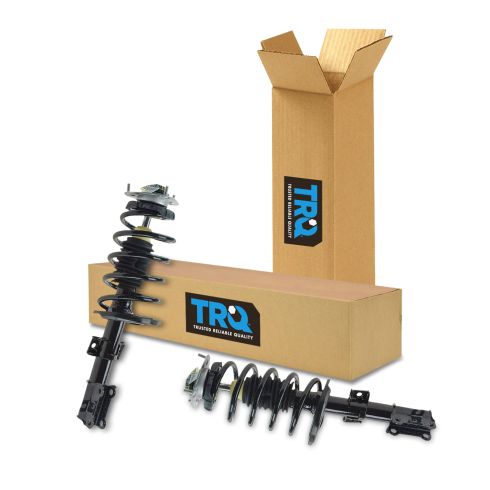
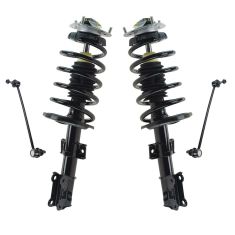
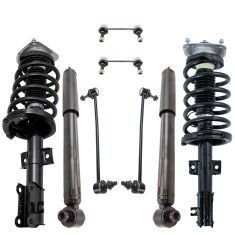
Oh. Hey, friends. I was just doing the 1A auto strut. Today we're working on our 2004 Volvo XC 90. This is the all-wheel drive, and I'm going to be showing you how to do a left front strut. It's going to be super easy. I can do it. You can do it, too. If you need this or any other part, you can always check us out at 1aauto.com thanks.
Okay, friends. Now what we're going to do is we're going to loosen up the wheel. I've got my vehicle supported from the ground, but the wheels still touching so that it can't spin while I do this. I'm just going to use my 19 millimeter. I have a thin wall socket on there so it can squeeze in between the rim and the in the lug nut. I'm just going to break it free. It's a tight one. That's the reason for doing it while it's still on the ground. If you tried doing this up in the air, the wheel of course is going to spin.
Okay, so I've got three out of my five lug bolts out. This is what they look like right here. They screw directly into the wheel bearing. Once you take off this one right here and then you go to take this one off, there's going to be nothing holding this wheel on, so you need to pay attention to that. I'm just going to take this one lug here, lug bolt, put it in a couple of threads, and that's just so the wheel won't be able to come off and potentially hurt me. Pushing my wheel up against, just grab it. I'm holding the wheel so it can't fall down at this point. Then we'll just grab it off and set it aside safely.
So here we go, friends. Let's go ahead and take this nut off right here. We're going to use our 19 millimeter socket. I'm going to use a half inch air gun. It's going to make it much easier than trying to turn it with a ratchet. I've got my safety glasses and my hand protection, of course. That's loosened up quite a bit. What I'm going to do now is I'm going to try to get back here and I'm going to see if I can get some locking pliers in to hold the stud because as I try to turn the nut, it's just spinning the stud. I'm not sure if these will get in here. I like to have these as tight as possible. Odds are it's still going to spin and I'll probably have to readjust it, but ... looks like it started a little bit more.
So I just grabbed different locking pliers here. I just want to let you know if you're trying to just do the strut and you don't want to replace your sway bar link here, when you're using locking pliers, there's pretty good odds these teeth are going to grab onto the boot and possibly put a little tear in it, so it's something that has to be done because there's no way I can get this nut off right now without holding the stud. Am I going to be able get locking pliers on right here and then somehow get my air gun over it? It's just impossible, so there's pretty good odds and it's ... generally speaking, it's a pretty good habit anyway. If you're doing front struts, you do the sway bar link at the same time. Both of them are available at the same time, 1aauto.com. Anyway, we'll get our locking pliers in here. Just going to see if I can get this tight as possible.
A little bit at a time, apparently. That's just the way it wants to go. I don't even think I can get these things tighter than they are. If you wanted to, you could try to apply a little bit of heat. The problem with that is that you don't want to apply heat to the strut itself, so I mean if you're over here blasting away trying to heat up this nut, I mean, I guess if you came across the edge here and you were nowhere near this part, you might be able to get away with it. It's just it's risky business because inside here is pressurized gas, so I'm going to try everything I can without heat first and we'll see what we have to do when we have to do it.
Really doesn't seem like anything good is happening at this point. I'm going to try to tighten this up, which might seem like it's counterintuitive, but once I get it tight and then re-blast it out, hopefully just the speed and the inertia and everything moving, it'll pull its way right off. Just give it another blast with this stuff. So I'm going on now and nothing's happening. Okay.
So I just applied a little bit of heat. I tried to go right along the edge here and just tried to catch the edge of the nut. Once again, like I said, I was trying not to hit up against the strut itself. It's a pressurized gas unit.
So we've got that nut off of there. Get our tool off of here. Bonk bonk. There's our lovely sway bar link end there. What was giving us all the trouble is when we were trying to squeeze on here, it was just literally spinning in the grips. It's very common. Like I said, when you're trying to take these off and you're using something like these, the locking pliers, the boots usually get torn and this one is. Luckily for me, we have one. 1A Auto supplied us with one. We're just going to take note of our ABS wire here. When we go to take these nuts off of here and take the bolts out, the knuckle's going to want to move around from the the strut unit, so we don't want to put a tug on our ABS wire.
I'm just going to take it out of its brackets. Just do that by pressing. It's got a little carve out there and it just sits in the groove. Same thing over here. Just grab it, give it a little wiggle, slides right out. We got our groove there. This is going to give us plenty of slack for in case the knuckle decides it wants to move around. We want to try to keep the knuckle in control, though, so once we take out these bolts and everything, we want to try to keep the knuckles so it's staying like this. We don't want it to come flopping out because then it's going to put a tug on our axle boots. We don't want to tear an axle boot.
We're going to use an 18 millimeter wrench here and a 21 millimeter socket on this side. We're going to take off these nuts and we'll take the bolts out through the forward end, and then we'll be clear to move on to the next step. I'm going to use my 18, like I said, right up here. This is just to hold the bolt so it doesn't spin, so of course watch your hands for any pinch points in case it comes spinning around. You don't want to get your hand pinched anywhere. Safety glasses, of course. Hand protection. There we are. There's our nut. Set that aside. I'm going to leave that bolt in for now. I'm going to move ahead to the next one. Just a nice little blast. Second nut. Same as the first. Now if you just push on your rotor a little bit, you can see everything can move around. Just give it a little wiggle, get that bolt moving. Pull it right out of there. That's what it looks like.
Just give this a little wiggle. Sometimes if you press down, it'll want to come right out, but of course this time, does not. I'm just going to wiggle it until it does. So there we are. Both bolts look exactly the same. We'll set these aside. There we are. So now we've got it so our strut can move around. We're going to tie this up with a, I don't know, maybe I'll grab a ratchet strap real quick just to make sure it doesn't come flopping down, and we'll move ahead to the next step.
Okay, so now we're going to use our 13 millimeter socket and we're going to remove these three. They're mounting nuts right here. You've got the studs that come up from the strut itself. We'll start with one. That's what it looks like. Set that aside so we can't lose it. The second one, that one's going to look the same, I can assure you, but I'm just going to leave it on a few threads, and now I'm going to go ahead and do this one. As I do that, the strut's going to come down, so you want to make sure when you're bringing it down, it's not coming anywhere close to hitting your axle. My axle boot's plenty far away and also we're not caught on our ABS wire. Okay, so just going to hold it so it's under control. Take off that nut. Take off the last nut. There we are. I'm going to see if I can get it to come down. It's way out. There's our front strut. Easy peasy.
So here we are, friends. A quick product comparison for you. Over here we have our original strut out of our 2004 Volvo XC 90. We just pulled it out of the front. Over here we have our brand new quality 1A Auto part. This has everything that you need to install it. Even comes with the mounting nuts for the top. Up here's your mount. It's got bearings in here. Allows this to rotate as you turn your wheel. Brand new coil spring, dust boot, rubber bumper. It's got the area for the sway bar link. As you can tell, it's welded all the way around. It's very nice. The original one, well, not so much. Maybe they didn't have as much time. I don't probably have a good excuse for that, but as you can tell, we did a great job. These are great welds, nice and strong. We've got our mounting area for down here. This is where the strut connects into the knuckle, and then of course you have the area for the ABS wire, which is also metal instead of garbage plastic.
I'm not here to judge anybody else's stuff. I just want to let you know that we have quality parts, so if you need this or any of the park, you can always check us out at 1aauto.com. Thanks.
Okay, so here we go. Friends, it's time to get this in. You just want to turn it so that the flat area is facing towards the outside of the vehicle just like this. Basically it's going to make an L for Len and we're going to put it right back in and under and then back up through. I want to make sure you have access to your nuts. We're going to go right down through here. Be careful for the body and the paint and everything. Let's see. Sometimes the plate moves, so you just need to pay attention to that. Okay. Of course it is a little heavy but it can be done. If I can turn this thing pretty close. Today, Junior. What do I do, turn it? Think I did. Let me pull that. There we go. It turns super easy with the brand new bearing cap into there, so get those started. Going nowhere, we can release that.
Okay. I'm just going to hold these up. We'll torque these down in a minute. Just get this out of here. It's over. Everything lined up. We're going to take our bolts. They're both the same. You can use a little bit of threadlocker if you'd like. Let's see if I can get this to slide in and through. This one, you push in just like that. Should line up pretty easy for you. There we are. Take our two nuts, 21 millimeter heads. Cool. All right. Let's just, we'll snug these up real quick and then we'll torque them down. Okay, we've got our tools. 18 on the bolt side, 21 on the nut side there. Going to snug it up. Let's go ahead and torque those down. Just going to snug this up to 77 and then we'll continue on to the second step. 77-foot pounds, by the way, not inch pounds. Big difference. There we are. Oops. Break it free. This one. There we are.
Okay, so now I'll leave that on there. What we're going to do, we're going to use an angle gauge and we're going to bring it all the way to 90 degrees. I'll put this up here. I'm going to put this kind of like this. I'm going to bring it over, set it up against here so it's resting. Now I'm going to use my ratchet. I'm going to try to bring this around to 90 degrees. Here we are. Get my tool out of here. Cool. I went just a little bit past because when I first started, the wrench was turning. I zoned holding onto it, so anyway, we'll do the same to the lower one and then off we go.
Okay, now that we have those both torqued, we'll get our ABS wire back on here. Just going to slide it through like this. Just kind of roll it as I push. It should want to slide right in. This one right here. I'm going to come from the back side, get it up on there. Now I'm going to roll it, slide it right in. Give them a nice little tug. Those are going nowhere. We know our ABS wire is secured. We can move along to the next step.
I'm going to be preemptive with the heat on this one because I know that the upper side needed a little heat, and I have nothing to worry about here as far as my heat's concerned. The ABS wire and everything is super far from this area. The closest thing we have is just the axle boot, so I'm not going to heat going in this direction, trying to spray that way. Just going to go right over here and there's literally nothing around here that I have to worry about except for maybe the bellows boot, but that's pretty far away.
The nut on the lower side of this that we're doing right now is actually a 17 millimeter, which is different than the upper nut. I don't know why Volvo did that. I'm sure they have their own reasons. I'm no engineer, just lowly old Len. See if we can get this to come off. Get our safety glasses on. Okay. It's getting loose. Locking pliers in here. There we are. Get that sway bar link out of the way.
Okay, so we've got our sway bar link, and put it up in here like this. This is the smaller side, the side with a small stud. Okay. You can get that started. Now we're going to blast this on with a 15 millimeter socket. We've got our 15 on our half-inch gun with some safety glasses. Tight. All right, so it's important to make sure that we have our ABS wire going along the outside of your sway bar link. You don't want it heading towards the inside there and getting all pressed in there and whatever. So if you notice it doesn't really want to line up very well, you can just do something as simple as taking your pry bar, go up against the sway bar, and then anywhere you can find to pry up against, and you don't even need to really go very far. Just like that. Just lined it up so it's straight. I'm going to take my 18 millimeter socket. Let's see if I can get it on here. Here we are. Now I'm just going to blast it on.
Of course not. We're going to try it one more time. I'm going to try it with a little bit more gusto. I'm going to leave it so it's just barely on there, and now I'm going to blast it. And that's a no. Okay. So I put some locking pliers on here, I'm going to be careful not to damage my brand new boot, and we're just going to go ahead and try to blast this on.
There we are. So now that we've finished up that job, what you would do is you'd go over to the other side of the vehicle, assuming you're doing the same thing on the other side, repeat the same procedure. Easy peasy. Grab your wheels, put them on, torque them down, down the road you go. Easy peasy.
Okay, so now it'll make it easier to get the wheel up on here where we don't have the lug studs that are sticking out and you put your wheel up on and just kind of holds the wheel nice and easy for you. You don't have to stand there and hold it forever. Volvo decided to make it fun and interesting and make it work your muscles a little bit. Well, 1A Auto sells this awesome tool and basically all these are is they're going to give you a lug stud, so when you're putting your wheel on, you just slide your wheel right over this and it's going to kind of hold it there so you don't have to sit there and try to muscle it the whole time while you try to line up the holes and put your lug stud in or lug bolt.
So I'm going to set that aside, I'm going to grab my wheel, bring it right over. Hold onto one of my lug nuts. I'm just going to bring this up, slide it right over that. Boy, oh boy. That made it easy. So now we just take our lug bolt, put our wheel up against there, start this in hopefully. I should've grabbed one of my sockets. It would've made my life a little easier here. Here we are, and even though I was holding the wheel steady that whole time, I didn't have to have my whole body holding it, try to line it up while I'm staring into the hole, and put this through. Thank you, 1A Auto. So we'll just start all these lug nuts in and then we'll bottom them out, torque them down.
Okay We've got all the lug nuts bottomed out. Now we'll just bring the vehicle back down so the wheel's touching the ground, but without full force of the vehicle's weight on the wheel, and then we'll torque down these lug nuts. Let's get these torqued down. We're going to use our 13 millimeter socket and torque them to 18 foot pounds. There we are in case you want to double check. Perfect.
So here we are, friends. We've got our torque wrench out. It's set to 103 foot pounds. I have my thin wall 19 millimeter socket because there's limited space to get in between these lug bolts and the wheel. When we tighten these down, we're going to go in a star pattern here, here, here, here, here, and then if we decide to go around again, we'll do the same thing. But anyway, the reason for going in a star is essentially so as we're going around, if the wheels cantered a little bit, it won't get stuck that way and maybe the torque wrench thinks it's torquing it down to 103 like it's supposed to be, but it's a little bit cocked off to the side. Then you drive it down the road, hit a bump or whatever, everything starts loosening up, your lug bolts come out. Long story short, just tighten them in a star pattern. There we are. I always like to go around twice. It doesn't cost me anything. It doesn't hurt me any, and it's a small price to pay for safety.
Okay. All torqued up. Great job, everybody.
Thanks for watching. Visit 1aauto.com for quality auto parts shipped to your door. The place for DIY auto repair. And if you enjoyed this video, please click the subscribe button.