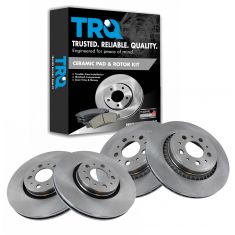
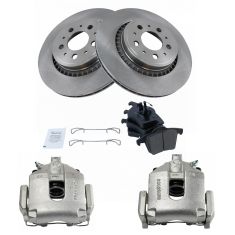
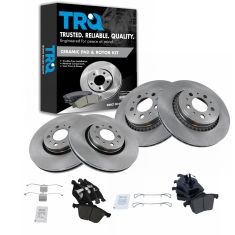
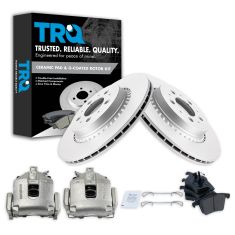
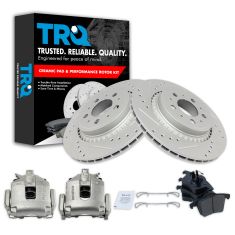
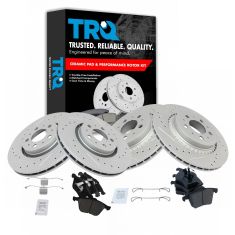
Hey, friends. It's Len here at 1A Auto. Today. We're working on our 2004 Volvo XC90. This is the all wheel drive version. We're going to be doing a rear brake job. It's going to be super easy. I can do it. You can do it, too. If you need these or any other parts, you can always check us out at 1AAuto.com. Thanks.
Okay, friends, so if you don't have an air gun to do your lug bolts here, I just use a long handle ratchet, 19 millimeter socket, thin wall because I have to be able to get in here and we're just going to essentially have the majority of the weight of the vehicle off of the wheels. But the wheel's still touching the ground and then you're just going to break them free. We're not going to loosen them up too much.
We don't want the wheel to be able to wobble. We just want to be able to have them broken free while the wheel's still on the ground because once it's up in the air and you tried to do this, the wheel's just going to spin. If you have an air gun, don't worry about any of this. Let's move along. So now we'll just take off these lug studs or lug bolts. Generally speaking, you'd say lug nuts. But these are actually bolts to hold the wheel on. So something to think about when you take all these out is the fact that once you get the last one out, there's literally going to be nothing holding your wheel to the bearing. So usually what I'll do is the fourth one here, I'll take it so it comes all the way out, just like that and then I'll just give it a couple of threads in. There we are and that's just going to make it so the wheel can't fall down while I finish removing the last lug bolt. Cool and we can hold the wheel.
Get this out, the last couple of threads, grab my wheel and get it down out of the way. Okay, so on the caliper here, we've got this clip. You're going to want to make sure you're wearing some safety glasses and just grab it with some cutters. Give it a little tug. That's what it looks like. We'll set this aside. You've got your caliper here. This is where your slider is going to be hiding inside here. There's a little boot on top of here though. Let's see if I can grab something. Just try to get in between here. This right here should just pop right out of there. Just a little plastic cap and that blocks moisture from getting into where your slider is. There's another one down on the bottom. There it is.
Hold those caps. We'll set those aside. We have our ABS wire connected to our brake hose. You can disconnect either side for the clips. They just pop right off and that's just going to give us slack for when we take the caliper off. We can hang it. We don't have to worry about putting a tug on our ABS wire. This is super delicate material right here. So get that out of the way. Let's move along. Okay, so we'll just grab this ABS wire. There's one more bracket that we're just going to try to lift it up and out of. Usually works easier if you roll at the same time as you left. There we are. Now we've got a clear view of these bolts. They're 14 millimeter. I'm going to get this one almost all the way out. But I'm going to leave it in a few threads and then I'll go ahead and remove the lower one, which is a little harder to get to, not much. It's not an issue or anything.
Come down here. That's what our bolt looks like. We'll set that aside. I'm going to grab the second one here. At this point, the caliper and brackets are going to be ready to fall. So be careful. I'm going to grab a tool that I can use to hang it and of course my pry bar here, that's just going to help get it off of there. We've got our other bolt. We'll set that aside with the other one. Small pry bar pulls that away. Here's our caliper with the bracket, which is this right here and then of course the pads in there. These pads still have plenty of meat. If it wasn't for the purpose of the video, I wouldn't say we need to replace them. But we want to show you how to do it. So I'm going to pull those right out of here.
The inward pad is going to have little clips that press into the piston. That just holds them secure. Set that aside. All right, so now we're going to take these out. We're going to use our Allen head tool right here and the size is a seven millimeter. Just put this in here. The hardest part is going to be holding the caliper still while you try to do this. Okay, so before I go grab an air gun, I'm just going to try something else. I'm going to take a pry bar, go right through the hole in the top of the caliper there. That's just going to be to hold this and I'm just going to use my seven millimeter Allen like I said. That worked pretty good. A little bit of leverage, much stronger than trying to use one hand and try to keep it from rocking and moving. I'll leave that one where it is for now. Come over to this one. Now that those are nice and loose, we'll just take them right out of here. That's one slider.
Grab this second one. At this point, the bracket is going to want to separate from the caliper unit. So the bracket will be held up by whatever you held it up with. If you have something there, that's great. If you don't, then you're going to have to hold it and the caliper of course it's going to be held up by the flex hose and you don't want to put too much pressure on flex hoses. So if you can avoid putting a terrible amount of pressure or stretch or bend or anything like that into them, that would be good. There's our second slider. We've got our caliper, the muscle. That's our bracket. All right, set this stuff aside.
So now we're going to use our 10 millimeter and we're going to remove this bolt. This bolt right here, pull it to the rotor onto the wheel bearing behind it. When you remove this, the rotor is going to be able to flop around. If you wanted to, you could use one of those lug bolts to hold the rotor from being able to fall off. I'm not super worried about it. I'll hold the rotor. I just want to let you know about that. We'll just use our 10, break this bolt free. Once it's broken free, that's what it looks like. Grab our rotor, we'll pull it right off of there.
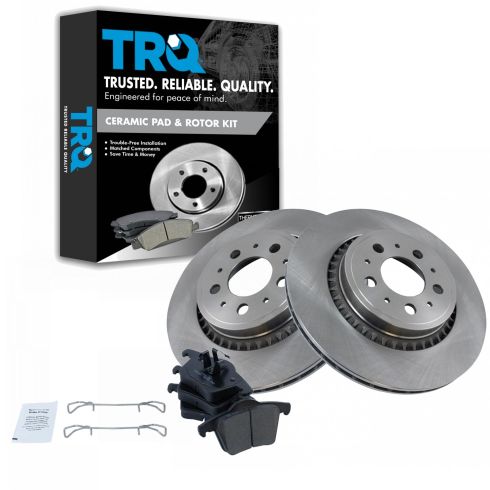
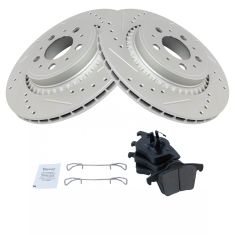
So here we are, friends, a quick product comparison for you over here. We have our rear brakes out of our 2004 Volvo XC 90. We just removed them and over here we have our brand new quality 1A Auto parts. As you can tell, both rotors are the exact same in exception of, well, this one right here, it's a cross cut. It's got all these little cross cuts coming along here. It's drilled and it's also slotted. The reason for all that is for brake dust and heat dissipation. Okay? Having all this in here is going to create air blowing around. It's going to be able to cool down much more easy and more efficiently. So that's super important and it's also going to help disperse the brake dust, get it from sticking inside your pads. You don't want crud and everything getting stuck inside your brake pad like this one. That's really bad.
That's going to cause noise and a squeal driving down the road. You also have really poor condition on the original rotors. So you can see along here there's some lifted hard spots. As the brake rotor gets hotter, those will raise up even further and you'll feel a brake pulsation. Maybe you're driving down the highway and you feel a little shudder in the seat of your vehicle or maybe in the armrest as you're braking. That's probably from your rear brakes. That'll be a very common reason to have hot spots like this. Having cooling areas like what we have on our quality 1A Auto parts, you won't have that issue. With that said, I don't see any reason why this wouldn't be a quality part to install into the vehicle. So I'm going to go ahead and do it. If you need these or any other parts, you can always check out 1aauto.com. Thanks.
Okay, so now we're just going to clean up this hub. We're going to use our 1A Auto brush here. That looks pretty great, practically new. All right, let's move onto the next step. So now what we're going to do, we're going to use a little bit of copper never seize on our bearing mating plate. This is the hub area, also where the rotor is going to press up onto or sit onto. So if we put a little bit of anti-seize on there, it's just going to make it come off nice and easy down the line. Okay, so we've got our rotor here. Let's get it up on there. You can see our hole or our bolt. Put it in here. We're going to snug that up. Got it so it bottomed out. Just give a little extra. The rotor can't go anywhere. It seems pretty decent. That noise you hear there is just the sound of the shoes hitting up against the inner surface in here. I'm not worried about that.
I just want to make sure that the backing plate didn't get bent and we don't have any backing plate grind here before I go too far. I think that that sounds pretty great. So let's move ahead to the next step. Okay, so we've got our caliper bracket here. We're going to get it cleaned up. Here's a couple of different methods you could use here. Where this doesn't have very much buildup and it doesn't feel like it has any grooves, you can use something as simple as a wire brush or if you wanted to, you could also use something like this. This is available at 1aauto.Com. So is the brush of course and this works really great because you hook it up to the air hose. It's got a little sanding disc and then you just take it, [imitates air tool noise], cleans it up nice and easy, especially if you have grooves. It'll help file them down for you. But for the purpose of this video, I'll just go ahead and go with this brush right here.
Essentially these just need to be cleaned up enough so when the pad needs to slide, it doesn't have any grooves or large ridges that'll hold it from sliding and cause it to bind. Last thing you want is your pad getting stuck up against your rotor. You'll be buying yourself brakes again fairly quickly due to a simple mistake. That looks really great. If you use the sanding disc, it'll be much cleaner and probably a lot quicker. So there we are. I would say that's good enough to install into the vehicle. Let's get over here real quick. Why not? There it is.
So now we're going to use a little bit of caliper lube and we're just going to go along the contact points where the pads are going to sit and that's just simply to lubricate it and also keep moisture from getting onto the metal and rusting up. You don't need very much. In all honesty, I probably have a little bit too much on this brush. So I'm just going to use what I've got. I'm going from the outside towards the inside and the reason why I'm doing that is because I don't want to have a big cake or a glob of it along here, which is where the rotor is going to go in between. Some people will say you don't need to put any lube here. It's your prerogative. You do you, booboo.
Okay, so we have the bracket lubed on all the contact points. We'll set this aside and now we're going to do the caliper piston itself. Okay, so we're going to do the same thing on the caliper. We're going to lubricate the contact points. So where the pads sit and they connect to onto the caliper is where we're going to add lubrication. I'm going to go right along the piston ring right here. That's where the pads going to sit up against and we'll also go on this ear and this ear over here.
What this does is it helps with vibration dampening and noise reduction. When you step on your brake and your brakes are creating friction and noises and all that, this is just going to put a little bit of a buffer and it also works as a lubricant to make it so your pads won't get stuck in the long run. That's kind of a secondary thing really. I would just mainly say it's for the vibration dampening and of course keeping moisture out from getting in between. So we've got that done. Now what we're going to do, is we've got these boots right here. That's where our caliper sliders go in. If you can get a little bit of lubricant in there, that'll be helpful for you. We're also going to put some directly on our caliper slider pins.
I'm just going to see if I can go a little bit like that. I'll take some of the big globs I got here. Get it in there. I'm going to see if I can just kind of push it right on in there. There we go. This one right in there. There we go. Get off the globs that are on the outside there. Looks kind of messy. But it's lubricated. Let's set this aside and we'll move ahead to the next step.
Okay, so we have our inner pad. That's the one with the little tabs on there. This is going to press into the piston there. We just put lubricant all over everything. So you want to make sure that if you get any lubricant on your fingers, you don't get it on the friction material of the pad. If you do, it's not the end of the world. We can clean it off. But if you can avoid it, it'll save you that little bit of time down the line. So that just presses right in there. That holds that inner pad from being able to move around. Now we can move ahead. We'll grab the caliper bracket and the outer pad. We've got our bracket here. I'm just going to take it, put it right over all this just like this.
I'm just going to clean these up real quick. Get off all the gunk. We'll make them nice and shiny and clean so that way there, they slide perfectly and we'll come right back. Okay, so we've got our sliders nice and clean. These are going to slide beautifully. I just cleaned them up with a wire wheel. It was very simple. I'm just going to put them through here. Line up the threads with the holes in the bracket. I'm gonna use my seven millimeter Allen head again. I'm going to turn these in a little bit here. Let's see if it's going. It is. I'm not going to tighten it up fully yet. I'm going to start the other one first. Put that right in there just like that. Okay, that one's snug. I'll snug this one up. It's nice and snug. I'm just going to grab my pry bar. Come around this way actually. There we are. Just snug that up quite a bit here. There we are.
The reason why I'm putting all this together before putting it onto the vehicle or before mounting the bracket onto there and then putting the caliper on is just because as we saw when we were trying to remove this, to take these out, they would have been hitting. Okay? So these have to go all together before you go ahead and mount it onto the vehicle. We'll grab our outer pad real quick. Get this stuff off my hands. There we are. We want to make sure the friction material is facing in. Just bring it down. Slide it right in there just like that.
All right, take our whole caliper with both pads. We have the friction material facing towards the rotor. That's super important. It's easy to make the mistake. I probably don't have to even say that that's the way it needs to go, but I will anyways. All right, so we've got the bracket up in there now. Now we're ready to get our mounting bolts right here. Remember there's two of them. If you want to use a little thread locker, you can go ahead and do that. I'm going to grab some real quick. Okay, so we're going to take our caliper bracket bolts and we're going to start them in. I'm going to start with the top one because it's easier for me to see and get to. I'm just going to wiggle the bracket around until I feel it want to slide in. Get this one started. I'm not going to tighten it up or even bottom it out until after I get the lower ones started as well. This one's much harder to get down to. It can be done. It's not very hard. It's just harder. There we are.
Both of these are started. Now we can go ahead and snug them up. All right, we're going to use our 14 millimeter. We'll bottom that out. As soon as it bottoms out, just give it a little extra. Give it a nice little bonk. There we are. Okay, we're going to go ahead and torque down these bracket bolts to 26 foot pounds. There's one. See if I can get that lower one. I'm just going to hit it one more time. There we are. This one. Both those bracket bolts are torqued down. We can move ahead to the next step. Okay, so now it's time to get our ABS wire back so it's mounted securely. I'm just going to get this on here. We've got the big flat bracket area and then the smaller area. The flat bracket goes over the caliper and then this area right here, it goes over this area of the hose. So we'll just get that on there just like that. Easy peasy. We've got another one. Slide that on there.
If either of these broke, it's really not that big of a deal. The one big deal would be to make sure that you do actually secure them though. Okay? That is super important. Let's see if I can get this back off of here. You don't want your hose or your, sorry, ABS wire just kind of flopping around, getting stuck inside where your shock moves and goes up and down. It could get pinched. It could get torn, could just overall go bad by moving around too much. So let's just keep it secured. That's the way Volvo wanted it and it only makes sense. So there's that. Onto the next step. We've got our little slider covers. Those go right on here and then of course the lower one, same thing. Presses right on there.
Now we've got our little bracket clip. This is just going to slide into this hole right here. You can give it a little bonk if you want. It's going to press up against the bracket. It's going to go into this hole right there and then this ear right here is going to press up against the bracket. So just kind of try to press it just like that. Give it a loving bonk. Give them a little wiggle. Nothing's falling out on its own. They're definitely in there. If they're sticking out quite a bit, they're not in far enough. If they really don't want to go in, you could just put a little penetrant in there.
But they need to go in. So what this does basically is it kind of holds the caliper from being able to flop around like this, but yet still gives it maneuverability to move around a little bit. All right? Okay, so now we're just going to get our wheel up onto here. Volvo made it fun for you essentially to get your wheel on there because normally you'd put your wheel up, we'd have some studs coming out like this. You could just put your wheel over the studs and the wheel's not going to go anywhere. Volvo said, "Hey, good luck." So we're just going to have stuff ready. We've got our lug bolt ready. We've got our thin wall, 19 millimeter socket ready. We're going to grab the wheel, roll it up to our leg and then use our ab muscles to lift it up. We'll put it up near where it needs to go. Try to line up the holes and get this one lug bolt through. After we do that, we'll continue on, at least get another one in real quick. Let's get this up here. Line up our holes.
I'm holding it up with my leg muscle right now. So that's nice. It's not going anywhere. We'll just get all five of these started in. We'll bottom it out and then we'll torque them down. Okay, so now we're going to torque down our lug bolts. We're going to use our 19 millimeter. We're going to go 103 foot pounds and we're going to do it in a star pattern, essentially from here to here, here, here, here. Make a star. Don't go around in a circle. For good measure, just go around one more time. We're here anyway. Doesn't cost us anything. Small price to pay for safety.
So there we are. It's all torqued and of course, to do the other side of the vehicle, you would just repeat all the same procedure. Easy peasy. Okay, so now that we've got the wheels on and torqued, we're just going to go ahead and pump up the brake pedal. Super important. Just want to make sure that you have all the fluid pushed all the way back down to the caliper that might've gotten pushed back a little bit there. There we go. Feels pretty good. Now just take it for a road test. Easy peasy.
Thanks for watching. Visit 1AAuto.com, your place for DIY auto repairs, for great parts, great service, and more content.
