Brought to you by www.1AAuto.com, your source for quality replacement parts and the best service on the Internet.
Hi. I'm Mike Green. I'm one of the owners of 1A Auto. I want to help you save time and money repairing and maintaining your vehicle. I'm going to use my 20+ years' experience restoring and repairing cars and trucks like this, to show you the correct way to install parts from 1A Auto.com. The right parts installed correctly; that's going to save you time and money. Thank you, and enjoy the video.
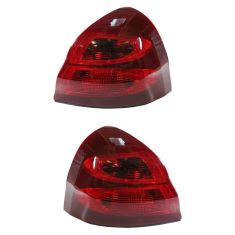
In this video, we'll be replacing a taillight on this 2004 Pontiac Grand Prix; the same as any 2004 to 2008 Pontiac Grand Prix. No tools are required.
Okay, taillight replacement on a 2004 Grand Prix; same as 2004 to 2008, and this actually all starts in the trunk. Okay, just set it there; make sure you look at what I need you to look at. Okay, first, little thumbscrew right up here; this actually is a screw that holds in the taillight, and it also holds this protective cover up. Really, probably the right way to do it is to remove this plastic piece, but you can pull it enough to just kind of move the carpet out of the way. Okay. Then I'm going to bring you over here.
Okay, and that stud is the screw we just took off, and then right there next to it is the other, another black thumbscrew, and the lighting's a little tough Try Up top right there is your third black thumbscrew. Try and get in here really close. You have the stud, the other thumbscrew, and then up top, that third thumbscrew.
Okay, so you've removed your thumbscrews, and the taillight just comes out. Okay, then everything twists out. Actually, even easier, the harness unplugs, and then there's your taillight separate from the car. If you just need to service your bulbs, they all just twist out; they come out. Get this little one; twists out, and by the looks of it, might need service on this car, and this one also just twists out. So pretty easy. Put it back together, so plug it in first. One, two, three, push it up in there. Then our top thumbscrew, tighten that up.
Okay, just one quick thing to show you. With this thumbscrew, you want to make sure you lift up the insulation so this screw gets in, and it bites on the metal because this is actually holding your taillight in. So you can start this screw a little bit and then just, I don't know if you can see that, you lift up the insulation over here, and then put the screw on. This is just to make sure that your screw is holding the metal and getting a good bite for your taillight. And it's all set.
This video was brought to you by www.1AAuto.com. We hope we helped you out. We are your source for quality replacement parts and the best service on the Internet. Feel free to call us toll-free 888-844-3393. We're here for you on the Internet and in person. Thank you very much.