Hey everyone, it's Len from 1A Auto. Today I'm going to be showing you how to do rear shocks on a 2010 Nissan Altima. It's going to be a very simple job, and I'm going to be the guy that shows you how to do it.
And as always, if you need this, or any other part you can always come down to 1aauto.com, and we'll be sure to take care of you. Now, we have our vehicle partially supported off the ground. We want to make sure the wheel's still touching. We're just going to break all five of these lug nuts free, and we don't want to loosen them up very much. We just want to break them free so when we get it up off the ground we don't have to worry about spinning the wheel, trying to break them free.
One, and we're going to be using our 21 millimeter socket. We're on our last two. That one off. Alright. What I like to do is, I like to leave one on there when I'm removing the last one, so I'll just put that second to last one back on a couple threads, and then we'll go ahead and remove this last one.
The reason for that is, so the wheel can't come loose, fall and hurt anybody. Safety is key here at 1A Auto. Okay, we got the last one. Now we'll just go ahead and remove this second to last one that we started on, holding the wheel. Take off that hubcap. Here we go. Being careful not to drop it too hard.
Now what we're going to do, we're going to use an 18 millimeter socket, put it on this side of the bolt, the other side's a welded nut onto the backside of this shock. So, I'm just going to give this a little tug. There we go.
Now we're going to pull this out. Being careful of any pinch points. There's that bolt. As you can tell, it doesn't have anything special to it. We could clean up these threads if we wanted to. Put that aside where we can find it.
Now we can move this around quite a bit. Now we're going to go ahead and remove our two 13 millimeter nuts. There's one right here, and one on the other side. You can use a long extension if you want, or whatever you use to get up in there.
I sprayed them all down so everything breaks free nice and easy. Get that one nice and loose, and I'm going to move onto the other side. This one I can remove completely. Alright, got the first one all the way out. I'm just going to start it on a couple threads. There we go.
Now I'm going to continue to take out the second one. There we go. Grab this with my fingers. It's almost ready to come off. There we go. Carefully remove this. And now we're clear to install a quality 1A Auto part.
Next what we're going to do, we're going to take off this rubber boot right here, it should pop off pretty easy, and then we're going to take off this nut. We'll notice that there's no spring tension. This isn't a strut, this is just a shock. If it had a spring coming from here to here, you would not touch this nut.
Since there's no spring, there's no spring tension, we can remove this, so we can remove our upper shock mount. We'll use our 16 millimeter socket. You're going to turn this nut to the left, but what you'll notice, is the whole thing spins. So, here's a little secret. You're going to want to try to push this boot up, so you can see under there, that's the shaft of the old shock.
We can take some locking pliers, we're going to grip it onto that shaft nice and tight, as tight as we can get it. There we are. Now we can take our 16 millimeter socket, and we're going to turn this until it breaks free. Once that breaks free we're going to take it completely off, and we'll put this together on the new shock.
So, if doing it with the locking pliers didn't want to work for you, maybe the locking pliers were slipping on the shaft under there, it's okay. There's other options. Something we can try to do is use a 16 millimeter wrench. We can put it right on this nut, use some sort of locking pliers on this. If it comes down to it, we can try to heat up this nut a little but, but we'll use that as a last resort.
So, first I'm going to put my wrench on, I'm going to use my locking pliers, try to grip it on as much as I can while they still lock we're going to see if we can break this free. Nice. Alright. So, we can continue doing it this way if we want, or if we want we can use something like a ratchet wrench, but essentially we want to get this apart and then we can move onto the next step. Alright.
Now that it's coming apart we can set stuff up so, we remember, which way it came off. If that helps you. That's completely up to you. We'll have a bushing on the top and a bushing on the bottom.
So, this is essentially how it's going to go. Pretty easy to figure out. It's going to go this way when it goes back together. Now we can remove this from our old shock, and we can mount all this onto our new shock. Okay.
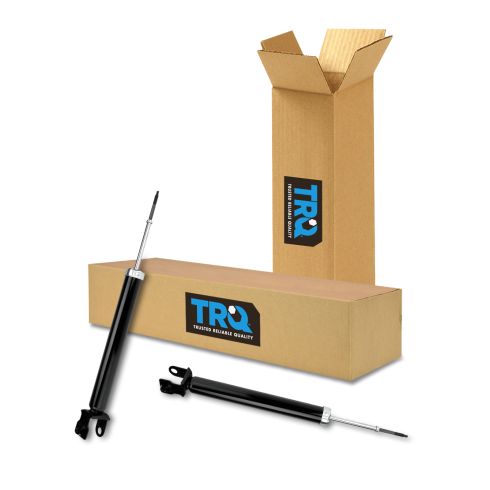
So, here we have an old shock. You can tell it's very rusted, it's getting very weak. You can hear it going on in there. We want to replace it with something new and quality. What I would do, is I would go down to 1A Auto. 1aauto.com really. And I would order this part. To me, this is a high quality part. You can tell it seems like it's very heavy duty, quality made, and of course it comes with the 1A Auto warranty. So, if you need this, or any other part you can always come down to 1aauto.com, and we'll be sure to take care of you.
Out with the old, in with the new, quality 1A Auto part. Something that I like to mention when you're going to be replacing rear shocks on this, is you want to compress these several times. And you want to do that while it's standing up and down like this.
This is much easier to do on the ground, it's much safer to do on the ground, but firstly, I'm going to put on some safety glasses. Because as always, safety is the number one concern at 1A Auto.
You can do something like this, very carefully push it down, and then we're going to try to get this off, like that. We're going to let it continue to go all the way up, as far as it wants to go.
Just give it a minute. And we can do this three, four, five, 10, 20, however many times you want, but at least three to five times. We'll go down. This is just getting it charged up. You'll notice it's going to go up faster now. We'll go again. It's getting harder to push, and it's also going to come up faster I'm sure.
If this was on the ground I would do it a couple more times, but for safety's sake I'm not. This looks good as it is. So, we'll move onto the next step, which will be removing this right here. This is just trash. I'll show you what it's for. Protect your threads right here, and also keep this on for shipping. Trash.
Now we move over to where our bushings are. Everything came new, so that's great. We remember the way it came. At least I do. This is going to go like that. So, what we're going to do, is we're going to try to match up the bushings, so we can see, which goes where.
This is a little bit bigger, it's better. Better quality. You can tell that one's a little smaller. Don't worry about that. It's going to be that way, you don't have to worry. This is just for better vibration dampening.
So, what you want to do, is you want to use a little bit of brake lube or silicone paste. We're going to go ahead and put on a little bit of lubricant. You can use silicone paste, or brake lube, whatever you want to use. It doesn't have to be anything too crazy.
Just so we can slide this into the hole. That feels pretty good. It'll compress in further if it needs to. We're going to essentially do the same thing with this, but first what we're going to do, is we're going to grab our upper mounting plate, we're going to put it through like that. You can see where this bevel lines up with that hole, right through the backside. Looks pretty great.
A little bit of brake lube on this side, or silicone paste. We're going to put that with the same little tip facing towards there. Pretty simple. Press it like that. That looks pretty great. This is ready to be installed onto the shock.
Now we've got our quality 1A Auto part, we're going to go ahead and slide the boot over. Just got to get it into the ... There's a little bushing in there. Like that. Put on this plate. Doesn't go this way, it goes this way. Covers the end of the boot.
Now we can go ahead and put this on. If you happen to turn the plate over, and you were inspecting it, making sure it was in good condition, and you forget which way it goes, it's easy to tell, because you can remember where the nuts were. The nuts were facing down weren't they? And this was up against the body.
You can also tell because there's a little bit of rubber here for vibration dampening. So, in case you forgot, just a heads up. Don't worry. Len's here.
Now we're going to put on our washer, right like that. And then we have our locking nut. You can see it has the neoprene locking on there. That doesn't go on face first. That goes on at the end, so we'll come in from the other side. And then you would just tighten this up. Alright.
So, we're going to go back to using our locking pliers, and I'm going to use a ratcheting wrench. For this application I'm going to be using a 17 millimeter, and it's a ratchet wrench.
You don't have to worry about lining this up. You can have it like this, like this, it doesn't really matter, because it's going to be able to spin once we get it together. So, don't worry so much about that.
What we do need to worry about is tightening this up, and you're going to feel it bottom out. You don't need to go much further than that. Just so you know. Just get that on there to hold it.
So, we're just going to tighten this up. The physical torque's supposed to be 22 foot pounds, which would be impossible to do with your locking pliers on the end here, because you'd need to put a socket in your torque wrench. So, for this application what I'm going to do, is I'm just going to tighten it up and tights, tight. Too tights's probably broken, but we don't need to go that tight.
You're just going to feel it bottom out. Sorry. That feels pretty good, and it does have the neoprene lock in there, so we shouldn't have to worry about it loosening up. It's going to do its job, that's what it's there for. Alright.
Now we're just going to put the rubber cap back on, keeps the moisture out of there. Now we're going to take our two 13 millimeter head nuts, we're going to come up here, line up the holes with the studs that come down, take one nut, start it on there. Think about getting the other one on there. Get them both started. A few good threads. It's not going anywhere, now we can go ahead and tighten that up with our ratchet, and then I'll get you the torque wrench, and we'll make sure we torque that down.
We're just going to bottom these out. If you have access to an air gun it might be helpful. Here we go. Nice and snug. Now we'll grab our torque wrench, and we'll torque those up.
We'll get our torque wrench set to 20. There's one. Bring it around, put it on the second nut. There we go. I'm just going to hit it one more time. One. Do this one again. Those are torqued down, now we can move on to the last bolt.
Alrighty. So, now we're going to line up this hole, with this hole. Depends on if you're going to be jacking up, or you're going to be lowering your jack. Whatever your circumstance is, essentially line this hole up with this one. For my circumstances I'm going to bring this up, there we go.
We're going to take our long bolt, if you want to use a little thread locker, it's up to you. For this video I'm not going to worry about it, I'm just going to put it through. Give it a couple threads by hand, then I'll go ahead and tighten it down, and we'll get the torque spec, and we'll torque it right up.
I'm just going to get this snugged up, then we'll hit it with the torque wrench for 66 foot pounds. We're using an 18 millimeter socket. Feels pretty good. Let's hit it one more time. There it is.
Alright. That completes our installation of the rear shock on this. We double checked all of our bolts, we made sure everything's nice and snug. Nothing's going anywhere, ABS wire nice and secured. This is all set.
So, we're at the point, we're going to take off our securing lug nut here. This was basically just to hold the rotor on, so it didn't wobble around. We remember that. It feels stiff. You can go ahead and use your 21 millimeter socket. I'm going to hold that in my hand, grab my tire. It's easiest to roll it right up your knee, so that way there you can use your abs to lift it, instead of your back.
So, I'm going to go like that, use my leg. Put it right up on here, just like that. I'll hold it still, I can grab my hubcap, or wheel cover. Whatever you want to call it. 21. Get it on here.
We're going to go ahead and start all five of these. We'll snug them up and then we'll go ahead and torque it right down. I'm just going to go ahead and snug these down. Our next step is to get this wheel, so it's just barely touching the ground, so it won't spin and then we're going to torque these lug nuts to manufacturers specifications.
Now it's time to torque this puppy down. We're going to go to 83, that's the manufacturer's specification. We're going to use our torque wrench with a 21 millimeter socket. We're going to make a star pattern, it's five lugs, so, a star. Here we go.
Now, maybe you got distracted, somebody came over and talked to you, you don't remember if you got them all. Just go around again. I mean, it's not like you got to pay for it. Let's hit them again.
Thanks for watching. Visit 1aauto.com for quality auto parts shipped to your door. The place for DIY auto repair. And if you enjoyed this video, please click the subscribe button.