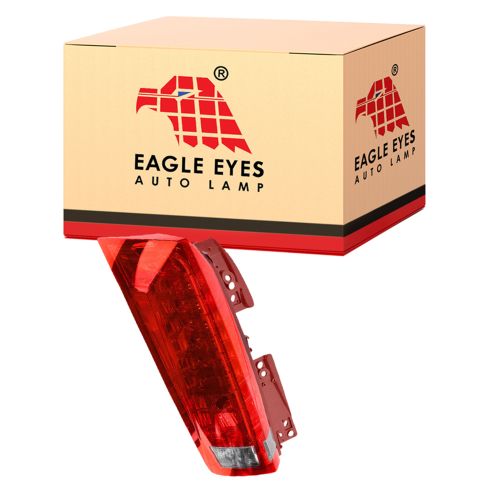
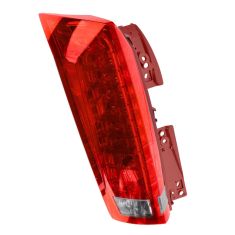
Assemblies may include halogen or incandescent test bulbs that should be replaced before installation.
Features and Benefits
Direct Fit - No vehicle or wiring modification necessary
DOT, SAE, and FMVSS Compliant - Meets on-road use regulations
Matching set for a restored look
Item Condition:New
Attention California Customers:
WARNING: This product can expose you to chemicals including Chromium (Hexavalent Compounds), which is known to the State of California to cause cancer, and birth defects or other reproductive harm. For more information, go to www.P65Warnings.ca.gov
This item is backed by our limited lifetime warranty. In the event this item should fail due to manufacturing defects during intended use, we will replace the part free of charge. This warranty covers the cost of the part only.
The bulbs are for testing and not covered under our warranty. Our warranty applies to the light assembly only.
FREE Shipping is standard on Orders shipped to the lower 48 States (Contiguous United States). Standard shipping charges apply to Hawaii, Alaska and US Territories. Shipping is not available to Canada.
Expedited is available on checkout to the United States, excluding Alaska, Hawaii and US Territories as well as P.O. Boxes and APO/FPO/DPO addresses. Final shipping costs are available at checkout.
How to Replace Tail Lights 2010-16 Cadillac SRX
Created on:
Tools used
Phillips Head Screwdriver
1. Removing the Tail Light
Pry up the trim button from the tail light trim and remove it
Remove the trim from the tail light
Remove the Phillips screws from the tail light
Pry out the tail light
Press the connector and remove the wiring harnesses
2. Servicing the Bulbs
Twist the bulb socket counterclockwise out of the light
Pull the bulb off of the socket
Push on the new bulb
Twist the bulb clockwise into the light
Reverse light bulb is HPC16w
Bulb is a w21w
3. Installing the Tail Light
Insert the tail light into place
Tighten the Phillips screws to the tail light
Press the trim to the tail light
Press the trim clip to the trim
Hi, I’m Mike from 1A Auto. We’ve been selling auto parts for over 30 years!
I'm going to open the lift gate, just grab underneath here, push the button, and it will automatically open. We're going to pull this trim piece off right here. We’re going to need to remove this clip. We’re going to use a trim piece tool to remove it. A little spot on the top get underneath here, pry up, and once it's out a little then that comes out completely. And we can grab this trim, bring it straight forward, and it pops right off, some clips in there.
We're going to take these Phillips head screws out: there's two right there, just use a Phillips head screwdriver pull those out. We're going to grab the tail light and grab underneath here the side. Pull it straight back. It might fight you a little bit. These little pieces go into these little slots.
To disconnect the wires, you’re going to push this connector right here down on the lock and pull it out. A little lock right here, push that down, and pull that one out. Then the bottom one the wiring harness is held in by this clip, pull that off, and then right here push this connector down. There’s a lock right at the top. Slide that out.
All right, we're going to remove this reverse light bulb. Just grab it, twist it to the left, and pull it out. This bulb is an HPC 16W. We'll remove this bulb, turn it to the left, and pull it out. You can grab the bulb from the socket and firmly pull it straight out. This bulb is a W21W.
To reinstall, we'll line it up with the slot, lock it in, and we'll reinstall it in the taillight assembly. We're going to line this bigger slot up with this slot right here and then turn it to the right. To install the bulb you're going to line the tabs up right here with the holes, the slot in the assembly, push it all the way down, and turn it to the right, lock it in.
Now we're going to connect the connectors. Take this connector and line it up, push it in, lock it in, and then this retainer that holds the wire, slide that on just like that. Take this green connector, line it up, lock it in, and then this connector will go way up here and lock it in make sure it's in there good.
We're going to line these tabs up with the holes in the body. Get those lined up good, and then firmly push the taillight on. Now we'll install our Phillips head screws with our Phillips head screwdriver. Get that one started and go down here. Start this one and we can snug it down. Not too tight it is in plastic so just snug.
All right we're going to align these little clips up with these holes on this trim piece and then push it on and lock it in. Get it underneath the weatherstripping right there and then we have this little clip, position that and then push it down. Then we'll close the lift gate.
Thanks for watching. Visit us at 1AAuto.com for quality auto parts, fast and free shipping, and the best customer service in the industry.
GM612-B000L
In Stock
Product Reviews
Loading reviews
4.86/ 5.07
7 reviews
5 Stars
4 Stars
3 Stars
2 Stars
1 Star
6
1
0
0
0
Great Value & Quality
Geena
February 22, 2017
Great! Dealership wanted 2 times the price! Installed and looks just like new!
great service
Bruce
March 1, 2017
I would like to say thank you for your great service and speedy deliver. The part arrived when you said it would and it was very well packaged. Installation was easy and looks great again. I highly recommend your company to anyone looking to save a money for replacement auto parts.
Bruce B.
Wow
K
June 22, 2017
U people are great!! I received the tail light the next day from my order. The product was spot on and the price was half the cost from anybody else. Thank you
Cadillac SRX Tail light assy
O
December 1, 2017
Light assy fitment was great, only issue was the new turn signal socket was defective, but just reused the old one and all worked great. Thanks for the quick shipping and video links on YouTube for installs. Will continue purchasing from 1A!!
Cadillac taillights
C
April 17, 2019
You guys are amazing. Your customer service and follow up is the best in the business. I tried before and a foreign company sent an inferior product and sent it back I just have to take the time to give you praise. Will use you guys for everything. Thank you again
Tail lights
G
May 8, 2019
Fast shipping, perfect fit, fair price. what else do you need.
This is my one stop shop for quality parts at a good price
Absolutely Outstanding!!
S
August 18, 2019
Part fit perfectly and excellent quality, responsive customer service and the well executed, specific instruction installation video was what incentivized me to purchase from 1A AUTO. I am now subscribed to your You Tube collection of how to videos. Thank you so much for making this an easy fix instead of an expensive, time consuming trip to the dealership. 1A AUTO has become my go to place for DIY car repairs!!
Customer Q&A
Is there a Video on how to replace taillight on 2015 Cadillac SRX?August 15, 2017
Stephanie Y
10
Stephanie it really is quite easy to do with out a video just remove cover to get access to the tail light assembly and you will see it is very easy. good luck
August 15, 2017
Bruce B
10
I could not find any helpful videos.
August 15, 2017
Linda A
10
Most likely on you tube but the installation is very simply if you have a torx head bit
August 15, 2017
John T
10
Hello Stephanie, there is a video to install this tail light. This company is AWESOME !! Delivered my tail light in a couple days.
August 15, 2017
Stacy R
Does this include the light bulbs and LED strip or is it just a light cover lens??September 20, 2017
K A
10
This will include the LED strip. The other bulbs may be included, but we recommend replacing them.
September 20, 2017
Alex P
Does it include the light bulbs and LED light strip?? Or is it just the cover lens?September 20, 2017
K A
10
Yes, everything was included. My new tail light works perfectly
September 21, 2017
Ron P
10
It includes the lights but Cadillac said "It is not a Cadillac part". It did not fit properly. I did not use it.
September 24, 2017
Louis P
10
Yes it does may have to reuse the factory light bulb sockets for the new lense assy.
December 1, 2017
O R
Does it include the light bulbs and LED light strip?? Or is it just the cover lens?September 20, 2017
K A
10
Yes. The one I got was the full unit. Easy to install too.
September 20, 2017
Seth M
10
It includes the LED strip. There is one light bulb socket which requires a bulb. I used the one from my old unit.
September 21, 2017
Robert Z
10
hi there yes it includes the LED light strip but not the other bulbs
September 21, 2017
Bruce B
10
The bulb is not included. Just the cover
September 22, 2017
Mildred H
Does it include the light bulbs and LED light strip?? Or is it just the cover lens?September 20, 2017
K A
10
Yes,on the LED strip, which is not replaceable, bulbs are replaceable
September 20, 2017
Roger S
10
Yes, light bulb. Looks like LEDD strip also included, electrical connector at bottom of lens (2 prong )
September 21, 2017
R M
10
Yes all is included
September 21, 2017
William J
Customer service
877-844-3393
Monday - Friday 8:00am - 9:30pm ET Saturday - Sunday 8:00am - 4:30pm ET
Cadillac is a registered trademark of General Motors Company. 1A Auto is not affiliated with or sponsored by Cadillac or General Motors Company.See all trademarks.
Enter Vehicle Year Make Model
Specify your vehicle's year, make and model to guarantee fit.
Year
Make
Model
Options
Drivetrain
This part doesn’t fit a . Select from parts that fit.