Brought to you by 1AAuto.com, your source for quality replacement parts and the best service on the Internet.
Hi, I'm Mike from 1A Auto. I hope this how-to video helps you out, and next time you need parts for your vehicle, think of 1AAuto.com. Thanks.
In this video, we're going to show you how to replace your worn out spark plugs in this 1998 Toyota Camry 4-cylinder. These spark plugs are going to fit a lot of different vehicles, and this procedure is going to be pretty much the same for any engine.
You'll need a new set of spark plugs from 1AAuto.com, a 5/8 spark plug socket. That's the one with the rubber insulation in the bottom to grip onto the porcelain here, make it easier to remove and install the plug, a long extension capable of getting down into the spark plug tubes into the motor, a ratchet, and a torque wrench.
Open the hood and secure the hood prop. On the top of your motor you'll see these four rubber boots. If you remove those, beneath each one is the connection to your spark plug. Down inside that tube there is the spark plug itself.
I like to do the spark plugs one at a time, moving down the motor. That way there's no risk of confusing the wires. We'll start with number one, which is on the passenger side here. Pull up and remove the boot. We're going to use a 5/8 spark plug socket for this. The difference between a spark plug socket and a regular socket is you can see that little rubber bushing in the bottom of the socket itself. That's going to hold the porcelain on the plug making it easier to remove and install. We'll also use a long extension and a ratchet. Set it down and rotate it until you feel it grab the spark plug, remove the spark plug.
After removing your spark plugs, an important step is checking the condition of the plugs you removed. You can see that ours has some light brown ash-like deposit on the tips, and while this may look very concerning, it's usually a result of various fuel or oil additives. All it means is that your cars spark plugs aren't liking the specific brand of fuel you use, or you're possibly getting an oil leak into the combustion chamber. If you don't notice a loss of oil in the vehicle, a blue smoke, or a burning oil smell while driving, then you may consider changing the brand of fuel you use most often in your vehicle. Otherwise, if you have symptoms of oil burn, like loss of oil, a blueish smoke coming from the tail pipe, or a burning oil smell, you'll want to check the rings of the pistons as well as the seals and valve guides in the head, which can cause oil leaks into the cylinder. While our number one spark plug had only light ashy buildup on it, you can see that our number four spark plug has a much heavier, darker buildup.
When we removed the plug, it was actually wet with oil, meaning that it's more likely that our oil additives are what is causing the ashy buildup, as opposed to being a fuel additive, which is also a possible cause. The simple way to check is to do a compression test to ensure that our rings are okay and controlling the oil appropriately, as well as removing our valve cover and checking the condition of our valve seals.
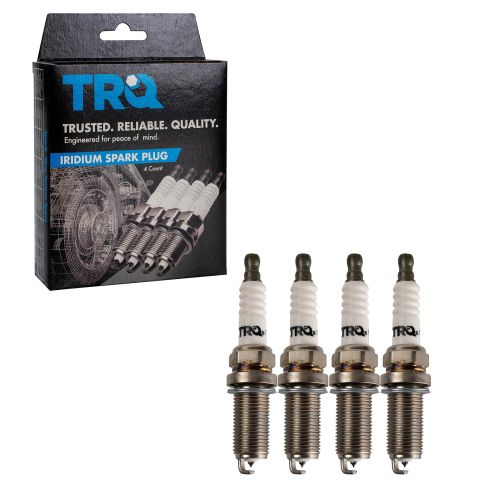
To give you an idea, here's the new spark plug we'll be installing in our vehicle. You can see that we have a nice clean electrode, both in the center and on the outside, nice clean threads, bright white porcelain insulator below the center electrode. A normally worn spark plug, meaning that the engine is operating properly and the spark plug is the correct heat range, will darken slightly, become possibly a light brown or gray color throughout here, as well as maybe some yellowing or graying of the white porcelain insulator at the bottom. The center electrode, while flush with the outside ones now, will become slightly shorter, will be free of any kind of deposit, be it dark from fuel or oil, free of any wetness from fuel or oil, and free of tan or white buildups from fuel additives, oil additives, or possibly the engine running to lean or too hot.
You can see all the spark plugs are identical. One important thing to check here is this number 11 on the porcelain of our new plug and the 11 at the end of the number on our old plug. It tells us that they are both the same heat range, which is very important for an engine. You can see we have the same threads, same connector at the top here, and the same two outer one inner electrode setup. If your old spark plugs are worn out, causing your engine to run rough or showing some concerns of the plug being improper or the engine not running right, then these new spark plugs from 1A Auto are going to go in direct fit, just like your original equipment, and fix you up right.
Install your new spark plug into your spark plug socket, bring it down as far as you can by hand. Once you can't turn it by hand, use a torque wrench and tighten the plug to 13 foot-pounds. Now, the tricky thing about the rubber bushing inside of that spark plug socket is to remove it. You may have to walk around the top of the extension before you can pull it out without leaving the socket stuck to the plug. Reinstall the plug wire until it clicks into place, repeat this process on the remaining three cylinders. Remove the hood prop, close your hood, and you're ready to go.
Thanks for tuning in. We hope this video helped you out. Next time you need parts for your car, please visit 1AAuto.com. Also check out our other helpful how-to and diagnosis videos.