Replaces
This part doesn’t fit a . Select from parts that fit.
Frequently bought together
Part Details
Item Condition:
New
Lifetime Warranty
This item is backed by our limited lifetime warranty. In the event this item should fail due to manufacturing defects during intended use, we will replace the part free of charge. This warranty covers the cost of the part only.
Returns: Parts with electrical components cannot be returned once installed.
FREE Shipping is standard on Orders shipped to the lower 48 States (Contiguous United States). Standard shipping charges apply to Hawaii, Alaska and US Territories. Shipping is not available to Canada.
Expedited is available on checkout to the United States, excluding Alaska, Hawaii and US Territories as well as P.O. Boxes and APO/FPO/DPO addresses. Final shipping costs are available at checkout.


Created on:
Tools used
Brought to you by 1AAuto.com, your source for quality replacement parts and the best service on the Internet.
Hi, I'm Mike from 1A Auto. I hope this how-to video helps you out, and next time you need parts for your vehicle, think of 1AAuto.com. Thanks.
In this video, we're going to be working with our 2001 Ford Ranger. We're going to show you how to remove and replace your spark plugs and wires. This particular one is a 4-liter, but this process is going to be very similar on most engines. If you like this video, please click subscribe. We have a ton more information on this truck as well as many other makes and models. If you want these parts for your vehicle, they're available from 1AAuto.com. You can follow the link down in the description. Here are the items you'll need for this repair.
We're going to start with cylinder 6, which is the driver's rear cylinder. Reach down and remove that spark plug wire. Pull that out of the way. We're using a 5/8” spark plug socket here. The difference is it's got this little rubber bushing on the inside that holds onto the porcelain of the plug and makes it easier to remove and install. It's pretty difficult to see these spark plugs because of their position into the motor. We've put an extension on there with the socket to show you right about where it is. You should be able to reach down there and feel for it, once you've removed the plug wire.
The way I like to do this to keep everything in order is to remove the plug wires individually. We just did the cylinder 6 spark plug. We'll remove the cylinder 6 plug wire. You might need a small, flat-blade screwdriver to open up this retainer. We can now remove that number 6 plug wire from the retainer, and the wire itself.
Our old plug wire was the original plug wire from the factory, so it has the number 6 marked on it to designate that this is for cylinder 6 on the vehicle. New wire kits are made to fit a multitude of different vehicles, so we're going to have to match up our wire from our vehicle with one of the new wires from our kit. I like to separate them and lay them out so you can get an idea of which one's the shortest and longest. This number 6 looks like it's probably going to be our shortest wire, judging from the fact that it goes right from the coil straight down onto the plug. Our shortest wire is here. Again, these are meant to be universal, so it is just a tad longer than our original wire, but that's all right. It's still going to go in just fine.
Just in case you don't have any handy, this kit comes with a little tube of dielectric grease. Put just a dab of that onto the connector here. We'll be sure to put just a little bit on the end of our spark plug as well to make sure that we get a good, solid, corrosion-free connection on our wire, as well as making sure it doesn't seize on there.
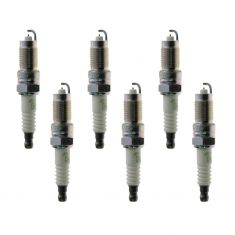
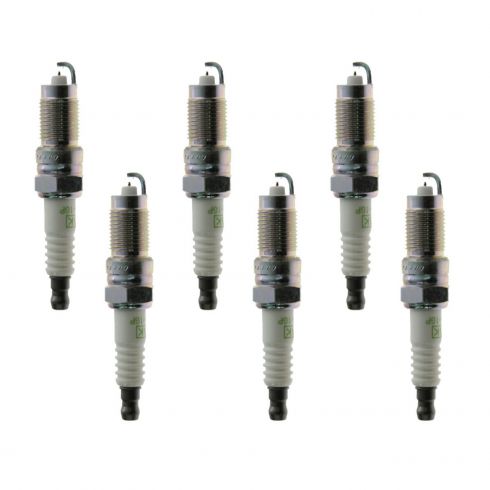
Here we have our old spark plug that we removed from the vehicle and our new part from 1AAuto.com. We have the same threads and the same porcelain. We have the same connector on the end here. You can see how nice and clean our new one is, with hat nice full electrode on the end, whereas our old one has gotten pointy. There's a bigger gap there from it being worn away. You can also see that we have some ashy build-up here. Looks like our engine might be running just a little bit lean. These new spark plugs are going to go in direct fit, just like our original equipment and make sure that we get a full burn of our air-fuel mixture, restore all that power and efficiency back into our motor, and fix us up right.
Again, we'll put just a little bit of that grease on the end of our plug before we install it into the motor. Try to line the spark plug up by hand first. We'll start to thread it in with the socket just on the end of an extension before we tighten it down with our ratchet.
Install your new plug wire. Remember how it was routed through that retainer. We don't want to close that yet, because we still have two more plugs and wires to do on this side. Locate the end of your spark plug. Install the wire until it clicks. Now we'll repeat these steps throughout the rest of the motor.
The procedure we've just showed you on cylinder 6 is going to be the same for the remaining 5 plugs and wires. The only minor differences maybe the combination of extensions, and/or U-joints that you're going to need to use in order to properly access the plugs. Changing your spark plugs and wires regularly or as needed, is a great way to make sure your engine stays burning fuel properly and running to the best of its ability.
Thanks for tuning in. We hope this video helps you out. Brought to you by www.1AAuto.com, your source for quality replacement parts and the best service on the Internet. Please feel free to call us toll-free, 888-844-3393. We're the company that's here for you on the Internet and in person.
Tools used
One of the first things we wanna do now that we have the hood up is we're just gonna check the gap on our new spark plugs to make sure they're at the spec that the manufacturer recommended. For this particular application, the 4.0 liter, they recommend 0.052 to 0.056. So you would just find that somewhere on this. Give it a little spin, just till it bottoms out, and just make sure where it's supposed to be. This looks great. You do the same to all six plugs, and we can continue.
The next thing you need to do is take a little bit of compressed air and go right down along the side of the engine right where the spark plug wires connect on to the spark plugs. You wanna try to get air all along the engine and make sure that there's no crud along there. That looks good. Do the same to all the cylinders. Get that all done and out of the way, and then we can move along to removing the wires.
Next, I'm gonna grab onto this wire. Give it a little twist, that's gonna break it free from the ceramic on the spark plug. Give it a little tug. That came off great. It's a good idea to take a peek inside the wire. Make sure that you didn't rip it apart or anything. This looks good. if the boot looks damaged, corroded, ripped, torn, pretty much anything that makes you feel like it should be replaced, I would just definitely replace it at this time. Just comes right up here and connects onto the coil. If you do one, you're doing them all.
Let's get that spark plug off of there. I'm gonna use my 5/8 spark plug socket. I've got an extension, a little swivel here, of course, my 3/8 ratchet to break free. Okay. We got the spark plug outta here. Take a quick peek at it. It looks like it's pretty dark. It's getting a little fouled, and then the area right along there is getting worn. Just gonna take a peek at the gap. I just kind of want to see. Bring it around and around. Holy moly. It's still going. Looks like we're at approximately 0.083, 0.084, and it's supposed to the way over here. So that's very bad. This spark plug is extremely warned. When you replace one, of course, you would replace them all.
We're just gonna compare the spark plugs real quick just to make sure that this area right here is the same length. If your new spark plug comes down this bar, in comparison, obviously you would have an issue. Just do a quick comparison. Make sure everything's copacetic. This looks great. I'm gonna install this in the vehicle. I'm gonna go right with the socket. I'm not gonna put it on the ratchet yet, because I wanna start it by hand to make sure I'm threading in smoothly. Got that snugged up. Just give it a little bit more, and then I'm gonna grab the torque specifications, and we'll torque it to manufacturer specs. I've got my torque wrench set to 150 inch-pounds, let's torque it down. There it is right there.
The next portion we're gonna do is apply a little bit of dielectric silicone. I'm going to go right along here. And that's just going to help it come off of the spark plug down the line. I would do that whether I'm reusing the same spark plug wires or if I was replacing them. Make sure you put that wire right back along the direction it came, you don't want it touching up against the exhaust or near anywhere hot. Push it right in there, give it a little tug, see if it wants to come free easy. This feels good. Now we're gonna do the same to all cylinders.
Tools used