Brought to you by 1AAuto.com, your source for quality replacement parts and the best service on the Internet.
Hi, I'm Mike from 1A Auto. I hope this how-to video helps you out, and next time you need parts for your vehicle, think of 1AAuto.com. Thanks.
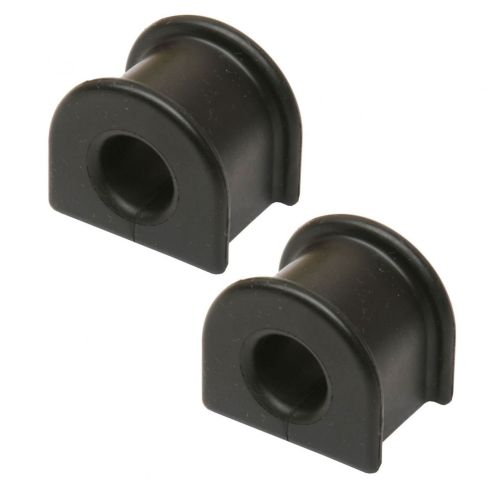
In this video, we're going to show you rear sway bar bushings on this 2007 Audi A4. These bushings are the same for 2002 to 2008, and the process is the same for basically any A4 or S4. The bushings and stabilizer bar just might be a different size. Items you'll need include: new sway bar bushings from 1AAuto.com, center cap removal tool, 17mm socket and ratchet or breaker bar tire iron, 13mm socket, torque wrench, flat blade screwdriver, hammer, and jack and jack stands*.
The reason those are starred is because you could do this repair without jacking up your vehicle, but it does make it easier getting it up in the air.
Start by removing the wheel. Remove the center cap. This vehicle, you need a special tool, which we sell on under VWXXX00001. You can also, if you have one in your toolbox, use a pick tool. Remove the cap and remove your five 17mm lug bolts. If you don't have the benefit of air tools, loosen the lug bolts on the ground with your tire iron or 17mm with a breaker bar, then raise and support the vehicle, remove the lug bolts the rest of the way, and remove the wheel and tire.
The rear sway bar bushings, each side right here. Technically, you don't have to raise the vehicle or take the wheel off, but obviously it makes it easier with the wheel out of the way, and obviously for filming as well, we took it apart so we could show you better. Two 13mm bolts hold the retainer onto the frame, and we'll remove those on both sides.
The upper bolt and your lower bolt might even be a little rusty. I'm just scraping the six sides of the bolt with a screwdriver to knock the scale off. Pull the brackets off, and the bushing.
Old part from the vehicle, new part from 1A Auto. You can see they're exact. New part from 1A Auto's going to go right in.
Fix your problem if your stabilizer bar has been rattling or it's just worn out. The new part from 1A Auto is going to fix your problem. Put your new bushing in place. Squeeze it around a little bit. Put the bracket on, and the bracket's going to force it further around the bar. We'll repeat the same thing on the other side. You want to pull back on your link here and give yourself a little bit of room to push the bar up in and start a bolt.
Get the bolts started on the other side as well. When you tighten them, you just kind of want to go evenly, don't just tighten one. Tighten one a little bit, switch to another one, and vice versa.
Once you get them tight, just firm them up by hand. Put the wheel back on. Put it in place. Turn it so you can see the holes. Thread in your top lug bolts, and follow with the rest. Get them hand tight, tighten them preliminarily.
Let the vehicle down on the ground and torque them to 90 foot-pounds. Put your cap back in place. See where the two tabs are furthest away, two slots furthest away, and line everything up.
Thanks for tuning in. We hope this video helped you out. Next time you need parts for your car, please visit 1AAuto.com. Also check out our other helpful how-to and diagnosis videos.