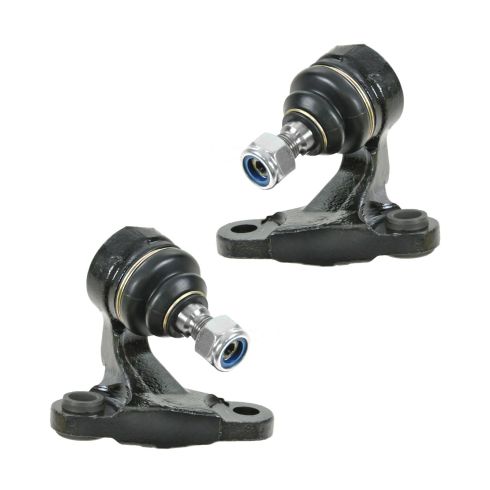
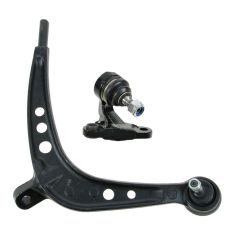
What's up, guys? I'm Andy from 1A Auto. In this video, I'm going to show you how to replace the front lower inner ball joint on this 2001 BMW 325xi. If you need this part or other parts for your vehicle, click the link in the description and head over to 1AAuto.com.
I raised the vehicle. We're using a two-post lift. If you're doing this at your house, you can use a jack and jack stands. I'm going to remove the tire to gain extra access. It's going to make it a little bit easier. I'm going to use the 17 millimeter socket and an air gun. You can always use a breaker bar. Take these lug nuts out, or lug studs out. When I get to the last one, I'm just going to hold the wheel so it doesn't fall. Take the last one out, and grab the wheel, pull it off.
I want to take this nut off and also the nut right here. They're pretty rusty, so I'm going to use some rust penetrant. Spray it down. Soak it for a little bit. Right there and right there. Now, I'm going to take a 18 millimeter wrench, go over this nut. I'm going to loosen this nut up. Once I get a couple turns on the box side, then I'll switch to the open side, and take this nut off. Get that nut loosened up. Sometimes, you can't get it off, because the axle's in the way. We're just going to leave it loose like that.
I'm going to separate the ball joint from the knuckle, right here. You can do this a couple of ways. Sometimes, there's a clamp that you can slide in there, and it pushes down on the ball joint. What we're going to use is a fork. We're going to try that method. You could also take a hammer and just tap on the knuckle itself, just be careful. You don't want to break anything. I'm just going to use this pickle fork and a hammer. Don't worry about that. Slide that in there. We'll separate it. Now, the reason why you might not want to use a pickle fork is, generally, it rips the boot on the lower control arm, or on the ball joint. Keep that in mind, if you're going to reuse the ball joint. You might not want to use this method. There we go, separated. Pull that nut out of the way.
If you're doing this job and you don't have an impact gun, what you're going to want to do is take a 22 millimeter wrench, get on this nut right here, and you're going to want to crack that free first. Otherwise, we're going to loosen up these two bolts right here. Just use an 18 millimeter socket, loosen these up. Do the same on this one. Those bolts are loose. I can take that one out. This one, I can't get out until I break this free. Just take a pry bar, put it under here, and just pry this away. Then, I can get the bolt out. Got to twist this a little bit, get that bolt out. Now, I can get a gun on here, take that nut off. Then, I'm going to take this nut off and just use a 22 millimeter socket and an impact gun. All right, got that off.
If you're going to reuse this ball joint, you're going to need to use a ball joint separator. What it does is it clamps in here and pushes up on the ball joint. If you're not going to reuse it, then you can either use a hammer on here or a pickle fork. I'm just going to use a hammer, try to break it free. If not, I'm going to use a pickle fork. All right, so I'm just hammering it off. I don't have enough stability with the arms, so I'm actually going to use a pickle fork. Just slide it in here, just be careful not to hit the CB shaft. There we go. Now, I did just put the nut back on, just so it didn't go flying. Just put it on a couple threads and slide it up.
Here's the old part. Here's the new front lower inner ball joint from 1AAuto.com. The shape is the same. Comes with a new nut. Take the nut off. This is just a dust cover. It's covered for shipping. Take that off. The boot is the same. Get yours at 1AAuto.com and you'll be ready to rock and roll.
I'll take this inner ball joint. Take the nut off here. Just slide that in position. I've these two bolts, get these bolts lined up. Actually, it's a good idea to get the in board one in first. Get that lined up. This inside bolt, I'm not going to be able to get a torque wrench on, because the arm's in the way. Otherwise, you want to torque this 57 foot pounds. I'll do the same with that one. With a 18 millimeter socket and a torque wrench, I'll torque this bolt to 57 foot pounds.
I'll take this ball joint nut, get that lined up. I'm going to take the 22 millimeter wrench and tighten this up, but the ball joint stud is actually spinning, so I'll take a 6 millimeter hex bit and put it on my ratchet. That's going to hold the stud from spinning. I'll tighten this up. I'm going to tighten this down. Now, if you're able to get a torque wrench on there, which it's very difficult, you could torque that down to 57 foot pounds. We're going to line up the lower control arm, put the ball joint through here. Take the nut, get this started. All right, then I'm going to take a 19 millimeter wrench, tighten this nut right here. Now, it's next to impossible to get a torque wrench on here. Maybe, if you used a crow's foot, you might be able to torque this. You're going to want to torque this to 48 foot pounds. So, just do the best you can.
Now, I'm going to put the wheel on. Just line up the holes. Take one of the lug studs, get that started. I can grab the other ones, and I'll just tighten these down. Then, I'll lower the vehicle and torque them. All right, now I'm going to use the 17 millimeter socket and a torque wrench. I'm going to torque these lug bolts to 95 foot pounds. I'm going to torque them in a star patterns so that the wheel gets tightened down evenly. Then, I'm just going to go around again, just double check. We're good to go.
Thanks for watching. If you want the parts to do it yourself, check out 1AAuto.com, the place for DIY auto repair.