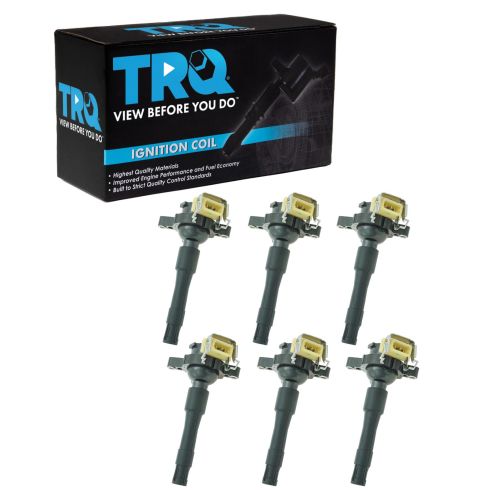
1AERK00105-BMW Land Rover 6 Piece Ignition Coil Set TRQ ICA61524

Replaces
2002 BMW 325Ci L6 2.5L 6 Piece Ignition Coil Set TRQ ICA61524

Product Reviews
Loading reviews
4.96/ 5.0
26
26 reviews
This. Web. So. Great. To. Shop. Anything. U. Need. Is. There. I. Love. The. Service. The. Speed. On. Delivvery. Brand. Many. Parts. They. You. Need. I. Give. You. Guys. 5. Start. The. Prices. Unvaliabable. Thanks. For. You. Time. And. Customer. Servi
June 26, 2017
Hop. Online. This. Web. Got. Everything. You. Need. From. Every. Parts. To. Customer. Service. Was. Great prices. Quality delivery. I. Recomende this. To. Anybody. I. Give. You guys. 5. Start. I. Will shop. Again. Soon. Guranted. I. Have. To. Get. More. Parts. Soon. But. I need. To. Save. Money. You. Guys. Have. Like. Special. Account. For. Customer. To. Shop line. Of. Credit just. Asking
These work fine
December 11, 2017
These ignition coils work fine - easy to install and price was good. I've had these in for a couple of weeks and they're doing the job.
great product
December 26, 2017
I have a 2001 BMW 330I and I just replaced the spark plugs and coils. These coils were a perfect fit and I had no issues what so ever swapping everything out. I have about 500 miles on these new coils and no problems. I can't speak to how long they will last but so far so good.
1AERK00105-BMW ignition Coil
November 25, 2018
I have a 2000 BMW 323ci and I needed a coil pack.started searching in the internet and found Am autoparts website.as I navigated through the format I was very surprised at how easy finding my parts and purchasing them.as well as keeping me updated with the tracking of my shipment.
Happy customer
February 3, 2019
Im very satisfied with these parts, nice quality parts and they werent expensive so it was a win win
Bmw Ignition Coil
February 9, 2019
If youre a DIYer then you have to buy your parts from 1aauto, super fast delivery, parts fit perfectly, plus 50% less than the big box stores, Ive purchased many parts from 1aauto and the results are the same, do yourself a favor and try them Satifaction Guaranteed!
Direct fit
April 6, 2019
Came on time. Was direct fit and working great so far. Have only had in for about 1 week
Perfect Fit
July 20, 2019
The parts came quickly, fit perfectly, and are operating as promised.
Great parts
July 23, 2019
I bought this cools for my bmw and they fit right on the money!! Will do business with this company again!!!!
Bmw 328i coils
August 13, 2019
They work super well and cheap campared to other ignition coils
Good business.
November 18, 2019
Im most satisfied with doing business with 1 aauto the prices are unbelievably low for good quality for the best quality, with delivery at hardly no cost and will never rely on auto zone orally's est. Ever for my auto parts.
Oem quality
December 8, 2019
Perfect replacement to oem coils. No adjustment needed just pop the old ones out and push these in.
6 for the price of 2?
September 6, 2020
Awesome deal. Fast and easy transaction. Quick installation and fit like a glove. Car runs perfect. Thank You A1.
Coils. Ignition
September 17, 2020
Good product would recommend it to anyone
2002 BMW 325xi e46
November 28, 2020
6 piece ignition coil pack set! Great price, fast shipping, A1 also has videos on DIY & coils work perfect!!
Happy customer
BME E46
December 31, 2020
Id highly recommend this part. Packaging was what it did for me, delivery time great too.
Ignition coil set for E36 328i convertible
April 1, 2021
After replacing the six ignition coils the engine is running smoothly.
Great decision
May 20, 2021
These coils were much less expensive than the OEM (which failed), arrived quickly, fit perfectly and performed flawlessly.
Review
November 12, 2021
Works like new!
December 19, 2021
Great item
March 14, 2022
Great ??
Good
April 1, 2022
Good product work well
Outstanding
April 3, 2022
Hate to admit it, but according to my tech equipment and driving they have given me better performance than OEM parts.
????
March 14, 2023
Awesome
Super
July 7, 2023
Great price,and arrived safely on time, super.
Bmw coils
August 2, 2023
Great fit and worked great
Customer Q&A
Where made ?
February 9, 2024
10
These are manufactured by TRQ. TRQ is a high quality, high-end name brand that we offer and back with our 1A Auto Limited Lifetime Warranty. TRQ parts are made in multiple over seas locations.
February 12, 2024
Andra M
BMW is a registered trademark of Bayerische Motoren Werke AG. 1A Auto is not affiliated with or sponsored by BMW or Bayerische Motoren Werke AG.
See all trademarks.


