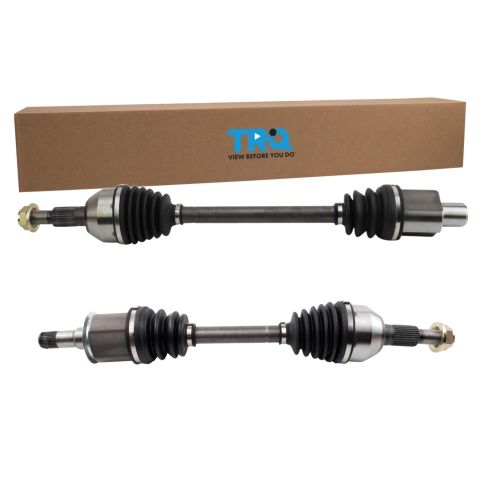
What's up guys? I'm Andy from 1A Auto. In this video I'm going to show you how to replace the front CV axle on this 2008 Cadillac CTS all-wheel drive. If you need parts for your vehicle, click the link in the description and head over to 1AAuto.com.
You want to keep in mind, when you start this job, you are going to have to get an alignment performed after you do this job because you're going to change steering angles and you want to make sure you keep your tires from wearing out prematurely. We're going to take this wheel off. I'm going to use a 22 millimeter socket and an air gun. If you don't have an air gun, you can loosen up the lug nuts on the ground with a breaker bar. Now take the wheel off. Just going to take a little rust penetrant, just try to get some on that axle.
I'm going to take that axle nut out next. I'm just going to use a 36 millimeter socket with an air gun. If you don't have an air gun, you can use a breaker bar. You're just going to need a pry bar in between the studs to prevent the hub from spinning. Take that off. I am going to take a hammer. Just give the end of the axle a tap. Be careful. It is grooved on the end. There is a angle, so it shouldn't mushroom if you just tap it a little bit, but if you have to wind up and give it a hard hit, you might want to use a punch so that you don't mushroom the end of it.
Okay, so I want to take the wheel speed sensor out. I just want to take it out so it doesn't break when I'm taking this apart. I'm going to use a 10 millimeter socket extension and an electric ratchet. If you don't have an electric one, you can use a regular one. Pull that out. I'm just going to use some pliers and gently grab the sensor, just rock it back and forth while you pull on it. Just be careful with it. It is plastic so you don't want to break it if you're going to reuse it. Slide that out just like that.
And there's a retainer right here. If you can get on the back side, it's clipped in, just try to squeeze that clip. We can pull the wire out of the clip. Well, the wire's going to stay in the clip, but the clip's going to come off the bracket. Let's see. There we go, and then we can just slide that out of the way, just so it doesn't break.
And I want to remove the bracket that holds the brake hose on. I'm just going to use a 10 millimeter socket and a ratchet. Pull that off and then just slide this out of the way. The reason I'm taking that off is just so I have a little more Slack with when I pull the knuckle out from disconnecting the upper ball joint. I don't want to put tension on this hose, so that'll just give me a little more slack. If I have to, I can remove the brake caliper.
I'm going to disconnect the outer tie rod end. I just going to use a little bit of rust penetrant and then I'm going to remove that nut. Take an 18 millimeter socket and an air gun. Remove this nut. If you don't have an air gun, just use a breaker bar or a ratchet. Then pull that nut off. There's many different tools you can use to remove this outer tie rod end. You can have a fork that's going to press on the center of it or you can use a fork if you're going to replace it. Generally that rips the boot, but I'm just going to take a hammer and hit on this stud straight down. There we go. That's one way to remove it.
At this point, this spindle is nice and loose, which is good, although I do need to remove this nut right here. To remove that nut, if I try to do that with this loose, then this is just going to spin and it's not good. So what I'm going to do is just take the tie rod and loosely put the tie rod back in and just put the nut on top. That way, this is just going to sit there like that. So I put the nut on there, then it still has a little bit of play. That's okay, but that'll prevent it from spinning when I try to loosen this up.
Spray a little rust penetrant on the stud, and I can take a 18 millimeter wrench and loosen this nut up. You could use a socket as well, although right now the stud is actually spinning so what I'm going to have to do is I'm going to have to put a hex. There's a hex key I can put right there so I can hold the stud while I loosen it up. All right, so I'm going to take my 18 millimeter wrench and a 5 millimeter hex bit and a ratchet and loosen this up. You could use a ratchet wrench as well, or you could even do this and have the ratchet work for you, but it's not the best idea to have the ball joint spinning in there. I'll just do it this way.
Could also use the pry bar and see if you can put enough force on this to stop the stud from spinning, which I am able to do. You can either have someone hold the pry bar for you or just take a rag and stick it between the fender and the pry bar. That'll keep the control arm down enough so that it's not resting up against the nut so we can take this nut off.
I can do it by hand. I'll just hold it down, hold the pry bar down, get that nut off. Then we'll gently try to pull the pry bar out and put control on. The control arm's going to go up and then the knuckle can swing out. Now we can slide the axle out of the knuckle. Actually, we'll take that tie rod and nut off. With that upper control arm disconnected and the tie rod disconnected, I should be able to grab the axle and just slide it out. Just going to have to find that right angle. That helped me out. I'm just going to use a pry bar just to try to get the right angle. Pry this out. You just twist that and pull it out.
Now I need to separate the axle from the front differential. I'm just going to take this fork. This is an axle fork. We actually sell this in a kit from 1AAuto.com. I'm just going to use a little hammer and give it a tap. There's a couple of different ways to get these axles out and this is one way. And that popped off. Basically, pop the C clip out so now we can just pull it out the rest of the way. I'll just grab the axle. I do you have a drain bucket underneath just in case any fluid comes out, but no fluid came out, so that's good. Then just slide the axle out.
On the end of the axle, I'm just going to put a little bit of grease in there. That's just going to help install it, and then if it ever needs to be removed, it'll come out a little bit easier. And then it is recommended you replace that C clip on there, but we're going to reuse ours, and the C clip is actually on the front differential side. It's not in the axle. I'll just slide this over. Get that in position. All right, so let me just work to get this lined up. I might just have to wiggle it back and forth a little. There we go. You want it to lock in place, and pretty much that's how you want it to be. So if you grab it, it's not going to pop out, so that's good. You're listening for that click for it to click in place.
All right, now we can get this end of the CV shaft in. You can put a little grease on these splines if you want. That will help keep some of the corrosion out. You could put some anti-seize on here as well, but we'll just use grease, and get this lined up. Just work this a little bit. It's not quite the easiest thing to do, but if you really struggle trying to get this back in or even out, you could always disconnect the shock and then your control arm will drop a little bit further, but it's not completely necessary. Just might be a little bit easier.
All right. If you turn the knuckle all the way to the right, it makes it a little bit easier to guide this in. Guide that in. Just make sure that axle goes through, and you can put the nut on there if you want, but I'm going to put the upper control arm, get that started, hold that down. You should be able to hold it down with your hand. Just be careful. If not, just grab a pry bar. Get the nut on there. It's a little bit dirty. Some stuff in there.
All right, get that started and watch your fingers. Let it go. We can hook up the outer tie rod end, push that in there. Take the nut, put the nut on, get that started. All right, so I'm going to hold the stud with a 5 millimeter hex bit and then I'm going to tighten up the nut with the 18 millimeter ratchet wrench. Just like this. Take that up. Now I'm going to use an 18 millimeter socket and a torque wrench.
Once that's snugged up with the wrench, you should be able to torque this without this stud being missing. And I'm going to torque this to 44 foot pounds. Now I'm going to take an 18 millimeter ratchet wrench and very similar to the upper control arm, but this time I'm going to use an 8 millimeter socket. It can go on the end of the tie rod end. Just hold the stud, and tighten it down. And once you snug it up, then I should be able to torque it.
All right, so the torque on this, I'm going to use a torque wrench and an 18 millimeter socket. I'm going to torque this to 26 foot pounds. And then after that I have to use an angle meter, if you have an angle meter, and then you're going to want to go on an additional 110 degrees. That's 26. All right. And then do the best you can with the angle. I need to go 110 degrees, so if you had an angle meter, put that on, and when you tighten it 110 degrees, that's when you stop. I'll just have to go a little bit further, a little more. If you think about 110 degrees, a 90 degree angle, and then another 20 degrees.
Now I'll take this brake hose bracket, line the pin back up, and then take the bolts. Get the bolts started right there, and then I'll take my electric ratchet and a 10 millimeter socket. Tighten up the bolt. Snug it up. We'll take this wheel speed sensor wire, take where the retainer is that it goes into that bracket, put that back into the bracket. We probably could have left that attached, but that's okay that we took it out. And take the sensor side and slide that back in position. Take the bolt. Line the bolt back up. Take my 10 millimeter socket and a ratchet, tighten it up. Just snug. That's good.
Now, this has a separate washer from the axle nut. Normally they are together, they'd have the washer together with the nut, but it doesn't matter. This one came with the axle. Slide the washer on, slide the nut on. It's always a good idea to replace the axle nut whenever you take it off.
To prevent this hub from spinning, I'm actually going to take the pry bar and go in between the axle lugs and just have this resting up against the ground. Then I can take a 36 millimeter socket and a torque wrench. Torque this axle nut to 158 foot pounds. Be careful. It is a lot of torque. There we go.
All right. Take the wheel. Re-install the wheel. Install the lug nuts. All right, now we're going to use a 22 millimeter socket and a torque wrench. Tighten these lug nuts to 100 foot pounds, and I'm going to do this in a star pattern so that it tightens the wheel down evenly. And I'll just go around again.
Thanks for watching. Visit 1AAuto.com for quality auto parts shipped to your door, the place for DIY auto repair. And if you enjoyed this video, please click the subscribe button.