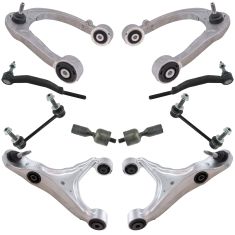
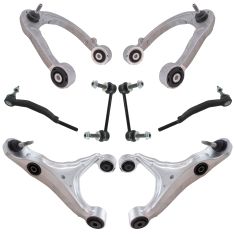
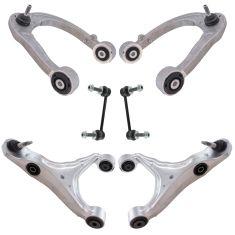
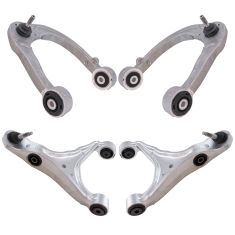
Brought to you by 1AAuto.com, your source for quality replacement parts and the best service on the Internet.
Hi, I'm Mike from 1A Auto. I hope this how-to video helps you out, and next time you need parts for your vehicle, think of 1AAuto.com. Thanks.
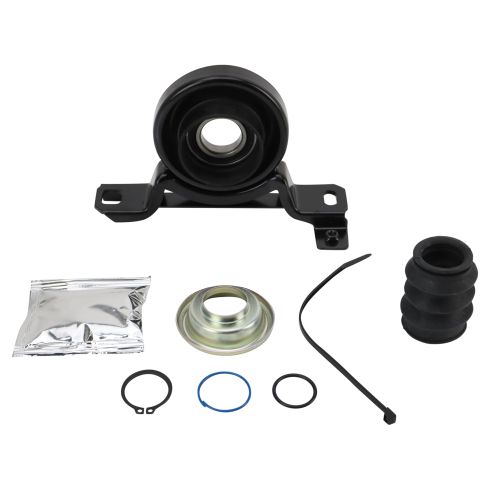
In this video, we're going to be working on our 2006 Cadillac CTS, 2.8 liter V6. I'm going to show you how to change the center support bushing, up here. You can see ours is pretty blown out. If you find this information useful, please hit the subscribe button, we have a bunch more information on this vehicle as well as many other makes and models. If you want to put these parts in your vehicle, check out the link in the description. Here are the items you'll need for this repair.
We're going to use a lift to make this easier to show you guys at home, but you should be able to do this in the driveway with a jack and jack stands. Locate the O2 sensor connector on the transmission. This is going to be on the left side of the tranny for the driver side O2 sensor and the right side for the passenger. This process is the same for either. Remove the safety on the connector, lift up, and release the electrical connector for the O2 sensor. Using a 22mm wrench, remove the O2 sensor from the exhaust. Disconnect the O2 sensor on the passenger side and remove it the same way as the other.
Remove these four 14mm bolts from the exhaust with a 14mm socket and ratchet. Separate the exhaust and allow it to hang. Remove these two 13mm bolts securing this cross brace under the exhaust. As you remove the last bolt, be sure to support the exhaust so it doesn't just fall. Push this down. Now that we've got it loosened up we can just move it out of the way, allow our exhaust to hang down a litter farther.
We have three rubber exhaust hangers here, got the muffler, we're going to spray some penetrating oil around of them to make them slide out of the rubber easier and then simply pull them over the ends and bring the exhaust down. Support the exhaust as you drop it out of the last hanger. Remove it from the vehicle.
We'll have to remove our entire drive shaft assembly from the vehicle. Before removing any component of the drive shaft, you want to be sure to index all aspects so that the shaft goes back in exactly the way it came out in correlation to the other parts because these are a balanced assembly. The way we'll do this by marking the drive shaft and the flange in two places just to be safe. We'll repeat these at the front of the drive shaft and the splines if we plan to separate the shaft.
Remove the drive shaft coupling to differential flange bolts, there's two here and one at the top. We'll have to rotate the drive shaft in order to access the one at the top of the vehicle. Using an 18mm socket and ratchet as well as a wrench, go ahead and remove the bolts. Get in and put the vehicle in neutral, and then rotate the drive shaft until you can access the last bolt. Put the vehicle in park.
Once the rear's been disconnected you can go on to remove the bolts from the transmission flange to the drive shaft coupling using an 18mm socket and ratchet. Again, we put the transmission in neutral and rotated the drive shaft so we could access this last bolt here.
We're going to take a small pry bar, wedge it between our coupling and our transmission flange and just pry that shaft back on the splines, as much as we can. It's a little harder to do with ours because the center support's blown out so it's flexing. Now we've got it starting to separate, so when we're going to remove our center support, it should be easier to remove our drive shaft.
Remove the two bolts on the center support bushing using a 15mm socket and ratchet. Be careful as your drive shaft is now disconnected, so you're going to have to support it as you remove the last bolt.
We've supported our drive shaft right at the center bushing with a screw jack. If you're doing this at home, on the ground, you can do this with a jack stand or a jack. Once that's supported, I'm going to use a bigger pry bar to try to separate the front portion of our drive shaft from the transmission. Repeat this step to separate the rear drive shaft from the differential. Once you've separated the coupling, we're going to remove our support. Remove our drive shaft from the vehicle.
Here we have the drive shaft assembly from our 2006 Cadillac CTS. We're after the center support bearing here. You can see the old portion is actually torn off. We slide that out of the way. What we're going to do is: we've indexed it. You can see we have some score marks here to line up the splines to the shaft, we have long paint stripes here, short ones here, and we left the last side blank to avoid confusion.
We're going to cut this ear on the crimp clamp, peel back the boot, and remove the drive shaft from the splines. Now, this last part has a little snap ring in it, so you do have to give it a little bit of a tug to get it to come out. There we go.
Remove this rubber boot. Be careful for this o-ring that sits into the channel there. Use a flat punch to tap this old dust shield off. There's a snap ring, keeping the bearing pressed onto these splines, that we'll have to remove before we can tap our bearing off the end of the yoke. Remove this snap ring with a pair of snap ring pliers.
We've put a bearing separator around the backside of our center bearing. We're going to spray a little penetrating oil down there just to lubricate it and maybe make it a little easier to get off. We tighten ours down with two 19mm with 3/4 wrenches. Be sure to tighten them down as evenly as you can. We're just trying to make sure that we really get behind the rubber and actually grab the bearing. Install the legs for the puller. To install the upper portion of the puller we'll have to remove these nuts and washers up top. Now we'll crank down until our bearing comes free. Tighten down our puller using the 17mm socket and ratchet, and our bearing is off.
We're going to apply a little bit of grease to the journal for the bearing just to help make sure that slides on there nice. If you feel any burs you're going to want to file them off, but ours is nice and clean. Lay the new center bearing on, be sure this portion faces out towards the splines, as this is where our dust cover will sit in. Using a large washer and a section of pipe to hit the bearing on until it doesn't move any farther. This really isn't taking much force at all. You don't have to go crazy hitting this. We'll remove our washer and check that the bearing has bottomed properly.
Install your snap ring back over the splines, bring it down to the bottom and set it into the groove at the bottom of the shaft, just above the bearing. We're going to use a flat punch and a hammer to tap that snap ring and make sure that it seats down fully and into the groove. You'll hear it click and see it go in, as well as the gap on the end closing here.
Clean off the splines of the drive shaft. Use the included lubricant to evenly coat the shaft and work the grease into all the splines.
Install the dust shield over the splines. We're using the pipe from earlier to gently tap this back down and seat it over the snap ring. Hammer it down until it bottoms out and seats evenly over the bushing.
Install the rubber boot. We want this end that our clamp is going to go on to face out. Bring that all the way down. We scraped a little grease off, so we'll be sure to add more of that. We'll install our o-ring over the groove at the end, and set up our clamp onto the boot.
Slide our drive shaft back onto the key marks. Set up your alignment marks. Push the shaft back onto the splines. Once you get it all the way in, check that all the marks are aligned. If they aren't, or you're unsure, remove the drive shaft from the splines and click it over one spline in the direction you think you need, and check it again. Set the crimping tool over the clamp. Make sure that everything is lined up and in place where you want it, and crimp the fitting until it's on tight.
Using a 10mm socket and ratchet, remove the two bolts securing the heat shield to the bottom of our old center support bearing. Remove these clip spacers from the old center support bearing, these just slide off. We'll slide them onto our new one. Flip it over, reinstall our heat shield, and tighten these bolts down with a 10mm socket and ratchet.
Reinstall the rear section of the drive shaft first. Be sure that your bolt holes are aligned and that the flange is aligned before bolting it down. You will have to pull out on the front yoke of the drive shaft in order to get it to seat onto the pin at the front. Start the two bolts on your center support bearing. Only do these by hand as we may still have to adjust and line up the flange on the drive shaft and the differential.
Find our alignment mark that we made before we removed the drive shaft, line up these holes. We'll repeat this process in the back, rotating the differential to make our alignment, as not to risk dislodging the front.
Now we'll clean the thread-locker off of all the remaining hardware and reinstall. Remove all of the old thread-locker with some brake cleaner and a wire brush. This will ensure that our new thread-locker sets in properly and that our torque specs are correct because our threads are free of dirt and debris.
Start you hardware into the differential, be sure that the bolts face in, with the nuts on the differential side. Now we'll put our transmission in neutral, so apply a couple drops of thread-locker before we tighten down each bolt. Remember our transmission is in neutral now, so we can rotate these around and tighten them quickly before the thread-locker cures. Rotate around, tightening these with an 18mm socket, ratchet and wrench. Be sure you're watching that the beveled ends seat fully into the flange before torquing the nut. The torque spec is 63 foot-pounds. Repeat these steps on the remaining two bolts.
Reinstall the three bolts for the transmission flange, we're going to want to go with the bolts from the transmission, coming out through the coupling. Again we're going to apply a few drops of thread-locker, tighten them down with this 18mm socket, ratchet and wrench. Torque to 63 foot- pounds. Repeat these steps for the remaining two bolts.
Tighten up these two bolts with a 15mm socket and ratchet. You'll see a discoloration from where it used to line up. Make sure that you align it to those marks, so that we know that this center bearing is in straight and won't cause any binding or vibrations. Torque these bolts to 37 foot-pounds.
We'll hook these three points into the rubber mounts, up here under the car. Lift on the exhaust once the rear two hangers are in place. Slide the center bracket in and hook it in. Start the bolt by hand. Now it's supported and easier to install our last exhaust hanger.
Tighten up your two 13mm bolts on the center support. This is not a machine surface or a seal of any type, so you just have to get them tight. We just recently replaced our catalytic converters, so there's no need for us to replace our exhaust gaskets. If yours need to be changed, you can pry them off with a flat blade screwdriver or you may have to break them off with a chisel. Install the new one, then we'll line up our pipes, and reinstall our four 14mm bolts. Tighten up all your bolts, and make sure that they seat onto the exhaust gaskets evenly.
Torque these bolts to 16 foot-pounds. Reinstall the O2 sensors into the bungs. Use an oxygen sensor socket, torque the O2 sensors to 40 foot-pounds.
Thanks for tuning in. We hope this video helps you out. Brought to you by www.1AAuto.com, your source for quality replacement parts and the best service on the Internet. Please feel free to call us toll-free, 888-844-3393. We're the company that's here for you on the Internet and in person.
