Brought to you by 1AAuto.com, your source for quality replacement parts and the best service on the Internet.
Hi, I'm Mike from 1A Auto. I hope this how-to video helps you out, and next time you need parts for your vehicle, think of 1AAuto.com. Thanks.
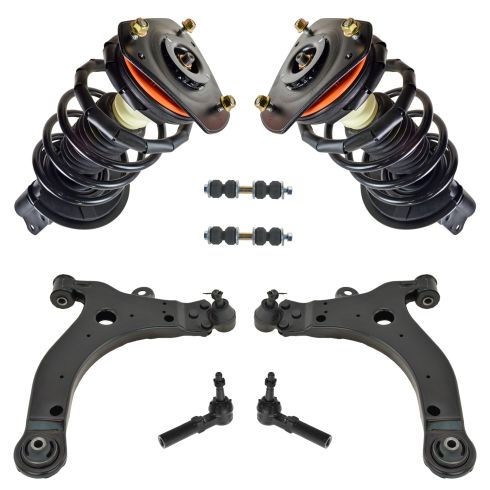
In this video, we're going to show you how to replace a lower control arm on this 2003 Chevy Monte Carlo. We'd show you on the passenger side, but it's the same procedure on the driver side. The items you'll need for this include a new lower control arm from 1AAuto.com, 13mm, 14mm, 18mm, 19mm and 21mm socket and ratchet, T55 Torx bit, 14mm, 19mm, and 21 mm wrenches, pliers, flat blade screwdriver, hammer, ball joint fork, and Jack and Jack stands.
Start off by just loosening up these lug nut caps. Now, you can remove your lug nut. If you don't have air-powered tools, you want to loosen these up while the vehicle is on the ground, then raise the vehicle, and remove them the rest of the way. If you do have air-powered tools, you can just remove them right here, and you can just pull your wheel off.
Spray your sway bar link with some penetrating fluid to make it easier to remove. And then, using a 14 mm wrench and socket and ratchet, just remove the nut on top of the sway bar link. That actually comes apart easily. It's not uncommon, but sometimes the link is totally broken, and you don't even have to do this step. You just pull the remains out. Also, sometimes, they're frozen up so bad, you have to use a sawzall or a torch to cut the links out.Pull the top bushings off and push the sway bar link down and out, and then remove the bushings in the center.
Replace a couple of lug nuts to hold the rotor in place. Using a pair of pliers, remove this cotter pin at the top of your ball joint. Now, jack up underneath the wheel. Using a 19mm wrench and a hammer, just loosen up this castle nut. You want to loosen it until it's only on by a few threads. Now, hammer the knuckle, and the ball joint should loosen up, and you should be able to pull it down.
If this isn't the case, you're going to need a ball joint splitter or a ball joint fork and just hammer it in between the knuckle and the ball joint to separate them. Now, remove that nut the rest of the way, and then lower the jack. Next, you want to remove these two 21mm nuts. The bolt is actually a T57 head, which is a fairly rare tool. We actually get by using a T55 with two people. Just make sure you hold that T55 Torx bit in there well, and you can do it.
For this bolt, you want to use a 19mm socket and ratchet and a 21mm wrench to remove it. Now, pull those two bolts free, and then you can pull the control arm down and over. Then just pull out this last corner, you will have to maneuver it a little bit, it's in there pretty good usually. That will pull out, and then the control arm is free.
On the left is the old lower control arm; on the right is the new one from 1A Auto. You can see they're identical, and they'll fit exactly the same. Take your lower control arm and push in the ball joint side first, then curve it back and push in this side. Now, you want to turn this so that the hole through the bolt is on the side so you can get your cotter pin back through it. You want to just angle the ball joint up into the knuckle. You may have to move the knuckle a little bit. Once you have it pushed into place, replace that castle nut, line up the holes right here on the control arm, and push your bolt through. Jack up the knuckle and tighten that castle nut a little bit more.
Once you get it at an angle that you can get the bolt up through the ball joint, just push the bolt through. Hammer the other bolt through and replace the nuts on both. Tighten up that castle nut. Push your cotter pin through and bend the tabs in opposite directions. Be sure to bend it in a way that the cotter pin ends don't have a change of going up and scraping along the CV joint boot.
Now, tighten up this bolt, and tighten this bolt. Take your sway bar link and put the center bushings in first, and then run your sway bar link up through the bushings. Replace the top bushing and the washer and nut, and just twist that nut on. Once you have it on there securely, you want to lower your vehicle down on to the jack stands so that all the pressure is on the suspension, and then tighten up the sway bar the rest of the way.
Replace your wheel and each of the lug nuts. You want to just tighten them preliminarily, then lower the vehicle, and tighten them the rest of the way.
We hope this video helps you out. Brought to you by www.1AAuto.com, your source for quality replacement parts and the best service on the Internet. Please feel free to call us toll-free, 888-844-3393. We're the company that's here for you on the Internet and in person.