Brought to you by 1AAuto.com, your source for quality replacement parts and the best servise on the Internet.
Hi, I'm Don from 1A Auto. I hope this how-to video helps you out, and next time you need parts for your vehicle, think of 1AAuto.com. Thanks.
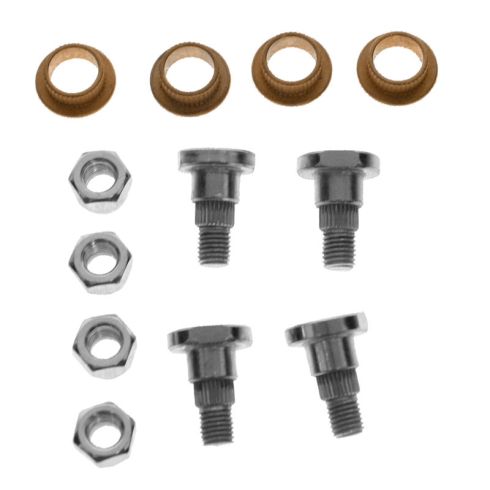
In this video, we're going to show you how to replace the door hinge pins on this 2003 Chevy Monte Carlo. We show you on the driver's side, but the passenger side is the same procedure. The items you'll need for this are a new door hinge pin kit from 1AAuto.com, a 13 millimeter socket and ratchet with an extension, a flat blade screwdriver, a jack, a vise, a 1/2 inch and an 11/16 inch wrench, a drill with a 3/8 inch drill bit, a hammer and a punch, pliers, grease, and an assistant is recommended.
If your door lifts up and down like this, you're probably in need of new hinge pins. Pull back this cover, and just pull your harness out a little bit so that you know you have some slack. Then get your jack and place it right underneath the center of the door, and then remove these four 13 millimeter bolts. You really want to leave in one bolt at the bottom and one bolt at the top, just a couple threads in, so that it will hold the door in place, but you can quickly remove them. Have an assistant hold the door, and once the door's secured, then just remove those last two bolts, and then slide the door back and out. Then, pull your harness the rest of the way out of the side of the car. Once you have the junction block out, there are two black tabs on either side. Once you press those tabs in, the white lever should swing around, and then the harness is disconnected. Then you can pull your door right off.
Now, use your ratchet, and this helps get some leverage. Move that out of the way so you can access those two 13 millimeter bolts. You remove those two bolts to remove either one of the hinges, and from here on out we're just going to show you how to rebuild the top hinge. It's a little bit more difficult than the bottom hinge, but the bottom hinge is the same process.
Now, pry the spring back and out. Then it pulls down. Then take a hammer and a punch, and right in the center of this pin, you want to just hammer a dent with a punch. Then, line up the drill with the dent and just drill down through the bolt. Using a chisel or a flat blade screwdriver, just hammer the top part off and then use your punch to hit the bolt out the rest of the way. We'll fast forward as Mike does the other side. You just want to flip it over and repeat the same process, and then you can just pull these two pieces apart, and then pull out these bushings.
Now, take your new bushings, line them up, and hammer them down into place. Now apply some grease to either side of this hinge, and push it into place. Now take your pin for this one up here where the arm is, where the spring would go, and you want to just line that pin up like this. Now, line this up in the vise and put a socket on the other side of the pin so the pin can push into it, and then just tighten up the vise until that pin is all the way in and flush. Then, you can loosen up your vise, and now just twist on the nut on the other side of that pin, put your other pin into place. You'll see that this one already sticks out the other end, so you won't need to use the vise on this one. Just twist on the nut, and then tighten it up, and it'll pull the pin the rest of the way through. You want to tighten these nuts up and then back them off about a quarter of a turn, and you'll notice that your hinge has a much smoother movement. It's not as floppy as it was before, because it's now tighter. Now just close the hinge like this, and then replace it into the vise. Pull back that arm, and then using pliers, push the spring closed, and set it down into place.
Where the bolts came out, it's nice and clean. You want to use that to line it up when you put it back together. When you put it back together, you could have it off and you can see this silver there or the silver there, but when you tighten it up, you want to place it so that the bolts are directly back where they were before. That'll give you a good preliminary alignment. We'll fast forward as he replaces those bolts and tightens them up. Pry the hinge open again. Here's a couple notes from the lower hinge. The lower hinge bushings were actually in better shape so they were a little more difficult to get out, but you can see, just use a chisel and bend them, and they'll come out. Then the other thing is, if you get confused about how the hinge used to go together, just bring it back to the car, line up the bolts, and line it up on the door with each section, and then just bring them together to remind yourself how to get it back together.
Now, put your door back on the jack. Then reconnect the harness while your assistant holds the door steady. Just close that lever back down to lock the harness. Then feed the harness back into the side of the car, and then pull your door closer and line up those hinges. Then replace those four 13 millimeter bolts and tighten them up. Push the harness in the rest of the way, and then take this rubber boot and then just push it back into the side of the car. Now close your door and open it, and you can see it lines up perfectly. It doesn't lift up and down anymore, and it's all set.
We hope this video helps you out. Brought to you by www.1AAuto.com, your source for quality replacement parts and the best servise on the Internet. Please feel free to call us toll-free, 888-844-3393. We're the company that's here for you on the Internet and in person.