Replaces
This part doesn’t fit a . Select from parts that fit.
Frequently bought together
Part Details
Product Features
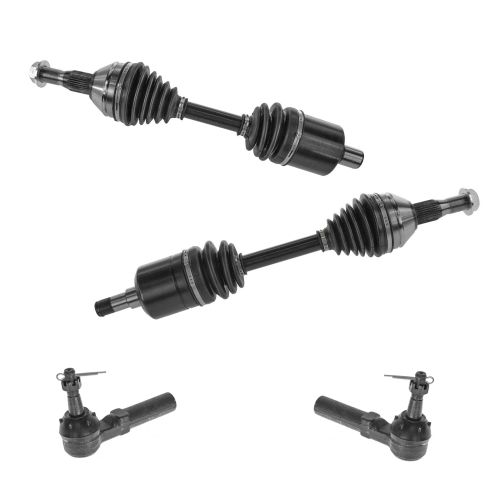
TRQ drivetrain kits are manufactured using premium raw materials to restore original performance. Each TRQ drivetrain component is designed to be a direct, maintenance-free replacement to the stock unit. To extend the service life of your drivetrain, TRQ recommends replacing wheel hubs, bearings, and constant velocity (CV) drive axles at the same time to ensure even wear of components and improved ride comfort. All products are fit and road-tested in our Massachusetts R&D facility to ensure we deliver on our promise of Trusted Reliable Quality.
Install Tip: When replacing steering components, have a professional alignment performed afterwards. This ensures proper tracking and even tire wear.
Our steering and suspension components are pre-greased and sealed for long life and do not require the extra maintenance typically required by greaseable versions.
Item Condition:
New
Attention California Customers:
 WARNING: This product can expose you to chemicals including Lead and Lead Compounds, which are known to the State of California to cause cancer, and birth defects or other reproductive harm. For more information, go to www.P65Warnings.ca.gov.
Lifetime Warranty
This item is backed by our limited lifetime warranty. In the event that this item should fail due to manufacturing defects during intended use, we will replace the part free of charge. This warranty covers the cost of the part only.
FREE Shipping is standard on orders shipped to the lower 48 States (Contiguous United States). Standard shipping charges apply to Hawaii and Alaska.
Shipping is not available to a P.O. Box, APO/FPO/DPO addresses, US Territories, or Canada for this item.
Expedited is available on checkout to the United States, excluding Alaska, Hawaii.
Final shipping costs are available at checkout.


Created on:
Tools used
Brought to you by 1AAuto.com, your source for quality replacement parts and the best service on the Internet.
Hi, I'm Mike from 1A Auto. I hope this how-to video helps you out, and next time you need parts for your vehicle, think of 1AAuto.com. Thanks.
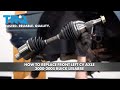
In this video, we're going to show you how to replace a front axle on this 2003 Chevy Monte Carlo. We show you on the passenger side, but the driver's side is the same procedure. The items you'll need for this is a new front axle from 1AAuto.com, a 19mm, 21mm, and 35mm socket and ratchet, a pry bar, a drip pan, a torque wrench, jack and jack stands, and a hammer.
Start off by just loosening up these lug nut caps. Then just pull your hubcap free. Now, you want to loosen up this 35mm hub nut. You can see we use a piece of pipe for some extra leverage to help break it free. You want to do this while the vehicle's on the ground. Then we're just going to use air-powered tools to get it off the rest of the way. You don't want to remove it entirely, though. You want to just keep it just a few threads on still. Just like that. Now you can remove your lug nuts. If you don't have air-powered tools, you want to loosen these up while the vehicle's on the ground, then raise the vehicle, and remove them the rest of the way. If you do have air-powered tools, you can just remove them right here. Now you can just pull your wheel off.
Remove that hub nut, and then just hit in the axle with a hammer. Then remove these two 21mm bolts at the bottom of your strut. You can see he's using a piece of pipe for some extra leverage here. We'll just fast-forward as he removes those the rest of the way. Now just hammer the bolts out. Then pry from the back of the axle using a pry bar and your hammer. You do want to make sure you have a drip pan underneath it, because it will leak. Then hammer again on the axle to loosen it up. Then pull the wheel knuckle forward, pull your axle free, and then tuck it off to the side.
After you do that, just start hitting the axle out of the wheel knuckle with a hammer. Now you can angle the axle up and out. Up front is the old axle; behind it is the new one from 1A Auto. You can see they're identical, and they'll fit exactly the same.
Put your new axle into place and tuck the back end of it back into that corner, so that you can angle the front down into the wheel knuckle. Then just push the wheel knuckle back onto the axle, and then feed the other end of the axle back into place. You kind of shake the axle up and down and turn it a little bit until it goes into the transmission.
Now push your wheel knuckle back into the strut and replace those two bolts. Twist the nuts back into place, and then tighten them up. Then torque both of these bolts to 130 foot-pounds. Replace your hub nut. Then replace your wheel and each of the lug nuts. You want to just tighten them preliminarily, and then lower the vehicle and tighten them the rest of the way. Then tighten up the hub nut. Now torque the hub nut to 159 foot pounds. Then torque these lug nuts to 100 foot-pounds in a crossing pattern. Replace your hubcap and tighten up those lug nut caps. Then you're all set.
Now start your car to warm up the transmission. Pull out the dip stick, wipe it clean, replace it, and pull it out again to check it. You can see we're a little low, so we're just going to replace the amount we need, and then replace our dip stick. It's a good idea to check it one more time.
We hope this video helps you out. Brought to you by www.1AAuto.com, your source for quality replacement parts and the best service on the Internet. Please feel free to call us toll-free, 888-844-3393. We're the company that's here for you on the Internet and in person.
Tools used
Tools used
Tools used
Tools used
Brought to you by 1AAuto.com, your source for quality replacement parts and the best service on the Internet.
Hi, I'm Don from 1A Auto. I hope this how-to video helps you out, and next time you need parts for your vehicle, think of 1AAuto.com. Thanks.
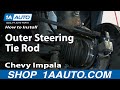
In this video we're going to show you how to replace the outer tie rod on this 2006 Chevy Impala. It's similar for 2000 through 2009, as well as from the left side to the right side. Also keep in mind that any time you're replacing suspension and steering components, we always recommend that you get an alignment afterward. In order to perform this repair, you'll need a jack and jack stands; 7mm, 18mm, and 19mm socket wrench; needle nose pliers; 13mm wrench; a 7/8" or a 22mm wrench; and a tape measure.
By hand, loosen the plastic lug nut covers until they release from the lug nuts themselves. Go ahead and pull off your hubcap. You're going to use the same size 19mm sockets to remove the lug nuts once you get that cover off. If you don't have the benefit of using a lift or air tools, what you'll want to do is remove or loosen up the five lug nuts just slightly with a socket and socket wrench and breaker bar, and then, once you've got it jacked up and on the jack stands, you can proceed to remove them completely with your socket and socket wrench.
Your outer tie rod end is going to be attached to your spindle on the back side, and you'll see it there. I'm going to start by using a pair of needle nose pliers to remove the cotter pin that goes through the end of the ball joint. I'm using an 18mm socket and socket wrench to remove the nut on the bottom of the outer tie rod. I'm measuring the distance from a fixed point at the boot of the inner tie rod with the center of the outer tie rod. This will give us a good starting point for when we install the new one. We can set it up to the same measurement, and that will give us a good preliminary alignment. The nut on the inner tie rod that sits against the outer tie rod is 7/8" or 22mm. Go ahead and loosen that up. I'm going to just slightly install that nut again, and give it a couple whacks to get it to pop out of the spindle. Now I'm removing the outer tie rod.
Here you can see the new tie rod on the left, from 1A Auto, and the old tie rod. It's going to be an exact match and install just like the original. Install your grease fitting and tighten it down with a 7mm socket and socket wrench.
Install the outer tie rod to the point of where the nut is on the inner tie rod, and then put it into its position on the spindle. Install the new nut that came with the outer tie rod. Measure the distance again from the boot to the center of the tie rod. Make sure it matches; adjust it if you need to. Then we can tighten up that nut. I'm going to install the new cotter pin. Put it through the threaded portion and the crown nut that you just tightened. Then peel the ears back so that it won't come loose. Use your 7/8" or 22mm to hold the nut and that 13mm wrench to hold the inner tie rod, and go ahead and tighten those down. Use a grease gun, attach it to the fitting on the outer tie rod, and squeeze until you're sure that it's full.
Reinstall the wheel and start by hand-tightening the lug nuts. With some pressure, back on the ground, torque your five lug nuts to 100 foot pounds. Then, by hand, tighten up the plastic lug nut covers, making sure that you're lining up the hole in your hubcap with the valve stem. I'll go ahead and fast forward as I do that.
We hope this video helps you out. Brought to you by www.1AAuto.com, your source for quality replacement parts and the best service on the Internet. Please feel free to call us toll-free, 888-844-3393. We're the company that's here for you on the Internet and in person.
Tools used
Brought to you by 1AAuto.com, your source for quality replacement parts and the best service on the Internet.
Hi, I'm Don from 1A Auto. I hope this how-to video helps you out, and next time you need parts for your vehicle, think of 1AAuto.com. Thanks.
In this video, we're going to show you how to replace an outer tie rod on this 2003 Chevy Monte Carlo. We show you on the passenger's side but the driver's side is the same procedure. The items that you'll need for this is a new outer tie rod from 1AAuto.com; 7, 17 and 19mm socket and ratchet; two adjustable wrenches; a hammer; pliers; a tape measure; a grease gun; and jack and jack stands.
Start off by just loosening up these lug nut caps. Now, you can remove your lug nuts. If you don't have air powered tools, you want to loosen these up while the vehicle is on the ground, then raise the vehicle and remove them the rest of the way. If you do have air powered tools, you can just remove them right here. You can just pull your wheel off.
Measure from the boot on your inner tie rod to this grease fitting on your outer tie rod and just remember this distance. Then, you want to loosen up this nut right here and put one wrench on the outer tie rod, one on the nut and push opposite directions to loosen it up. We recommend using two adjustable wrenches. Next remove the cottering pin from the bottom of the outer tie rod, just use your pliers to straighten out the pin and then pull it free. Now, remove this 17mm castle nut. Hit the knuckle with a hammer. This will loosen up the outer tie rod and you can lift it up and out. Just turn the outer tie rod counterclockwise until it comes free and then remove this nut.
On the left is the old outer tie rod, on the right is the new one from 1A Auto. You can see they're identical and they'll fit exactly the same. Put your new nut into place and then twist the outer tie rod on. Then, lift your outer tie rod up and into the wheel knuckle. Just push it down through. Measure it again from the end of the boot to the middle of the grease fitting and make sure it's the same. This is a good preliminarily alignment, but you probably still want to go get your vehicle aligned and have it adjusted and then put the castle nut back on, tighten it up, and then push the cotter pin through and bend the tabs in opposite directions. Using your two adjustable wrenches, just tighten this nut up. Then twist in your grease fitting, and using either a 7mm socket and ratchet or a 7mm wrench, just tighten it up. Then, using your grease gun, fill it with grease. Clean up any that came out on the sides. Turn your wheel. Then put your wheel back into place and replace the lug nuts. While the car is on the jacks, you want to replace the lug nuts and tighten them preliminarily, lower the vehicle, and then tighten them the rest of the way. Torque each of the lug nuts to 100 foot-pounds in a crossing pattern. Then replace your hub cap and tighten up those lug nut caps.
We hope this video helps you out. Brought to you by www.1AAuto.com, your source for quality replacement parts and the best service on the Internet. Please feel free to call us toll-free, 888-844-3393. We're the company that's here for you on the Internet and in person.
Tools used
Tools used
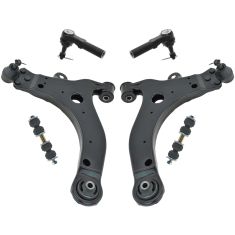
6 Piece Steering & Suspension Kit
$144.95
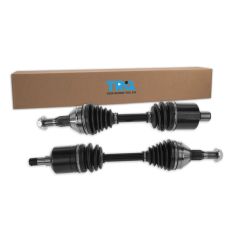
2 Piece CV Axle Assembly Set
$149.95
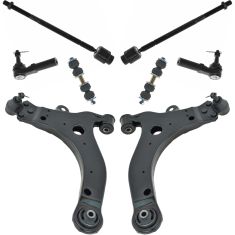
8 Piece Steering & Suspension Kit
$154.95

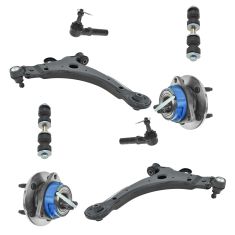
8 Piece Steering & Suspension Kit
$185.95
8 Piece Steering, Suspension, & Drivetrain Kit
$209.95
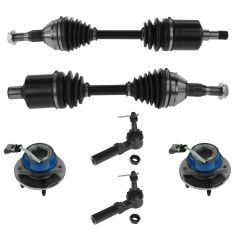
6 Piece Steering & Drivetrain Kit
$234.95
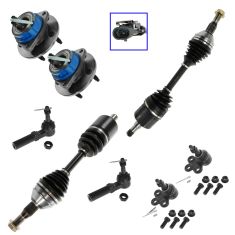
8 Piece Steering, Suspension, & Drivetrain Kit
$238.95