Brought to you by 1AAuto.com, your source for quality replacement parts and the best service on the Internet.
Hi, I'm Mike Green. I'm one of the owners of 1A Auto. I want to help you save time and money repairing or maintaining your vehicle. I'm going to use my 20-plus years experience restoring and repairing cars and trucks like this to show you the correct way to install parts from 1AAuto.com. The right parts installed correctly: that's going to save you time and money. Thank you and enjoy the video.
In this video, we're going to show you how to replace a rear window regulator and motor assembly on this 2001 Malibu, same as any '97 - '03 Malibu. Tools you'll need for this job are: Phillips screwdriver, flat blade screwdriver, a putty knife or door panel clip tool, needle nose pliers, and 7mm and 10mm sockets with ratchet and extension.
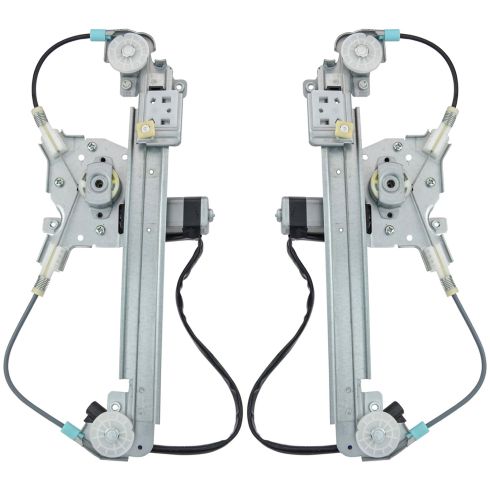
Slowly and carefully pull your water shield down. Here's our window motor and regulator and here's the replacement from 1A Auto, actually like this. A lot of times what happens is these cables snap or the wheels here break. In that case, your window's probably going to move up and down. If your window motor has burned out, it could burn out in the up position. I'm going to show you how to take it apart in the up position.
It's pretty straight forward. There are four 10mm bolts: one, two, three, and four. Before I remove those, take a regular screwdriver, push up on the little tab here, pull my lead to the window motor out. Before I remove that top bolt, you can see there is a little bracket here and basically what happens is this bracket just slides into a little channel on the window. So what you're going to do is remove this top bolt. As you're removing it, reach in and hold the window up. The bolt just came out and slid down right there. And now, what you want to do is just reach in here, slide your window regulator back, and your window now is free so it can come down, but it should stay in the up position. Pull your regulator out.
Here's the new one from 1A Auto. To reinstall, have your top bolt, which is your small one, ready to go in your socket and extension. I'm going to put this in and I'm going to look right through this little hole where it goes until I see that threaded hole where I'm supposed to bolt into. Now I can see that threaded hole, take my bolt, force it in, now my regulator is hanging there. So now with our regulator hanging here and swinging back and forth, you can see our bracket is right here. So what we're going to want to do, is lower our window down and now we can see the window bracket right there. We can push our regulator over and now line up that bracket as the window comes down. Now our regulator is attached to the window. Now we can start these bolts here. I'm going to speed it up here as I put in those three bolts and tighten them up as well as tighten up that top bolt.
This is a little different. It comes with a little pigtail. You want to connect the black one to the inside and the red one to the outside. Connect them together. Connect your pigtail and I've got the battery reconnected and got my key on and just make sure it's the correct way. My battery in this car is a little weak. Just connect the charger to the car to make sure the switch and everything is working correctly. Turn the key back off, disconnect your battery, if you like so you don't run down the battery with the interior lights, and disconnect your switch and then put your water shield back in place.
Re-installation is a reverse of the procedure. Make sure you pull that power window switch wire through, hang it up on top of your window sill there. Guide the clips all into their holes. It's just a matter of getting an angle looking back in there. Basically, they usually just need to be pushed up a little bit. Push the clips in. Put that bezel around the door handle back on. There is a little insulator, make sure that goes in there as well. Phillips screw, tighten that up. Then the two 7mm bolts that hold the door pull area. You'll see as I do this second one, I get a little antsy and multi-task a little bit and put the switch in place at the same time. Put it down into place. Once those are firm, put the bezel back in place and you're all set.
We hope this helps you out. Brought to you by www.1AAuto.com, your source for quality replacement parts and the best service on the Internet. Please feel free to call us toll-free, 888-844-3393. We're the company that's here for you on the Internet and in person.