Hi, I'm Mike from 1A Auto. We've been selling auto parts for over 30 years. We're dedicated to delivering quality auto parts, expert customer service, fast and free shipping, all backed by our 100% satisfaction guarantee. Visit us at 1AAuto.com, your trusted source for quality auto parts.
In this video, we're going to be working with our 2008 Chevy Equinox. We're going to show you how to remove and replace your rear wheel hub and bearing assembly, as well as a new ABS sensor, which is included with our new part. If you like this video, please click "Subscribe". We have a ton more information on this and many other vehicles. And if you need this part for your car, you can follow the link down in the description over to 1AAuto.com. Here are the items you'll need for this repair.
Using a small, straight pick, pop out the center cap on your wheel. Using a 35 mm socket and a breaker bar, break your axle nut loose.
Using the 19 millimeter socket and breaker bar, loosen all of your lug nuts about one turn. Raise and support your vehicle. We're using a lift to make it easier to show you what's going on, but this job could easily be done in your driveway or garage with a jack and jack stands.
Normally, you would remove all five of your lug nuts and remove the wheel and tire. However, we've been having a hard time getting these wheels off of the car, because they've been on there so long. So, we'll show you a trick to remove a tire when it's stuck on the hub. We'll remove four of the lug nuts and loosen the top one so it's hanging on by just a couple of threads. The best way to do this is using a dead blow hammer; however, a rubber mallet will work. You don't want to use a steel hammer, because you'll risk damaging the wheel. Go ahead and hit the wheel in as many places as you can reach with your hammer. That's why we leave that lug nut on a couple of threads, so when it pops loose, our wheel doesn't just go flying off. Now, you'll just hold your wheel. Remove that last lug nut, and remove your wheel and tire from the vehicle.
Now, you'll remove the T30 rotor screw. I'm doing this with a Torx socket and a little breaker bar. You may need to use a pry bar between two of the wheel studs to keep it from rotating when you break this screw loose. Sometimes they'll come out without, but usually you're going to have to counter-hold. Once you get it broken loose, it should spin right out nice and easy.
Using a 14 millimeter socket and ratchet, remove the two 14 millimeter bolts securing the caliper to the bracket. Now, sometimes these pins will spin when you go to loosen the bolt. If yours is spinning, it takes a really skinny wrench to get on there. If you don't have one, you can use a pair of pliers, or they're usually not under a lot of torque so you can just kind of hold them and remove the bolts by hand.
Remove the caliper. Normally, we would use a bungee cord or something like that to secure it. However, this is on a pretty short hose. You can set just set it on that control on it. If you want to be a little more secure, you can wrap one around there, a zip tie or some mechanics wire will do that just to be safe. Using a flat blade screwdriver, or a small pry bar, remove the pads from the caliper.
Using the 15 millimeter socket and ratchet, remove the two caliper bracket bolts securing it to the spindle. You do have to be careful, because you have your shock here, so you’re not going to be able to back that one all the way out with a socket and ratchet. If you can't get it out by hand at that point, you may have to switch over and use a wrench. It looks like what we can do here is when that bolt is backed all the way out, you can slide the caliper bracket out, and then you can push the bolt in to remove your ratchet. It looks like this 15 is not going to want to come out past that bolt, but we can pull it out far enough that it doesn't interfere here. So, we'll just leave it there.
Now, you're going to need to save this little rubber plug here, because these aren't included with new rotors most of the time. Just pop that out with a flat blade. We're going to check that our e-brake isn't dragging, and it's not. But if it were, you would spin it around and use this access hole to find the adjuster, which we'll show you when the rotor's off. Back that adjuster off, so the e-brake doesn't drag on the rotor.
Now, if you need to save your rotor because, you’re doing a wheel bearing or something else that requires you to remove this without needing to replace it, you'll want to hit this surface with a hammer being careful not to hit the lug studs. However, if you're actually doing a brake job, you can hit the surface of the rotor for some more leverage, knocking this off.
Disconnect the connector for your ABS sensor. Finish removing your axle nut. Then, using a straight punch the same size as this hole here, we'll tap the axle to release the splines from the wheel bearing. You don't have to go crazy because it's not going to come full out of the hub, but you can see there that it's bouncing. That's as far as we're going to get.
Now, we'll spray the back of the bolts for our wheel hub with some penetrating oil. To keep it from getting all over our E-brakes, we'll go ahead and wad a paper towel in there so as we spray it, it just gets soaked up. Repeat that process all the way around.
You'll find the four 13 millimeter bolts securing the hub to the spindle down here inside of the back of the spindle. There's little cutout for them here. Go ahead and get in there with a long 13mm socket and your ratchet and remove all four of the bolts.Now, for the bottom two bolts I've switched to a short 13 millimeter socket and a little extension because you want to go right up here in between the lower control arms. You get pretty good access to them like that. I'm trying to remove all of these evenly, so the bearing comes out as I loosen the bolts. That way we don't risk them coming back and tearing the boot here on the axle.
When removing the last bolt, you want to hold on to the hub and the backing plate assembly. We already broke ours loose because we were having some trouble with it, but you should be able to tap this out or remove it with a slide hammer if it's really frozen. Make sure you push the axle out of the hub. Push the rubber boot for your ABS sensor harness through. Remove all of this from the backing plate.
Now, if you're careful, you can either put the backing plate here or just let it hang. As long as you go easy, none of this E-brake hardware should move or come undone.
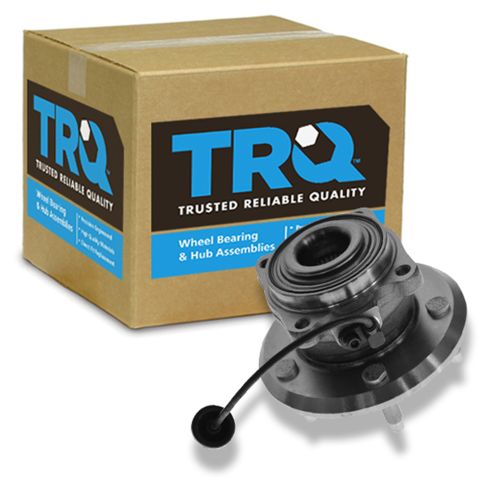
Here we have our old wheel hub, bearing, and ABS sensor assembly that we removed from our vehicle, and our new part from 1AAuto.com. Now, our old part got really beat up in removal. It doesn't even turn now, but normally if that bearing goes bad, you start hearing a whirling, grinding sound coming from that corner of the vehicle when the wheels are turning. This new part has a nice new bearing, it's nice and tight but still spins smoothly. We also have the same threaded hole for our rotor screw. It comes with five brand new wheel studs in the same bolt pattern and thread as our original wheel and lug nuts. On the back side we have the same splines down inside of our bearing for where our CV axle is going to attach. You can see what a hard time we had removing this. Everything's all beat in from the hammer. We have the same four-bolt mounting location in the back, which is threaded. This will reuse our same hardware. That's really nice because sometimes, and like our bearing, you have a bolt break off in the removal process. It even comes with a new ABS sensor and the sensor ring, which is already inside of your bearing assembly. This sensor can be a real pain to get out. These little Allen bolts strip or break and the sensor gets frozen into the hub. This new part goes in without us having to worry about anything on the old sensor that is prone to breaking or failing, as well as the assembly itself. If your wheel bearing is grinding, you have a broken ABS sensor, or you've broken a bunch of wheel studs and want to replace the entire assembly instead of removing it and trying to place these later, this new part from 1A Auto is going to go in direct-fit just like your original equipment and fix you up right.
Reinstall the ABS sensor wire through your backing plate. Push that little rubber boot in there until it seats correctly, otherwise you're going to get moisture in your E-brake. The ABS sensor on the driver's side faces the nine o'clock position, or to the front of the vehicle.
Set your axle in with the splines, and we'll start the axle nut on there by hand at this point just to make sure none of this stuff falls while we're lining it back up. I like to take an extension with a socket on the end of it, again this is a 13 millimeter. Reach back there. It makes it a little bit easier to line these bolts up and get them started. Make sure you have at least two of them lined up before you start tightening anything down too much, otherwise you may have something misaligned and it's not going to go back together easily.
Now, if you can get a torque wrench in there, the final torque to tighten them is going to be 52 foot pounds. That's about as tight as we can get it with just a 3/8 ratchet. Reconnect the electrical connector for the ABS.
Using a small flat blade screwdriver, carefully pry the shims off of your caliper carrier. Now, ours are still pretty smooth. They don't have a lot of rust build-up on them, so we can just clean these off and reuse them. We'll do the same thing on the place they ride here, on the caliper carrier as well. We'll do this using a wire brush. Be sure you have proper safety equipment on, like some safety glasses and a dust mask so you don't inhale all this harmful debris. Now, all of the dirt and debris is off. You don't have to get these perfectly clean. It's not really likely that you'll get them perfectly clean and looking good and new again. However, as long as you've got all the heavy build-up off, it'll allow the shims to ride in there nice and flat, which will allow your brake pads to move smooth and freely which is really all we're after. Once we've cleaned that off, we'll repeat this process on the shim. If these are really heavily rusted and corroded or cracked, breaking, missing pieces, or they aren't springy any more – you can see this is still moving nicely – then you're going to want to replace them. Ours don't look bad so we can just clean them up. Put some fresh grease on there, and they'll be just fine. We'll want to do this on the front and the back to make sure that everything sits and rides smoothly. Again, just like the carrier, as long as you get the bulk of the stuff off, they don't have to be perfect.
Now, we'll apply a thin coat of grease where our shims are going to ride. Make sure you're using brake specific grease for this. Anything else could get onto the pads and rotors and damage them. Brake grease is designed to be on these components, so it's a lot less harmful if something does happen. Re-install your shim. Then, we'll apply a thin coat of grease to that as well. You can go a little bit thicker here since this is where the pad is actually going to move. Nothing moves on this portion out here, but if you lay a little coat of grease on it's not going to get all rusted and corroded.
While we have the grease out, we'll hold back the boot here on our caliper pin. Remove that. Ours is pretty clean, but if you have a bunch of old gunk and grease buildup on there, you'll want to wipe it off with a paper towel. Apply a good thick coat of fresh grease. Re-install it into the boot. Make sure it suctions on there, and it moves nicely. Then, we'll repeat all of these steps on the other end of our carrier. Now, our caliper carrier's ready to go back on our vehicle.
Apply a thin coat of grease to the hub to make sure your rotor doesn't seize to it in the future, because brakes are a wear item. You may have to do them again some day. Install your rotor onto the hub backwards. Spray it down with some brake cleaner. This removes the coating they use when these are in storage, between the factory and being delivered to you. This prevents them from rusting. However, it is very slick and will affect your braking if you leave it on there. Now, we'll install it the correct way with the beveled hole over the threaded hole in our hub. Spray down this side as well.
Re-install the rotor screw with a T30 Torx bit. Now, it's not dangerous if you've lost this or broken it. All it really does is help keep this rotor in place and make it easier to re-assemble everything, but if you do have it, it's good to put back.
Now, we'll align the hole in the rotor with that adjuster wheel for the e-brake that we showed you earlier. We'll adjust it up by moving it a couple of teeth. Just wait to hear and feel that little bit of drag against the brake. Once that's all set, install the cap.
Re-install the caliper bracket and start your two bolts as far in as you can by hand. Then, finish tightening them down with a socket and ratchet. Torque the caliper bolts to 89 foot-pounds.
Install the brake pads. The little squealer was on the back side when we removed it, so, I'll put it back there, going back together. Apply another thin coat of grease to the back here. Remove whatever you used to secure your caliper. Use a pair of groove-job pliers to compress the piston. Be sure to go nice and slow here. Re-install the caliper and the two 14 millimeter caliper bolts. Torque your caliper bolts to 24 foot pounds. There's an example of that hinge spinning, so I'm going to hold it with a pair of pliers.
Reinstall your wheel and tire. Get your 19 mm lug nuts on as tight as you can by hand. Put the weight of your vehicle back on the tires. Using a 35 mm socket and a torque wrench, torque to 151 foot pounds. Reinstall your center cap. Torque your lug nuts to 100 foot pounds in a cross pattern
Thanks for watching. Visit us at 1AAuto.com for quality auto parts, fast and free shipping, and the best customer service in the industry.