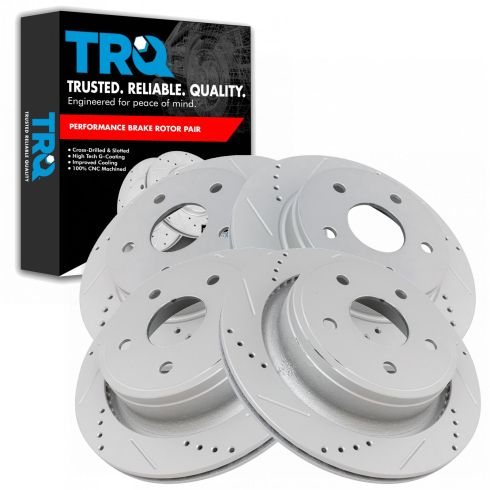
1APBS00391-Dodge Ram Chrysler Front & Rear 4 Piece Performance Brake Rotor Set TRQ Performance BRA13958

Replaces
2006 Dodge Durango Front & Rear 4 Piece Performance Brake Rotor Set TRQ Performance BRA13958

Product Reviews
Loading reviews
5.00/ 5.0
18
18 reviews
Nice quality made rotor
November 12, 2017
Looks great, well made product, have no issues and been on my ram a week so far. Post again in a few months
The parts are great
December 27, 2018
Cant ask for anything better keep up the good work and with the parts and the website its the best thanks
Awesome product
May 9, 2019
I ordered the drilled/slotted rotors, and I have to say, after having them on a month, I love them. Dealing with Atlanta traffic everyday, commuting can sometimes be sketchy. These rotors definitely give me a better edge on being able to stop a lot of truck.
Great product
November 18, 2019
I would recommend this product, fit perfect and very easy to install. Arrived quickly and cheaper than competitors!
F & R Brake Rotors
August 18, 2020
Took to my favorite mechanic and he said great choice and finally someone who brings in the correct part for the job. Recommend 1aauto for all your needs
Good parts
October 17, 2020
The parts I got are every good
Great service and quality
October 5, 2021
Breaking has really improved on the truck I would recommend them to anybody
May 12, 2022
Good ??
August 10, 2022
Rotors seem like a high quality product, installation was smooth and the client whose truck they went on was very pleased with the drive quality.
February 5, 2023
Like new
Get them for your Ram!
[{"url": "https://wac.edgecastcdn.net/001A39/prod/media/pNISJll75W64CYGsite/457945ebc211addb52057ff8fbd8c768_1690473340785_0.jpeg", "caption": "Rear"}, {"url": "https://wac.edgecastcdn.net/001A39/prod/media/pNISJll75W64CYGsite/02084e9004b8e869d03fadc715df0e1d_1690473340785_1.jpeg", "caption": "Front"}]
July 27, 2023
No problems with delivery or putting them on!! Best Buy I've made for the truck for a while!!
10/10 recommend
August 6, 2023
I purchased the front & rear pads & rotors. I would 100% purchase again. Easy install, no brake dust no squeaking.
Awesome product
September 23, 2023
Working great!
January 16, 2024
Excellent kit. Easy install, no squeaks, no dust, great stopping ability and look great. OE brakes had 100,000+ miles on em (lot of highway driving) Hopefully these will last the same time.
April 12, 2024
Excelente
Sper recomendado puntualidad servicio todo excelente sper recomendado.
June 27, 2024
Llego a tiempo el producto es muy bueno, sper recomendado estoy muy contento con la compra y con el servicio sper recomendado gracias
great
October 5, 2024
My mechanic took them out of the box and said?..wow?.you got the good ones????????????????????????????????...
October 12, 2024
Worked good love it
Customer Q&A
How much is the weight on one of these rotors?
February 1, 2019
10
This rotor kit ships at approximately 100lbs. So individually each rotor will weight about 25lbs.
February 1, 2019
Jessica D
Does this come with the pads or just rotors ?
August 22, 2021
10
This particular set came with rotors only, as started on the page. Great product!
August 23, 2021
Christopher G
10
Just rotors
August 23, 2021
Eric M
10
Just rotors
August 23, 2021
Eric M
whats the difference between the ST and the SLT trucks?
November 17, 2022
10
Depending on make some different trim packages some have large brake capabilities than others.
November 17, 2022
James J
Dodge is a registered trademark of FCA US LLC. 1A Auto is not affiliated with or sponsored by Dodge or FCA US LLC.
See all trademarks.


