Hi, I’m Mike from 1A Auto. We’ve been selling auto parts for over 30 years!
We'll open up the door. And we are going to start off by coming up here and removing this cover. You can just put your hands behind it, kind of pull up. And you can see there's a push pin here, and a push pin here, and then there's two little hooks that hook into the door panel itself. Around the perimeter of the door panel are six T-20 torx bolts, and they're actually made of plastic, which is a little strange. We'll go all around the door panel, and we'll start pulling these out. Being that they're plastic, they don't come out like a normal screw does. You have to be very gentle, and almost pull on them as they unscrew. Here we go.
Right here, behind the door panel, is a secret cover that you can pop off with a flat-tip screw driver. And you can see, you want to grab it from the top, and go down, and then behind that is a Phillips head screw. So now, we'll use a Phillips head screwdriver to remove the Phillips head screw. For the power window switch, we'll just slide a little screw driver in here. It pops out super easy. And we'll pop up this little safety pin. Here we go. And then you can push the tab down and pull the connector out.
These little anchors here, they need to come out of the door panel because we need to lift it up. We just lost one. Now we'll do the upper one, and there's the second one. So we'll go all the way around the door, and pop those out. And then all we have to do is lift straight up on the door panel, and it should come off. Around the perimeter of this inner plastic door panel, there's about twelve 10mm bolts that we want to remove. So we're going to go ahead and get started. Using a 10mm socket and a ratchet. Once you get them started, you can probably just pull them up by hand.
Here we have the speaker, and you can see there's four 5mm screws holding it on. So we're going to go ahead and use a 5mm socket and an extension, because I love extensions, and a 1/4" drive ratchet to remove this. Now you can pull your speaker out. On the back side of the speaker, you have one connector that you can push down the tab of and pull it right out. And there you are. Now it’s completely removed from the door.
All right. Behind this sort of secret door here you'll find the window regulator. And the window regulator is attached to the glass by this clip. So, what you might need to do is attach your power window switch and adjust your window up or down so that you can get this right here. So you might need to put the key in the ignition and then adjust the window up or down, because you want to be able to push this little clip right here and release the glass from the window regulator.
And the same thing applies over here in the speaker hole, you want to move the window regulator down until the glass is right in front of the speaker hole. All right. The glass is held in on this clip and there's little push tabs here. You can see… you can push it in with a flat-tipped screwdriver. There's another one on the inside here. And, if you push both of those up like so, the glass will be released from the regulator. And you can do this on this rear one and on the front one in the speaker hole. You're probably going to want a second person to hold the glass up so that it doesn't fall down in the door and either injure you or break the glass.
Now, we should be able to lift this glass right up. And you can do a couple of different things with this. What I like to do is just get some tape, and I'll tape to the glass on both sides and up and over the top, and that'll hold the glass in place. The other option is to remove some of the trim at the top, and you can pull the glass right out of the door. It's a little bit more work, more work than I want to do and probably more work than you want to do. So it's best to just get some good tape and put a bunch of tape all over the window. Once you have your glass set in place, you can go ahead and remove your power window switch. And that way your window regulator won't move around unexpectedly, and you can pull your key out of your ignition. Now, we're going to start removing all of the wires from the plastic panel in here. There's the first one. You can use needle-nose pliers to get that. This one, you can use a trim panel tool, or you could probably just pull on it.
Over here, there's a couple of little tabs that you push down to get these connectors out. See, this is the tab you want to push down. And there's the second one. So now the mirror's disconnected. So now we'll go to this. We'll use our trim tool again and follow it along. Down here we've got the speaker and this sensor. This also has a push tab on it. Over here, we need the trim panel tool again. All right. Then we need to do the power window motor by pushing the tab on that connector.
And then up here, we'll disconnect these two, actually it's three connectors at the module by pushing the tabs on those. Up inside this access panel, there's two little clips that attach your door handle and your lock to your door latch. And we need to remove those. They actually function the same exact way as the door handle clip, where you'll just kind of pull it away and you can see it latches right on just like this. So I'll put it back in to show you how it clips on. Just like that. And it functions the exact same way. So we're going to do that up inside the door.
Next, we're going to use a T30 Torx bit to remove the door latch from the door. Once you crack these loose, you can probably just spin them out by hand fairly easily. All right. Now, you should be able to pull the door panel away from the door. There we go. And drop it down behind this harness. You'll keep it all connected to the car, but you can pull it out just like that.
On the top of your door latch is a connector for your door lock actuator and you need to push the red tab back, that's the safety, and then pull on it to disconnect it from the actuator. And then, over here on the front of the door panel, you've got to pull this rubber grommet through and then you'll have it completely separate from the truck. The door handle is right here. And we're going to start by removing these two clips that hold the rods in place. So there's the first one. And then we'll do this pink one right here, hopefully. All right. There's the second one.
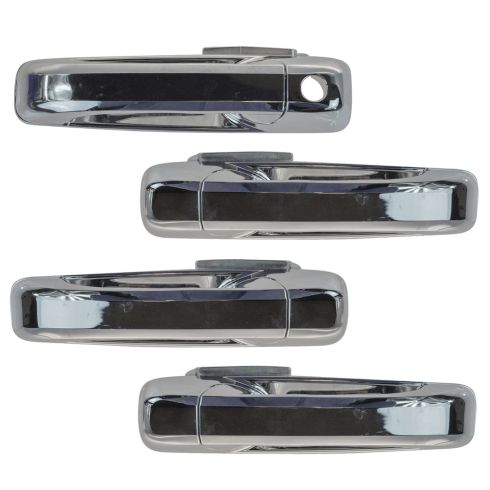
Now, we have three 8 mm screws or bolts, whatever you want to call them. And we'll remove them with an 8 mm socket. You want to support the handle from either the inside or the outside so it doesn't fall. And, at this point, we should be able to ever so gently slide it off the truck. Here we are. All right. Now to get it in, I've kind of loosened the lock cylinder so I can slide that through the hole first. And now, we'll get the clips in and hopefully get it in just like this. There we are.
Now, back on the truck. Now, we can start putting the screws back in. Start with that one. You don't want to tighten these too much because it is easy to snap them off in the handle. So just make them smug and you should be okay. And we're going to slide these right back in. We actually put some marks on the top so we would know which way is up, rather than putting them in upside down. So we just put a little marker on the top.
So we'll do the pink one first. And now we'll do this one with the black clip. So we have to get this door lock actuator wire through the door panel. So we'll feed this through. It should go behind this cable, behind the window regulator itself, and then behind this bracket. Right here you have a clip that you can snap into place. And then right here is another clip. And then over here, at the actuator, we can plug in the connector and snap the safety in. That way it won't fall out when you're installing the door.
There's also this rubber grommet on the door panel that we are going to want to push into place. With the front of this plastic panel downward, we're going to slide this in, and then we're going to lift up on the front of the panel, tucking it in behind all the wires. Here we are. Now we're going to put these three Torx screws back in to the latch.
I like to get all three in loose before we tighten them up. It's tough to see, but behind here, if we're installing the door handle rod, and the lock rod into the door latch. Now we can start putting all of the wires back in place.
We'll snap the power window motor connector back in and we'll feed these wires up here. Get the blue one right here, and I believe purple is on top, then white, and down here by the speaker, we can feed these through. And then we have this one at the bottom that plugs in right here. Up here we have the mirror wiring. Snaps in right there, and then right here, and then it plugs in into the module.
Now we're going to slide the glass down into the door, and we're going to snap it into the window regulator. But to do that, we need to remove all these tape that I have holding the window. Be ready for the glass to drop, when you do the last piece of tape. Maybe have a friend hold it. And then we can slide the glass back down into the door, very gently, until it reaches the window regulator right down here. And you can see it, and here it snaps right into place. You want to make sure this side is latched.
And you want to come over here in your speaker hole and make sure that this side is latched as well. We'll plug the speaker back in, right here. It’s nice because the speaker has these two little tabs at the bottom that hold it in place. I'll get all the bolts started before I actually tighten anything. Now we'll tighten these up with a 5mm socket and ratchet.
Now we'll reinstall this little access panel cover, and then we can start putting the twelve 10mm bolts all the way around this plastic panel. You want to get them all in first to make sure it’s all aligned, and then you start tightening them up.
So to put the back panel back on, we're going to slide this lock, up through the hole, and then we're going to feed the power window of wires per window, switch wires, through this, and then kind of drop it down onto the door panel. Now we'll plug in the window switch and drop it right into the door panel.
We're now going to slide the door handle bezel, behind, doing the rear section first, and then snapping it into place. And then there's a large Phillips head screw that we'll slide right through here and screw in. And then there's the little access panel that will also slide in, doing the bottom first. And that also just snaps right in. We're now at the point where we can put these door panel screws back in. They go in just like this. Looks like I'm probably going to have to hold the bottom piece to get the screw in. And we'll do this, all the way around the door. And lastly, we'll put this right back on to cover up the mirror bolts.
Thanks for watching. Visit us at 1AAuto.com for quality auto parts, fast and free shipping, and the best customer service in the industry.