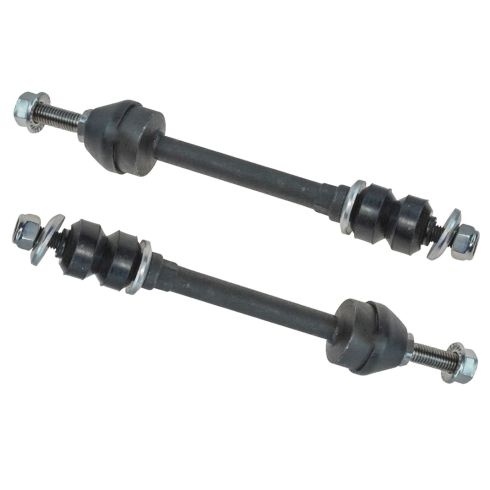
1ASFK02367-Dodge Ram Front Driver & Passenger Side 2 Piece Sway Bar Link Set TRQ PSA55830

Replaces
Dodge Ram Front Driver & Passenger Side 2 Piece Sway Bar Link Set TRQ PSA55830

Product Reviews
Loading reviews
3.35/ 5.0
20
20 reviews
2007 RAM 1500 4x4
June 14, 2017
Fit perfect and now that I have these, new brakes and rotors and struts, the truck rides great again.
GREAT PRODUCT!
June 10, 2018
GREAT PRODUCT! Easy install with the help of the how-to videos, good quality parts would highly recommend this company to anyone looking to repair their vehicle. Fast shipping, also a great price. Thank you 1A Auto!
Sway bar link
April 18, 2019
YES I ordered these links on line, not sure about them but after looking and reviewing them and watching your video. Then I was sure that I was buying the right product for my truck.IT was just a few days later they arrived in the mail..Few days later I put them on only took about 1 hour. But Dam what a PERFECT FIT ! Every thing went in good . thanks for your Video it made everything text- book fit. truck handles good now. They seem to be if not better then factory ones. I will order from you again the next time I need a part. Thank-you... Neil Panzer Rhinelander wi.
Happy
April 22, 2019
Very happy with purchase so far.
Be careful
September 6, 2019
I hve got these 2 times and the bushings did not last!
Now the company was gracious and helpful and timely so maybe this was a fluke but I wont ever buy their bushings again
Great customer service but terrible bushing
better than oem
September 25, 2019
these Moog replacement links are designed with the mechanic in mind they have great tool attachment points for positive grip and ease of install no locking pliers required for these parts unlike factory and cheaper quality aftermarket suppliers!!!!
Great part
March 21, 2020
Great part, well built, install was easy
Good fit
April 2, 2020
Good fit, just needs a little thicker but on one side for easier wrench fit,
Great product
October 4, 2020
I bought these end links for my dodge and they installed perfectly! Great service great quality!
Perfect fit
[{"url": "https://wac.edgecastcdn.net/001A39/prod/media/pNISJll75W64CYGsite/cee2a4281a27f9f366857c9516c1feee_1643484550161_0.jpeg", "caption": "Fit perfectly easy to switch out. Tip take tire off and link on both, sides push sway bar up."}]
January 29, 2022
Fits perfectly easy to switch out
Nice
February 17, 2022
Easy peasy lemon squeezy. I love 1A auto.
Bad rubber
April 15, 2022
Rubber bushings shot after 2 weeks!
Good investment
August 17, 2022
Perfect fit ... works great
Not happy
September 12, 2022
Bushings are no good I just put them on two weeks ago and Bushings went bad had to go by moog
No good
December 9, 2022
Less than a 1000 miles on them and the bushings are split...
December 25, 2022
There diferente and small and no good quality
May 4, 2023
Easy to change.
Not impressed
May 7, 2023
Not happy the rubber is already wearing away
Awful
June 12, 2023
Awful split in 2 and a half months inspection in 2 days so I had to scramble to Napa
February 15, 2024
It's been 3 months and the one rubber boot already broke and cracked
Customer Q&A
do these have grease fittings?
April 24, 2018
10
Hello! Our parts do not come with grease fittings, no. They are pre-greased and guaranteed to last and performed exactly as the factory original did on your vehicle.
April 24, 2018
Peter L
10
No, they do not have grease fittings.
April 24, 2018
Jonathan P
10
No, they're OEM exact.
April 2, 2020
H E
Can I use these on my 6 inch lift?
August 8, 2018
10
No these will not work on a 6 inch lift. Speaking from experience.
August 8, 2018
B R
10
Dont believe so
August 8, 2018
Anthony N
10
I would say no
August 8, 2018
Greg S
10
No. You can not. You need some that are elongated enough to work.
August 8, 2018
C N
Can you tell me how long these are please?
March 7, 2019
10
Actual Measurements are not listed or available. Our parts are exact replacements for your vehicle's OEM parts.
As long as your year, make, and model match up with our listing, these parts will directly fit and function like the originals.
March 7, 2019
Emma F
Will these fit a 2017 ram 1500 2wd?
March 8, 2019
10
These will not fit a 2WD, they will only be correct for 4WD applications. We currently do not carry these for the 2WD.
March 8, 2019
Curtis L
Do they fit 2wd?
March 16, 2021
10
This kit is only able to fit for vehicles with 4 wheel drive.
March 16, 2021
Emma F


