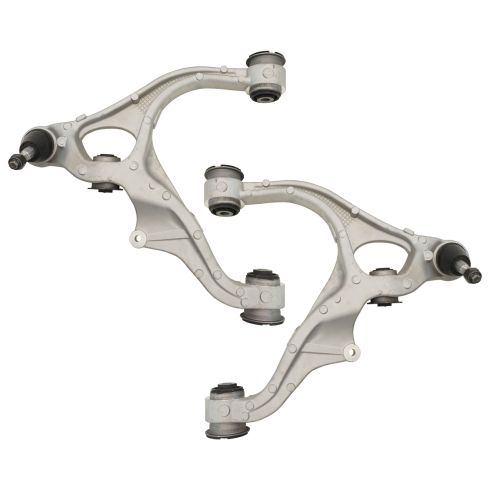
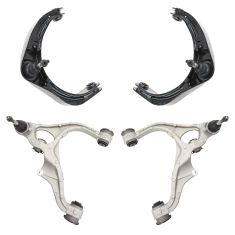
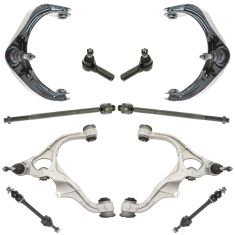
Hey, friends. It's Len from 1A Auto. Today, I'm going to be showing you a simple job. We're going to be installing a lower control arm in a 2016 Ram 1500. It's going to be a very simple job. And I want to be the guy shows you how to do it. So if you need this, or any other part, you can always check into 1AAuto.com. Thanks
So we've got our vehicle set up on all the lift points. We got the majority of the weight off of the wheel. It's still on the ground, just barely. We want to make sure that it can't spin while we're trying to remove the lug nuts. All I'm going to do is I'm going to break them free. So, once they come a little loose, I'm just going to move along. We don't want to unscrew them very far, to the point that the wheel can tilt, and/or put more pressure on the wheel studs. We don't want to break any of those.
Now we've got it to this point, we loosened all five, we can bring up the vehicle, remove all five lug nuts, take the wheel off. Here we go. So I'm going to continue using my 22 millimeter socket, going to use the ratchet to break it free if it's still a little tight. We're just going to remove the lug nuts. What I like to do, is I get one fully unscrewed here, the first one. Once it's all the way off, take a look, looks okay. I'm just going to go ahead, put it on a couple threads, and then I'll go ahead and remove the other four. The reason why I put this on a couple threads, is so when I remove these, the wheel can't come off and hurt me.
So I've got the other four lug nuts off. Now I'm going to hold the wheel stable as much as I can, so it doesn't come falling off and hurt me. Remove my last lug nut. Going to set it aside. Grasp the wheel firmly. I can hold my leg underneath it to support the weight if I want, so I'm not using my back. I can hold this all day if I wanted to. Put it down, roll it out of the way. Now we're all set to move onto our next step.
So we got the wheel off. We used our 22 millimeter socket. We're ready to move onto the next step, which would be comparing our part. You want to do this first before you take anything apart, so you make sure that you ordered the right part for your particular application. So what we'll do, is we'll just bring it under. We'll take a peak. See if the bushings line up where they're supposed to for mounting. We'll make sure the hole's there for the sway bar link. Got the hole here for the strut to come through. And of course the ball joint stud down there.
Looks like it matches up pretty good. We can do a better product comparison once we get it out. But it looks like it's good to go, so we can get started. So we're going to take our small screwdriver, follow our ABS cable. Like I said, it comes up behind there. Can see it pretty good. If you want, you can try to get it back there. Break it free. You could try to pull it all the way out of the fender housing if you want, it's up to you.
It's got a little red clip, so what we're going to do, is we're just going to try to pry that up. You can get in between here, do that. So now this is two pieces. What we're going to do is we're going to squeeze this black piece right here, if you have the thumb strength you can do that. Or you can try pushing with your screwdriver. Let me see if I can do it with thumb strength. And then I'm going to hold the top piece, and pull down on the bottom piece, while trying to wiggle it, and jiggle it. Do all the fun stuff.
All right. So that came free. Now what we can do with this, is we can just put it some place where it won't get mangled, or tugged, or broken in anyway. We'll just put it like that for now. We can move it in a minute. We're going to move on, and we're going to remove this nut right here. You can remove it completely. And then we'll put it on a couple threads just to get it so it's going to hold. Then we're going to whack this with our big, fabulous hammer.
I'm going to be using a 21 millimeter socket, long handle ratchet. If you wanted to you can come up here with an extension in your airgun. If you have access to that, that's great. Let's see. That broke free nice and easy. That's great. So like I said, I'm just going to remove this all the way. And then I'm going to go ahead and put it on a couple threads. And then we're going to give this knuckle a whack.
So we got our upper ball joint nut nice and loose. I put it on a couple threads like I said I was going to do. Next, what I'm going to do, and you don't have to do this, this is preference. I'm going to take an 11 millimeter socket. I'm going to break this bleeder screw free, just like this. Wearing my safety glasses of course. Comes trickling out. Now I'm going to take a small screwdriver, I'm going to go between the caliper and the rotor. My bucket under there, make sure I'm catching it. Fluid's going to want to push out, so make sure you don't have your face in front of that bleeder screw.
I'm just going to push back this caliper piston a little bit. Doesn't have to be too much. Just enough to wiggle it around. Going to let it finish trickling out, and wait until I see a solid stream of fluid again, and then I'll close it back up with my 11 millimeter. The reason why I did that, is basically so when I take off these two caliper bracket bolts, and I want to remove this caliper bracket from the rotor and hub assembly, it's going to be able to come off very easily, and go back on nice and easily.
So, we can wait a little while to do this. Wait for it to bleed out if you want. For me, I'm going to end up bleeding it out anyways. So, I don't need to worry too much about it. But if you did end up doing it this way, you'd want to make sure that you had a solid stream of fluid coming out. And if you had the option, you'd want to either bleed it out yourself with a bleeder, you can do it on your own. Or, you can have somebody get in the vehicle and do a bleed system, bleed the system with you.
So, this looks good enough for now, because I'm just going to do the bleed anyways. So I'm going to close it back up with my 11. I'm going to take my 21 millimeter socket back here. And I'm going to go ahead and remove these two bolts. I'm going to take the caliper, I'm going to find a place to hang it, preferable off the frame and out of the way. You don't want it hanging from the hose. If you do that, you could cause a pull, or a tug. It'll get a little bubble in here, or even a crack or a tear. God forbid if something like that ever happens, and you do happen to see a tear or a bubble, just replace the hose. Safety first is the number one concern. Brakes are high pressure systems.
So, I'm wearing gloves. Keeps my hands safe from this brake fluid. If you're not wearing gloves, you want to make sure that you get off as much of this brake fluid as possible, so you don't get it on your skin. It's hygroscopic, so it's going to absorb moisture, it's going to get into your bloodstream. Could be bad for you, is bad for you, is what I should say.
Now, I'm going to remove these bolts using a 21 millimeter. You could use a ratchet, a wrench, an airgun. I have access to an airgun, so I'm going to go ahead and blast it. Get that one out. I'm just going to turn it in a couple threads. So now my caliper bracket won't fall off when I remove my last one. See if I can get it over here. This one I can remove completely. Just going to wiggle the bracket around.
This is what the bolt looks like. I'll remove the second one. Actually, I'll grab my hanging tool. You can use whatever you got, coat hanger, wire tie, whatever you have access to. If it seems like it's still a little stuck, you can go ahead and turn it out a little further with your airgun, air tool. Holding the bracket. There we are. Remove the second one. I'm going to put it safely aside. I took note that both bolts are the exact same. I don't have to worry about which one goes where.
Now that we got this off, we can take a peek in here, look at our brake pads. Make sure everything looks pretty good, no cracking, or broken pieces. Looks decent. So I'd say we can save those. Now you can hang this anyway you want. Just as long as it's keeping most of the pressure off of this brake hose. You might see that it's a little taut, it's really not too bad. This is holding up the majority of the weight. If I wanted to, I can go and hold it a little closer. That takes off even more the weight.
We remove this rotor, just get it out of the way so we're safe. Big fabulous hammer time. Going to go ahead and whack it. I got my nut on here. I know that it's not going to come free and just come slamming down, hurt anybody, myself. I'm going to hit right here. Closest to where the stud is. What should happen is this is going to break free. The ball joint's going to want to lift up, you'll just notice it move around a little bit. From there, we can move on.
There we are. We might want to hit it a couple more times, but let's be real, that's enough. Going to remove that nut. Lift up on it. Move our knuckle out of the way. Next what we're going to do is we're going to remove our outer tie rod end nut, right here. I'm going to use an airgun with a 21 millimeter socket. Just going to put it on there, and I'll try to blast away. Wearing my safety glasses. Safety first.
That came off nice and easy. Very simple. Now what we can do, is we can go ahead and whack right here with our big fabulous hammer, or even if you wanted to you can go here. But I prefer to go right on the knuckle. What I'm going to do, is I'm going to try to break this upper, sorry, outer tie rod end free from the knuckle. That wasn't hard enough, huh? Let's hit it again. I just want to make sure I move my ABS cable out of the way. It's very clear. I don't have to worry about anything with it. Broke free nice and easy.
If you wanted to, and you didn't want to worry about this thing slapping around, you could take that nut that's on the floor, put your control arm back through here, and use your nut to hold it stable. Next, we're going to take off the axle nut. We're going to use our 36 millimeter socket. We're going to double check, make sure it fits on there pretty good. It's a little loose, but if I grabbed a 34, it wouldn't go on at all. So, I'm going to go ahead and try this one.
I'm going to be turning it to the left. And I'm going to hold this. This is the hub. I'm just going to hold the studs on it. I'm going to see if I can get this free. It's coming off. There we are. Next what we want to do, is we'd want to try to push this axle back through the knuckle, or through the bearing. It does seem like it wants to move. If didn't though, you could take a punch and a hammer, or if you have an air chisel, you'd want to go right in this little divet right here, and try to push it through. You want to be very careful not to just use a regular hammer, and whack away, because if you damage these threads right here, you're going to have to use something such as a file, or a tap, or replace the axle to fix it.
If you didn't have a punch or anything like that, and you were just like, "Len, what do I do?" You can go ahead and do something like this. And this is kind of the last resort really. You'd want to put this on so it's back flush with the end of the axle. I would go a little bit further on, obviously. And then you can go ahead and whack on this with a hammer. And try to at least get it to break free. Of course, spray a little bit of penetrant in there first.
I'm not going to worry about it for this application, because the axle actually came out very easily. So now that we know that we've got that broken free, we can go ahead and move onto the next step. Right here you have an axle boot, so when we drop this knuckle down, what's going to happen? This is going to come down, hit up against your lower control arm. You're going to be pulling, and moving, and twisting. If you rip this boot, you're going to cause yourself an issue. And that'll be a video for another day, I'm sure.
But generally speaking, it would be easiest to just replace the axle at that point. So we know we've got the ABS cable broken free, that's not hanging onto anything. We're pretty much going to be all set. Once this comes free, right here, this knuckle could come down, you might not even need to hammer it yet. So we want to make sure that we're holding onto it. Once we get this nut off all the way, we're going to go ahead and put it on a couple more threads. So we can make sure that this knuckle can't fall off, and then we'll hit on this with our big, fabulous hammer, and see if we can break it free. Then we'll be clear to hold the knuckle, and take that nut completely off.
So, here we go, using our 24 millimeter socket. All right. That's pretty much ready to come off, just show you what it looks like. Want to go on a couple threads. This is just to catch it. If I don't have this on, I got my foot under here, and I'm whacking away with a hammer, this thing comes falling off, Len's going to be hurting. I don't want that. So I got that nut on there. It's definitely not going to come off.
Now, what you want to do is you want to try to hit on the knuckle, as close as you can without banging on this backing plate. So I'm going to go ahead and move this outer tie rod out of the way, just rest it up there, wherever you want to put it. I'm going to start hitting right here. If you wanted to, you could use something such as a pickle fork. See if you can get under there. Might be a little more difficult than this. But last case resort, you might have to do something like that.
I'm just going to whack it. First I'm going to give it a little spray. You can't go wrong with some penetrant, just works its way in, especially with the vibrations of the hammer. So I'm going to hit right here. I mean, you can hit wherever you want, but this is pretty much the closest I got for hitting area. And I'm going to try not to hit this backing plate. Nice. So, as you can see, it broke free. We don't need to hit it anymore. If you're in your driveway doing this on the ground, you might want to, but I'm not going to.
So, here's our nut again. I'm holding the knuckle. I'm going to see if I can get this to come down and out. So as you can tell, I'm pulling the knuckle down, and out, and that's because I want to pull it out from the axle right here, and down from the ball joint right there. All the meanwhile, being very careful not pinch this boot. Let's see if we can get it. Might have to twist and shout, and do all sorts of fun stuff.
There it is. We've removed our knuckle. Here we go. We're getting down to the nitty gritty of getting this lower control arm out. We got the knuckle off. We got the upper ball joint, everything like that. Everything's nice and secure, and out of the way. What are we going to do with this axle. Well, you can go ahead and remove it if you want. For this application, I'm not going to worry about that. But if you did need to, you could spray right in the back side there, and then come from the back, with a little chisel, or a pry bar, and a hammer. Pop it right off, slide it off, put it out of the way. I'm not.
I'm just going to secure it, with something a little bit like this. You can do however you would want to do it. Could use the hook, not worried about that. Just go like this. I could put it up here, I could put it up there, wherever I want to put it really. Just as long as it's up and out of my way. Next, what I like to do, is I like to remove this sway bar link from the lower control arm. You can replace this if you wanted to. I'm just going to take some of these locking pliers, I'm going to grab up here. Make it as tight as I can. That's tight. Next I'm going to take an 18 millimeter socket. I have access to an airgun, so I'm going to go ahead and use that. That came off nice and easy.
I can remove my pliers. So now this is going to be able to break free from there. I'm going to be replacing this for my video. But if you aren't, what you can is you can go ahead and put this on here, so it's pretty much level. And then bonk it with your hammer. Something like this. You can see that it broke free. So that's good enough for now.
Next what we're going to do, is we're going to go ahead and remove this nut right here, from this side of the bolt. I'm going to use a 21 millimeter on the bolt side, and a 24 on the nut side. I'm going to hole it stable with the bolt side, and I'm going to remove the nut side. So turning to the left. There's our nut. This bolt feels like it's going to come right out. So that's nice. If we had to, we could just use a little ratchet and just keep turning it to the left, and it should work it's way out.
Could also go with something like this. That should be helpful. Try to move the control arm around a little bit. I'm going to move the strut around a little bit. So we've got our bolt, we've got our nut. Still go together perfectly, we didn't mess up any threads. If we did, we want to chase those out. And we're just going to remember that the bolt came in through the back side.
So, a couple things to take note of, is this is your alignment adjustment right here. You just want to see which way that little arrow is facing. It's facing down. Just going to mark it, and I'm going to follow that. I'm going to try to mark it. Basically, we just want to get this as close to where it was before. There's one on the back side, one over here, one on the back side. So you can go ahead and do the same to all those. That'll just get your alignment back close as possible. So once you're done doing your front end work, you can go ahead and get this aligned, and at least it'll drive down the road straight enough. By the time you get there, you won't have wiped out your tires by putting this in fricking sideways or upside down, or whatever.
So that'll be bad news. You want to just make sure you mark it. It's easy peasy. Use a crayon, a marker, nail polish, lipstick, whatever you got. Yeah, just go from there. We're going to go ahead and mark all these. And we'll move on to taking out the bolts and nuts. So now what we're going to do is we're going to use two 24s. All right. It doesn't matter which way you go. Once goes on the front side, and one goes on the back side. Just like this. We're going to loosen it up. Turning to the left.
I'm just going to put it on there again, for now. We'll take it back off in a minute. We're going to do the same to the other. Holding it with my 24. Now we can go ahead, and we're just going to line these up, so it's pretty much flush, and we'll just tap on this with a hammer, or if you have a little bit of an air chisel, you can go ahead and use that. Big fabulous hammer time. I'm going to hit right here. I've got my nut, so it's pretty much flush. I'm going to try to make sure that I hit pretty much dead center as much as possible.
And then we'll go ahead and move on, do the same to the front. All right. Let's give that another whack. Nice. That came through beautifully. So we'll go ahead and do the same for the front, because we know that worked well. I've got it lined up. This one's a little harder to get to. Oh, yeah. Beautiful. Perfect. So now we can go ahead and take nuts off the rest of the way. We'll drive these bolts out from rear to front. And, we're going to have to, on the last one, we're going to have to make sure we're holding onto this control arm, because it is going to want to come down.
If you're having a little bit of an issue, driving those through, which is very probable, you can go ahead and use a little bit of penetrant. Go in from this side. Going to come in from the front side. I'm just going to take my 24 millimeter wrench, and see if I can work it. We want to try to get that penetrant to make its way inside where the bolt rides inside the bushing on the lower control arm. Sometimes moisture can get in between there, get it rusted, or frozen up somehow on you.
For good measure, we might as well just do the same to the other side, or the rear of this. So I'll come back here, just going to give it a little spray. Wearing our safety glasses of course. That one doesn't feel too bad at all, actually. So that's nice. Hopefully it should come out fairly easily. Feels like it's going to come right out, so that's nice. This one feels like it's going to need a little bit more coercing, which is great. I don't mind a little fight.
Something that I did want to mention though, is I took my sway bar link nut, and I put it back on here a couple threads. That's just so this control arm can't come falling down. If I'm under here, and I'm doing my thing laying on the ground, whatever I'm doing. Stop the drip. I'm laying on the ground, I'm doing my thing, trying to get these out, bink, bink, bink. This thing comes swinging down, I don't want to get hurt. So, I just put this back on here. Once it starts breaking free and everything's loosey goosy, we'll go ahead and take it back off. And then we just want to make sure that we're safe, so.
Grab my hammer again. That one's nice. See about this one. There we go. All right. We are cooking now. Going to go ahead and take that nut back off got it out and removed. I'll set it aside. Just going to wiggle this, see if I can get it free. If you can't, something that you could try doing is using a pry bar, or screwdriver, whatever you got as long as it's strong, and you can actually hit it with a hammer, because there's some that will break, shoot you in the eye. You shoot your eye out kid, you don't want that.
We're going to come right under here, and just plunk. Or you can use a punch and come through the back side here, and just punch the bolt all the way through to your prerogative, whatever you want to do. I know the hammer's a little over size, but this is just what I got in my hand, and I didn't feel like going on a walk for another one. That's pretty much ready to come out. I'm just going to leave it in. I'll go ahead and move over to this one. That one's going to come out nice and easy.
So now I can go ahead and take off this sway bar link nut. It's off. See if I can bonk this down a little bit. Basically, what's holding me up right now is just pulling this sway bar link through this hole. So if you're having an issue, and it doesn't want to come free, you can just give it a little spray. Any type of penetrant will work, whatever your preference is. I'm going to continue bringing this down while holding the control arm, so it can't swing down freely.
There we are. See if I was underneath the car, that could have hurt. I'm going to go ahead and take out this bolt. Remembering that this is the way that it was. This was facing downward. I'm going to place it so I can remember where I put the rearward bolt, or I guess you'd say camber adjustment. This one as well. Wiggle this puppy. And now we've removed our lower control arm assembly.
We have our old control arm assembly. You can see all the bends and the grooves, and holes, and the bushings and all that. You'll notice our brand new one from 1A Auto, it's very quality. This is nice. We'll notice all the same holes. Want to make sure that everything lines up the way it should. Ball joint. This looks nice. You can bring it over, do a little comparison like that. As you can see, all the bends line up as they should. So that's always wonderful.
If you ask me, I would say that this is a quality part. And I would definitely install this in my vehicle. So if you need this, or any other part, you can always check into 1AAuto.com, check us out. Thanks.
So now it's time to get our lower control arm back in. We remember that the bolts came in from the front to the rear. So we'll go ahead and get this lined up into the frame. Just give it a little wiggle. Remember that these were aimed downward. So we'll get it as close as can. You'll notice I'm still holding on to, because the rear side bolt isn't in yet. Put that in. There we are. Now we can go ahead, and we can take this, we can lift it up into position, and we'll just hold it with the sway bar link nut. This lined up. Get that on a few threads. Now we can let go.
We can go ahead and take off this nut now if we want. Remove this plastic, recycle it. Now we're going to go ahead and put these back on. There we go. Lines up pretty good. Something that I want to make sure you know, is that it is oblonged there. You can tell that it kind of only goes in one way. So if you're having a hard time getting it lined up, it could just be because these bolts turned a little bit. Let's see if we can get this one in. That feels pretty good. Now we can go ahead and put the nuts on. If you have some Threadlocker, you can go ahead and use that. I'm not going to worry it for this application.
Now we can go ahead and put in our lower strut to control arm bolt. That's this right here, with the nut. We're going to go from the rear to the front. I'm going to try to line this up, the same time pushing up on the control arm. It's going to be fun. It can be done. The bolt started a little bit. Might be able to work it. There we are. Get that started. Perfect. Now we can go ahead and start tightening some stuff along here. I'm going to use my 24 on the nut side, going to use my 24 socket. And on the wrench side, or the front side, I'm going to use my wrench. I'm going to try to line up those markings as close as I can.
We remember we made those little crayon, or lipstick, or whatever you used markings. I'm just going to hold it with my wrench where I had it. And I'm going to go ahead and try to blast this on. There is a torque specification, so you don't need to crank on it for too long. Just get it zipped in. There we go. Looks like I can go quite a bit further. That pretty much just got it to its lock point. We're going to use our 24 millimeter wrench and our 24 millimeter socket with our torque wrench. We're setting this to 155 foot pounds. So I'm going to try to use the wrench to hold this still, try to keep my markings as close as possible.
You're going to get this aligned afterwards, so you don't have to be too particular about it. We're going to see if we can get this torqued. There's one. There we are. We can hit them again if you want. Next, we're going to tighten up the bolt that goes through our strut into our control arm. We're going to be using a 21 on the bolt side, which is the rearward side of it. And a 24 on the forward side, which is the nut side. Then go to 125 foot pounds hopefully. That's plenty torqued. Then move onto the next step.
We're going to go ahead and tighten up our sway bar link nut. It's an 18 millimeter. If it looks like it spins like that on you, you can go ahead and grab it with some locking pliers. See if I can get this on here. You want it to be as tight as you can get it by hand, without hurting yourself. Turning this to the right with my 18 millimeter. So we've got our knuckle back in our hand. It's a little heavy, but not too bad. We're going to remove this. You can go ahead and use a little bit of Never Seize if you have something that you want to put on there, or directly in here.
I'm not going to worry about it for this application. I'm going to try to get the spindle inside here, and this, inside here. All the meanwhile, as I'm shaking everything around, making sure I don't mess up this boot. Wish me luck. There we go. Holy cow. We got the nut on there. I can relieve pressure. It's going to still want to swing down, so you just want to be careful. We're going to grab our 24 millimeter socket, we're going to put it on this nut. We're going to drive it up. As soon as it bottoms out we're going to stop.
We're going to check the torque specification, and then we'll go from there. So here we go. Bottomed out, so I'm going to stop. Now we can go ahead and start torquing this down. If it becomes too much of an issue moving around, you can put the rest together and then torque it. So we'll just wait on that. We'll wait on torquing it. And we'll try to remember that we have to make sure that we torque it.
We got ourselves back up top here. We're going to take off that upper ball joint nut. Lift up on the control arm. Get it into the hole there. Move it like that. There we go. Now I'm going to take a pry bar, and go right in between the coil spring, and the upper control arm, bring it down, I can get this started. We're going to blast this nut in. We're not going to go too hard, once it bottoms out, because we want to make sure we torque that as well. So we're going to use our 21 millimeter socket. We're going to blast this right up. Once it bottoms out, we're going to stop, and we're going to make sure we torque this and the lower ball joint.
Wearing my safety glasses as always. If it seems like it doesn't want to get all the way down, what you can do is you can grab your bar, try to lock it in a little tighter. And then blast it again. If that doesn't work, and you don't have a bar, you can use a wrench, and a 21 millimeter wrench there, give it a little tweak, once it's on, and you should be able to torque it right down.
I'm going to try with the bar first, and then if not, we'll go ahead and do the wrench effect, and go right on the spring. Try to pull it down. There we are, it's bottomed out. Get my tool out of here. All right, so we're just going to go to our 38 foot pounds with our 24 millimeter socket. There we are. Then we're going to go another 90 degrees, so it's bottomed out. Can use your torque wrench still if you want. Other people would rather not. I'm just going to do it. Basically, I'm just going it about a quarter turn, it's an approximation.
If you have a degree torque wrench, you can use that. That would probably be great. For this application, I'm not going to worry too much about it. Then we'll go ahead and move up to the upper. We're going to have to change our socket out. Now that we've got this torqued to our 40 foot pounds, we're going to have to bring this 180 degrees around, which would be facing the exact opposite direction, plus a little bit.
I'm going to use my little crayon here. You can use whatever you got. I'm just going to put a little mark on my socket. So basically, I want this to come all the way around to the back side there. And then it's going to end up pretty much here by the time I'm done. All right. I feel like I've got it just about there. I could have went a little less, might have been better. But not going to hurt anybody. It's definitely not going to fall off. Everything still moves, flows nicely. We've got our axle nut here.
We're going to go ahead and start it on. Could use a little bit of Threadlocker. It's all preference. I'm going to put this on with the gun. With this though, you don't want to put it on, and hammer, hammer, hammer, hammer, hammer, because it's going to crush in your bearing, and you're going to have bearing issues. Once we get it bottomed out, I'm going to go ahead and torque it down to 185 foot pounds.
Once again, we're using our 36 millimeter socket. So I'm going to get it down, so it bottomed out. And then we'll get it down to a lower level where I can torque it. That feels pretty good. Let's torque this puppy. So what I did, is I just put my bar in between here. I want to make sure that it's as flat as possible for when it hits up against these studs. You don't need it to be in a diamond or anything like that, because God forbid, you mess up these threads on the studs. You'll be having to chase them down.
I'm going to take my 36 millimeter socket and my torque wrench. I'm going to torque this down to 185 foot pounds. That's all torqued up. We're clear to move onto the next step. Just going to go ahead and clean up around the hub a little bit. If you notice large chunks of anything, you want to try to make sure you get all that off. You don't have to worry about the color of rust. It's not going to hurt anybody. It's going to be buried underneath your rotor. The reason for making sure you got off any big chunks is to make sure that the rotor sits flush against your hub. If it doesn't, you'll get a break pulsation.
So I'm just going to go around. Can hit this with a little bit of brake parts cleaner, or whatever you might have. That looks pretty decent. We do the same thing for the rotor. Make sure that the mating surface is in pretty condition. You could a little bit of Copper Never Seize if you'd like. Then we'll go ahead and put the rotor on. Make sure it's secured, then we'll move onto the next step. With that cleaned up, go ahead and put this on there. If you wanted to, you could use like a lug nut, put that on there to hold the rotor.
You don't it flopping around too much. Every time it moves, you got another chance of rust getting down in between, causing an issue, or this falling off and hurting yourself. Obviously, we don't want that. So we'll go ahead and see if we can get a lug nut on there. We might need to use a little bit of a spacer if you have something that'll work. That'll be optimal.
For the purpose of this video, I'm just going to go with something that pretty much everybody has lying around, some place or another. Just a little clamp. Just put it over the stud, then go ahead and put this lug nut on. Push the rotor up against. The clamp's just working as a spacer. We're not going to tighten this down or anything and crush that. It's not about that. It's just holding the rotor still.
So next what we're going to do, we're going to make sure our ABS cable is clear and out of the way. We're going to take our two caliper bolts. They're both the same, you don't have to worry about mixing them up. Exact same. We're going to take our caliper with the bracket attached, carefully remove it. Get rid of that. Put this puppy on here. Should slide right on. Oh, yeah. There we go. This one started. Now we can take our 21 millimeter socket, we'll bottom these out, then we'll grab the torque specification and torque them down.
Making sure that I'm turning to the right to tighten. That's one, two. We'll torque these puppies up. So using our 21 millimeter socket, we're going to go ahead and torque these down to 130 foot pounds with our torque wrench. One, two. There we go. So we torqued these to 130 foot pounds with our 21 millimeter socket.
We've got our ABS wire. We're going to put it right in here. There's a little clip. Try to wiggle it, and jiggle it, and all that. Got our little clip here, clip that in. Behind here, we've got our little harness. Take a peak in there, make sure there's no funny colors. Greens, blue, reds, purples, nothing. Look metal color, nice. We're going to look at where our lock was, and where it's going to be. Lines up this way. The red thing's going to line up with right here, so that we know.
Clip that in. Give it a little tug. Feels good. We're going to make sure we re-secure it to the under flare. Just push this through. Everything feels like it's nice and secure. If this clip right here was broken for some reason, maybe you broke it coming off, you don't want to laeve your ABS cable just rattling around. If you have a little wire tie, you can go ahead and put that on there fairly loosely. Just enough so that it'll keep it adhered to the brake hose, but not necessarily to the point that it's going to pinch the brake hose. You don't want to pinch the brake house. Fluid needs to flow.
But this ABS wire does need to be mounted to the flex hose, so it doesn't go flopping around, and get caught on anything. So we have our outer tie rod locking nut. You can tell it's a locking nut because it has this red around here. It's neoprene. Where this has already been on, and come back off, it might be a good habit to go ahead and put on a little bit of Threadlocker, because the odds that this is going to work the way it should where it's already been used, it's minimal. But for this application, I'm not going to worry about it. It's up to your preference what you want to do.
Go ahead and put the tie rod back through. We're going to put our nut on. This is a 21 millimeter head. So I'm going to go ahead and zip this on. I'm just going to bottom it out. And then I'm going to torque it down to the specifications. If for some reason you were trying to tighten it, and the stud was just spinning, you could go ahead and use a pry bar and try to push down on the tie rod, in between here and here. Just to give it a little bit of downward pressure and hopefully lock that stud into the knuckle.
It went in fine, so I'm not going to worry about it. But that would be what I would do in that case. Torque specification for this is 22 foot pounds. So I've got it on my torque wrench with my 21 millimeter. All right. Now we're going to go plus 90 degrees. So, if we went from here to here, that would 180 degrees. We want to go half of that. So basically, I'm going to bring this around to you. Here we go. We'll call that about 90. So this is all torqued up. Now we're clear to go ahead and remove this lug nut when we're ready.
So we can go ahead and take this back off. Recycle this, or keep it for something handy, maybe you can use it again someday like I like to do. So we're at the last point here. What we're going to do is make sure we get all our air out of here. We're going to use our 11 millimeter socket. You break this free, turning to the left. Like that. See a little air bubble. We want to wait until we see solid fluid coming out. Looks like it's pretty good. I'm wearing a glove, so I can do this. Don't do it with your bare hands please.
That looks pretty good. If you wanted to, you can give your caliper a little tap. Making sure you're wearing safety glasses in case anything spits out at you. Just keep an eye on for any little air bubbles. As soon as you don't see any air bubbles, you're clear to close it back up to the right. If you wanted to, you could do a manual bleed on this. For this purpose, I would say that it's fine.
Once we get it cleaned up, we would make sure we put on this little boot. And at that point, you'd be clear to put your wheel back on, and then drive her on down to a reputable service shop and get it aligned. So there we go. Easy peasy. Now it's time to get the wheel up on here. I want to make sure I emphasize on the importance of not lifting with your back. You want to make sure that you're safe, you don't hurt yourself. So don't grab your tire like this and expect to go, and lift it up.
It's big, so all I'm going to do, is I'm going to roll it up my leg. I'm going to use my abs. That's why I have them, right? Roll it up. Lift my leg with my abs. Comes right up, nice and easy. I hardly used my back at all. Save your back, you're going to need it someday, or every day, right? So I got one lug nut on there. Now I can let go of the wheel. I'll get my other four on. I'll just bottom them out, and then we're going to torque them down to 130 foot pounds.
So we've got out 22 millimeter socket, or torque wrench set to 130 foot pounds. We're going to go ahead and we're going to start with one, and we're going to make a star pattern. And if we want to, we can go around again, just to double check. I'll just go around again, now that I know they're all torqued down, you can go in a circle if you want, or continuing your star pattern. There we go. Now we've got it all torqued up to 130 foot pounds. And we've completed our job. Great job everybody.
Thanks for watching. Visit 1AAuto.com for quality auto parts shipped to your door, the place for DIY auto repair. And if you enjoyed this video, please click the subscribe button.