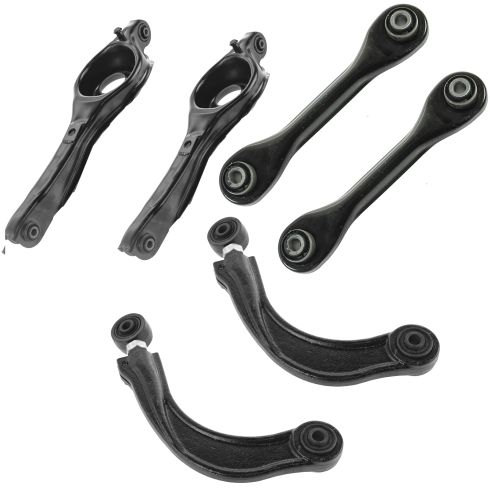
Hey friends, it's Len here at 1A Auto. Today we're working on our 2001 Ford focus ZX3 hatchback and I'm going to be replacing a rear control arm. It's going to be super simple. I can do it. You can do it too. If you need this or any other part, you can always check us out at 1aauto.com. Thanks.
Okay, so one of the first things we have to do is take off the wheel obviously. We're going to remove our lug nuts. These are missing the caps. Usually they have a chrome cap on them. That would make them 19s. These are actually closer to an 18, so that's what I'm going to use to remove it. But generally speaking, you're going to use a 19 to remove your lug nuts. Leave that one on there a little bit.
That's just going to help prevent the wheel from falling off when I take off the last one. Set this aside. Take off our wheel. Set it aside. We've got our rear arm here. This is an alignment adjustment. So what you want to do is just mark this with an area on your frame. Oops, here we go. Now I get two crowns. Cool. Cool. All right. So the reason for this is so that when we're putting it back together and we go to tighten it up, we're going to have this alignment camber adjustment right to where it's supposed to go. All right, so first thing we're going to do is loosen this up. These my 19 backside here, 18 on the side closest to me.
Let's leave that nut on there for now. Just going to move around. See how that changes everything here. This pivots and that's going to angle your wheel. So that's the importance of making your markings. All right, we'll leave that like that. Important to note. I've got pressure right here. It's holding up this arm. All right. Not too much pressure. I'm not, you know, lifting the vehicle up off the lift or anything. But the reason for that is so that when I take this bolt out, if this spring is under any tension, I want to be able to control how fast this arm can come down. So this can't just come flying down, potentially hurt me. We're going to remove this bolt. It has a welded nut on the backside. This is a 15 millimeter.
I'm just going to try to maneuver this so that I'll be able to get this bolt out of here. Maybe up, maybe down. Guess we'll have to see which way it needs to go. Getting a little bit more slack here. Okay. Here's our bolt. Set this aside and we can slowly lower this down. There it is. All right. It's like we still get a little bit of spring tension here. It's the reason for having this here. I can bring it down at my own leisure. I know I'm safe. The springs aint coming flying out. I'm just going to bring the vehicle up a little bit more so it'll relieve a little bit more tension.
Here we are. Let that hang. Here's our rear coil spring. Get this nut off of here. This right here has a slot in it and that slot lines up with that divot on the adjustment washer there, so that way there when you turn this backside of the bolt, it turns that and it does what I showed you before. Let's get this out of here. See if I can get my bolt out and through. Here it is, and here's our rear lower control arm.
I'm just trying to get this rubber off of here. Do whatever you have to do to get it off because we want to switch it over to our new control arm. Here we are. Here it is. The reason why it's so hard is because right along here there's a little lip and that just holds on inside there. Over here we have our lower control arm out of the rear of our 2001 Ford focus ZX3 hatchback. Over here we have our brand new quality 1A Auto part. Both these parts are created the exact same. They've got the same shape as you could tell. Same length, super important. You got your mounting holes, right? And then up here, same. And then of course even the spot for the little rubber jounce bumper there.
This brand new quality, 1A auto part has everything that we need. With that said, I don't see any reason why I wouldn't want to install it into the vehicle. So I'm going to go ahead and do it. If you need this or any other part, you can always check us out at 1aauto.com. Thanks.
So here's our adjustment piece, right? That's the side that I was holding with the wrench. Came through this way and we have our adjustment washer. You can see where it slides into the groove right there. And then we have our neoprene locking nut. Generally speaking, these are reusable. If you felt the need, you could use thread locker on it to make sure, but it should be good to go. So this is the way it's going to go in. Just like this. Just going to go through this sub frame, right through there and hold our lower control arm. Got our control arm, just let me see if I can get this up and in here. There we are. That lines up.
Just going to start this on here. We're not going to tighten this up yet. Let's move ahead to the next step. So right inside the lower area of the control arm there, you can see there's like a little groove, comes around and it stops there. That's where the end of your coil springs is going to rest up against. So you want to make sure when you're installing this, you have the end of your coil spring right up against where that hole is. To be able to confirm it you could just look through the hole once you're starting to get it up in there.
So it looks as though I'm going to go just about right here. So I want to get this ready. I'm going to bring this up and in. Turn it as needed here. Looks like that should be it. See about bringing this over. Cool. I'm going to grab my safety glasses. Super important in case this thing slides out. The arm comes down and the spring wants to come and try to hurt me for some reason, even though I did nothing wrong. Accidents happen.
Before we go too far with that though, I'm going to grab my rubber bushing. I'm just going to see about trying to get the rubber bushing onto the new arm. There it is. And now we'll go up. As we bring this up, whether it's with a floor jack or a bottle jack, whatever it is you're using, it's applying pressure to the spring, trying to compress it. So you need to keep that in mind. If this decides it wants to come out and let this arm down, this spring's going to want to do something kind of crazy. And so just get out of the way if something happens.
Here we are. I'm just going to try to line up my bull hole here. Whatever you got to do to get it lined up. Your situation may be a little different than mine, but that looks pretty great right here. I'm just going to go from the rear of the vehicle towards the front. Lower this down a little bit and see if I can bring that up. Okay.
So right now it's through this part, but this actually needs to come through at an angle like this. So now that we've got it through this side, I'm going to go ahead and lower this down and then I'm going to try to grab just a little bit further over on the forward side of this and see if I can get it to go up at an angle. Right up in here.
Okay. So I got my bolts started in here. I got a couple threads. The way that I did it is, I just kind of jacked up along the side right here so I can tilt the lower control arm's coach to get it to line up with this because it's not sitting parallel to the ground. All right. You could use something like a ratchet strap if you have a ratchet strap or whatever you have to do to make it happen. So to continue, I'm just going to take this, I'm going to bottom it out and then I'm going to go ahead and bottom out the other side. And then we'll torque them down. Before we go too far with bottoming this out, what we're going to do, we're going to bring up the suspension. It's high enough, maybe down a little bit. There we are.
Just bring it up so that way there the suspension's compressed as if the vehicle was sitting on the ground. All right. So it's under load right now. Okay, let's bottomed out. We'll torque that in a minute. We're going to come up here and tighten these. Okay. It's time to start snugging this up. You'll notice that as I turn this back here, I'm moving my marks. Okay, so use your wrench, line up the mark with where you want it and then go ahead and use the ratchet on the rearward side of the bolt or rear side of the car to snug it up once you have it lined up with where you want.
It doesn't need to be perfect, just want it to be close because after you're done this service, you're going to want to bring it down to a reputable shop and go ahead and get an alignment anyways. So this is just going to get a close for the next person that's going to be doing it for you. We've got that snugged up. We've got this snugged up. Let's go ahead and torque them down. We're going to torque this down to 85 foot pounds with our torque wrench. I'm holding the backside.
There we are. I'm going to go ahead and do it one more time. Tight. We'll move along to here. I'm going to switch over to my 15. All right and hit it again. Torqued. Torqued. Get this out of here. Onto the next step. Here we are. Just going to wheel it up my leg. Cool. We've got our lug nuts. We're just going to snug up these lug nuts. There we are. Bring it down, torque them up. Okay, so here we go. We're going to torque these down to 94 foot pounds with our torque wrench. Go around again. There we are. Do the same to the other side of the vehicle.
Thanks for watching. Visit 1aauto.com for quality auto parts shipped to your door, the place for DIY auto repair. And if you enjoyed this video, please click the subscribe button.