Hi, I'm Mike from 1A Auto. We've been selling auto parts for over 30 years.
Hi folks Sue from 1A Auto here. Today we're going to be putting in the driver side CV shaft axle on our '07 Mazda 6 sedan.
Just take all five lug nuts off. Send them aside some place safe. Once I took the tire off, I brought it back down because I have to break free the axle nut. I put a nice long pry bar in here, and it's going to put the pressure on the ground as I try to reverse this axle nut off. Now this is a 32 millimeter socket for this axle nut. It is torqued to 202 foot-pounds. So you're going to need a nice long ratchet or breaker bar. There we go. Once you get the nut off, it's safe now to remove the breaker bar, I mean the pry bar, and now we can raise it up and start removing the axle.
I'm going to remove the cotter pin from the tie rod end, and then remove the nut on the tie rod end. You cannot reuse the cotter pin. So if it breaks, that's cool because you're going to replace it with a new one. Sometimes these rust inside, and the only way to get them out is to drill them out. Let's not wish that today. Although, I'll be fine. As you can see, these just broke off. So I'm going to try to pull them one at a time out. There we go. I'm going to spray some rust penetrant oil on here and then I'm going to take the nut off.
Now with the penetrant spray on there, soaking in there, I'm going to put my 17 millimeter socket on the tie rod end nut and break it free. Okay, I'm going to turn this out just to get a little bit more throw. Turn the sting to the right. See how close we can ... There we go, coming to the end of it. That is warm. Now with the nut off of the outer tie rod end, I'm going to hit the knuckle on these points right here mostly to vibrate the tie rod end shaft loose from the knuckle. There you have it, popped right down.
Next I'm going to be removing the upper control on that. It's a 17 millimeter socket. Okay, just give it a good tug. Now we're free to set that. We're going to hit the upper knuckle into the upper ball joint. We're in the same spot. They have those nice marks. Something you don't want to do. There we go. All right. So now with that, dislodge, you can see how the knuckle rolls forward here, and I can see that I have some strain here on my front flex hose, not much on this cable, but because I want the max out of this knuckle to come forward so I can get this CV shaft out, I'm going to undo this one mounting bolt. That's a 12 millimeter socket. I might have to undo the ABS here also. I'll see.
I think I'm going to undo the ABS just because in this case it's always safe to be ... It's better to be safe than sorry. I don't want to put any pressure or strain on the ABS cable, nor do I want to do it to the front flex hose. That's why I'm dismounting this. It's not like we're opening up the hose, so there's no air going to get into the system because we don't have to dismount the caliper to get this axle out.
Yeah, now I've got more throw to it without any pressure. So I'm going to dismount the ABS sensor mounter bracket right here and that is a 10 millimeter socket. Now I can really get a good view. The axle shaft is coming out right through the hub here. I want to see if I have any movement in it. I'm going to grab a hammer. Let's see if I can tap it through. There we go. I'm going to go from the backside here, pull it all the way out. Now we have full access view of it.
I think the next step I'm going to do is I'm going to undo the wishbone into the lower control arm. That is a 50 millimeter socket on this long bolt. I'm going to pull the bolt out so that the wishbone is free from the lower control on ball joint, so I can move the shaft out through the bottom. Then I'm going to disconnect it from the transmission.
So 15 millimeter socket on this wishbone lower part of the strut, break that free. The nice design about this is it has a self-locking nut on the other side. It's got a middle tab that's welded into it. So you never need to use a wrench. That's what the nut looks like, welded with a tab on it so when it comes around, bottoms out whether you're tightening or loosening. Now I'm going to pull the bolt out. There we go. I can see the whole knuckle comes right down, drops down. I'm going to have clearance right here to pull the shaft out once I break it free from the transmission.
Now I'm going to take a pry bar and I'm going to wedge it between the inner part of the CV shaft and the transmission seal right in here. You'll see the tip of my pry bar. They do have some tools for these that will work. Sometimes it doesn't, does it? But you're just going to give it a good tweak. There you go, pulled it right out. I already have a catch pan down below. Even if you're working on your back, and you have jack stands, draining fluid can come out, so you're going to want to catch that and not make a mess. So with it broken from the transmission, I'm clear to pretty much grab this CV shaft and manipulate it out. This is where I'm going to slide it through that wishbone. And here we go.
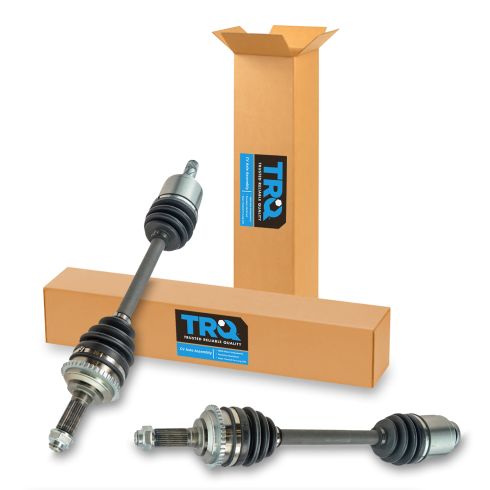
There's our old driver side CV shaft. We're going to get ready to install the new one. Here we have an axle shaft from 1aauto.com. The new one is on this side, and the old one is right here. If you compare the two, both the same length, come with the same amount of tooth ABS ring that's pressed on, and the new axle from 1A Auto comes with a new lock nut. On the opposite side, that's the inner side. This part goes into the transmission, comes with a new lock clip. It's got the splines for the fluid flow, the bearing seat. If you need this part or any other part for your car, click on to 1aauto.com.
I got to fish the new axle up behind the knuckle. Then I'm going to put the shaft into the wishbone area. Start lining up the new axle inner CV shaft area into the transmission. See that seal? This is where you just give it a good push. I'm going to have to lower it because of ... No, we got it. Yep, it snapped in, locked in. Sometimes because I'm vertically challenged, yes, that means I'm short, I have to bring things down to more of a waist level for strength, but I got that one in. Nice. So now I can manipulate the shaft, axle shaft into the hub bearing. It's lined up really good there. Try to get the wishbone back into place. Now I'm going to lower it so that I can lift my knuckle up. I'm going to put the top control on bolt ball joint in nut in first, so it takes some of the pressure off for me to put the rest of it together.
Now I'm at a level that I can work a little bit easier. I'm going to see the splines, so I got to line the splines up on the CV shaft and push it through the hub. I see there's a lot of rust in the hub as you can see too. I'm going to put a little penetrating spray in there, and hopefully clean some of the rust out. Look at all the rust coming out. You can see it falling right out of there. Okay, now continue to try to line the splines up. There we go.
Now I'm going to put the upper ball joint back into the knuckle, put the nut, start it, hand tight. That way I can really probably get the wishbone both in easier. There we go. As you saw, I lifted that up. I just put it on my arm, give it a lift up, started that. We're going to torque all these bolts and nuts once we get them all together, and now I'm ready to do the same on the wishbone. Put that bolt in. I'm going to put the wishbone bolt right through the control arm again. To do that I'm just going to lift it up a little bit. I'm going to need a little hammer. Okay. There we go. Put it all the way through.
Now I've got my nut with the self locking arm on it so it will spin it around. I'm going to make sure that it locks into place here. 15 millimeter socket. I'm going to just tighten this up while I'm here. This is going to come right around, bottom out on that wishbone, just snug it in because all these have torques to it. I'm going to torque it up in a minute. I'm just going to put the new axle nut on, hand tight. It's a 32 millimeter socket. Just try to bottom that out a little bit.
Now I'm going to move on to my brackets. I'm going to install my front flex hose bracket. Put the bolt in for my ABS sensor. I'm going to tighten those up, 10 millimeter socket for this one, the ABS sensor bracket, and 12 millimeter socket for that one, the front flex hose.
Now I'm going to get a 17 millimeter socket and snug up my upper control arm. I'm just snugging it. Now I'm ready to reinstall my tie rod end. It's a 17 millimeter also. I'm going to have to get a pry bar, pry up on just like that to get the tapered stud off the ball joint to see so that the lock nut will spin the stud ... won't spin the stud in place. See how far I can get. I like to get my nice long pry bar. I'm just going to put some pressure on that. There's one more trick that I've seen and I've done in the past is I've actually just pried, tilted the tire rod end. It's not so much of an effort. Let's see what size I can fit in there. It's probably going to be a 19. Yeah, let's see if that works. This is going to be a stubborn one.
Now that the tie rod end is tightened, I'm going to put my new cotter pin in. Now we're going to get ready to torque up the upper control arm, the upper control arm nut and the wishbone nut bolt. We're going to lower our car. Torque our axle nut. Then put our wheel on. Then we're going to take the draining fluid because we lost just a smidge of draining fluid. So while it's up in the air, I'm actually going to clean that. That way I know that it's all cleaned.
Okay. Let's get the torque wrench in, torque up the wishbone and the upper control arm. Now I'm going to torque the upper control arm ball joint nut to the knuckle. It is 39 foot-pounds, 17 millimeter socket. That's all set. I'm going to move down to the wishbone to the forward control arm bushing bolt, and that is 93 foot-pounds. I have a 15 millimeter socket on the wishbone bolt, and it's 93 foot-pounds I'm going to torque it to.
Now with that all set, we've got the hose connected, we've got the ABS sensor wire connected. I got the tie rod end connected with a new cotter pin, upper ball joint nut wishbone. Now we're going to lower it and torque the axle nut and put the tire on.
Now with my pry bar in place holding it from spinning, I got my 32 millimeter socket and my torque wrench is set up to 202 foot-pounds. I'm going to torque this axle nut. I want to clarify the importance of torquing a front wheel bearing. That's a wheel bearing in there, pressing the bearing that that axle goes through, and that is putting pressure on that bearing. If you use an air gun and you under or over tighten it, you will make the life of that bearing, you'll wear it out faster. Too tight is not good and loose is not good. There is a difference in importance of really torquing the axle nuts on hub bearings.
Now that I have my axle nut torqued down to specs, 202 foot-pounds, I raised it back up and I'm going to hammer over in the lock. It stops it from motion. You never know, but this is what they call a lock it in place. Some use cotter pins. Just really have to make it a divot. Good enough. That will help stop that from moving, not that it should at 202 foot-pounds.
I hand tighten the lug nuts on. We'll lower it and we'll torque this wheel. The torque on this wheel lug nut is 65 to 87 foot-pounds. I'm probably going to go to max because the car is an '07, so that means these wheels have been off quite a bit. So I'm going to go right up to 87, always a star pattern, which I know you know. Come on. The reason for star pattern is to keep the pressure equal on the hub all the way around.
All right, now I'm going to lower it to the ground and torque it to 87 foot-pounds. All right, 87 foot-pounds. I'm going to do it twice in a star pattern just to make sure it's all seated. And there you go.
Thanks for watching. Visit us at 1aauto.com for quality auto parts, fast and free shipping, and the best customer service in the industry.