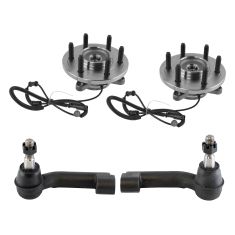
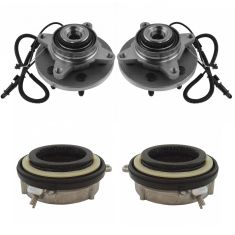
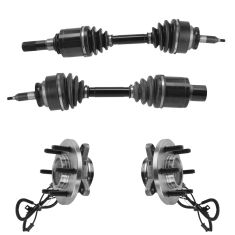
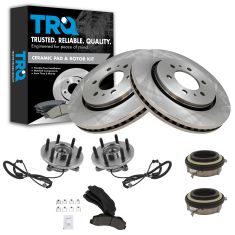
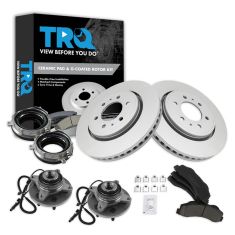
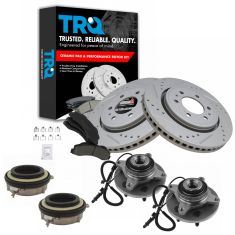
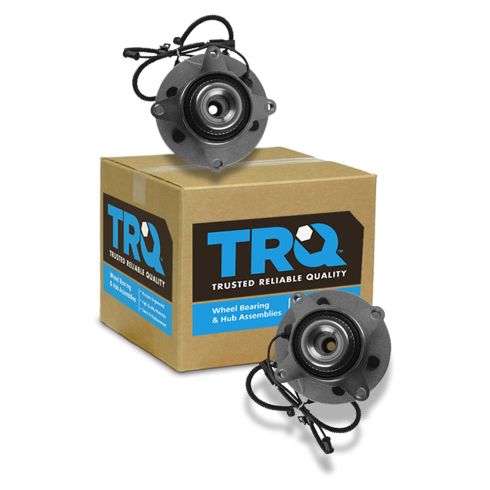
1ASHS00921-Ford Lincoln Front Driver & Passenger Side 2 Piece Wheel Bearing & Hub Assembly Set TRQ BHA53782
Replaces
2012 Lincoln Navigator 4 Wheel Drive with 6 Lug Wheels Front Driver & Passenger Side 2 Piece Wheel Bearing & Hub Assembly Set TRQ BHA53782

You may also like
Product Reviews
Loading reviews
4.68/ 5.0
63
63 reviews
Sensor Cable Torn
March 1, 2017
This product worked out fine, easy to install. I had to reuse the old sensor and cable. One of the new one I received was completely severed, like maybe they dropped it and the edge sliced through the wires.
Arrived quick
October 1, 2017
Everything fit and works well. Nothing bad to say. Definitely shop here again for my truck.
Everything worked out pretty good
February 23, 2018
The hub assembly worked as advertised, only bad thing was the abs sensor that it came with had a broken connector but i just used the old one
Good fit, eday installation
May 27, 2018
Never attempted changing out wheel bearings before. Cost tor tgeee was less than half of orgers
Great deal. I highly recommend
Excellent transaction
October 16, 2018
Easy ordering fast shipping right parts!! Thanks will definitely order again when needed.
Fix it right
January 3, 2019
Had to replace my sons 4x4 front wheel bearings after he raced it truck in 4 wheel drive. Replaced the hubs and went for test drive. Everything engaged as it should win both high and low.
Hub and bearing
February 4, 2019
Abs sensor plastic plug broken
Was able to straighten pins had to tape to hold together
Plug should be protected during shipping
I'm not the only person to encounter this
From other reviews I've read
Part fit well shipping was fast time will tell
Wheel Hub and Bearing assembly
February 5, 2019
Appropriately made part. Appears to be of good material. Thanks.
2013 F150 front 4x4 wheel hubs
March 3, 2019
Great product, cheaper than everyone else online. Impressed with the professionalism of the transaction and delivery all within a timely manner.
Exceptional Automotive Store
March 5, 2019
I recently purchased a pair of Wheel Bearing & Hubs. They actually came much faster than I anticipated. They were a direct fit and easy to install. The cost was very reasonable, along with free shipping. The Website was easy to maneuver. Totally happy with the quality of parts and 1A Auto.
Sincerely
Stuart Neal
Front hubs for 2011 F150
July 6, 2019
The hubs arrived within the days stated.
My friend installed them both in about 1.5 hours.
There was no issues and everything went well.
Bill Baker
Needed high quality hub replacement, and sure found it here
July 19, 2019
My truck has 256000 km on it. I wanted to replace the hubs, as a preventative maintenance item. As i have bought from these folks before, i did not hesitate. Do mot bother to look elsewhere. This company is #1
Great Price and great product!
July 20, 2019
I was looking for an affordable option to replacing my front wheel hubs and stumbled upon these. The price seemed too good to be true but I figured I could chance it since there was a limited lifetime warranty on them. So I bought them, my brother-in-law (who is a industrial mechanic) looked over them and was impressed with the quality and manufacturing. Thank you for offering a great product at a very reasonable price!
September 18, 2019
Very happy with your service. I orderd apart from rock auto they sent me wrong one they had no customer service to speak with only pre programmed online thing. I had to pay to send part back to warehouse that was ten min. From my house I could of returned it my self.
That was when I called 1 a auto spoke to a friendly girl who got me the right part. I orderd the wheel bearings online then called and spoke to another girl who made sure I orderd the correct part. I'm very happy with your service and will always look to you first for parts from now on.
2014 Ford F-150 hub assembly
October 7, 2019
Great fit just like oem parts installed have been working awesome and price was great as well no issues at all.
Cant beat the price and quality
October 17, 2019
For the price, not sure you can do better. Both hub assemblies fit and had all the correct abs sensors and wiring. I did have one problem. When I opened one of the boxes, the abs wire had been pinched and cut due to the wheel stud sitting on top of the wire. I repaired the wire and all is good. I didnt even contact 1A about the problem. We will see how long these bearings last but I am happy so far. I recommend this hub assembly from 1A
Great parts
December 16, 2019
I just installed my new wheel bearings, hubs and actuators.
No issues, fits perfect and works great. !!! I'll be back orering the next time I need parts
Affordable parts and Help!
January 3, 2020
Good price for quality parts. Also the help videos for installation is a HUGE help if you do it yourself.
Excellent customer service!
January 10, 2020
I bought 2 hub assemblies and even though they turned out to be bad hubs, A1 auto was fantastic to work with. The shipping was fast and when they found out the hubs were bad they refunded my purchase immediately. I definitely recommend using them.
F150 wheel hubs.
March 18, 2020
Great product. Feels heavier duty than OEM. Great quality bearings inside.
As advertised
May 13, 2020
Quality parts for the money. 1,000 plus miles on them and no issues. 90+ MPH for several hours.
Great place for parts
June 25, 2020
Quality parts at a great price, can't beat it.
Great......but
July 5, 2020
Order these 2 parts arrived 1 week later in a torn re-taped box and some parts were missing. The great thing is that customer services was great at replacing the missing products it just took another week to get them. Very happy with the product just frustrated with the whole issue of missing products and having to wait for the replacements .
Fixed the noise
July 6, 2020
I replaced the one hub assembly that I knew was bad and it seems to have taken care of that problem. Only a few miles on it, but it seems to be working fine. Still need to get the other one installed. Hopefully I'll never have to test the lifetime warranty.
2011-2014 Ford Expedition Hub Assy
September 14, 2020
THIS IS FOR FORD EXPEDITION FRONT AND REAR HUB-BEARING ASSEMBLIES
Hub / bearing assemblies fit fine, fronts and rears. Have 500 miles on them without any issues. Packaging is a little iffy, one box was completely trashed.
Great quality hubs
September 17, 2020
Better deal than autozone. Great quality hubs.
Good fit and match
September 26, 2020
time will tell how they hold up but this is the first time replacing after 150000 miles
Worked great
November 12, 2020
Parts were right and went together no problems at all. Used 1AAuto video repair library and watched repair before hand easy to do. One thing would be nice is to have the little axle shaft nuts included with either part as you have to remove and they need to be replaced after removal. Thanks
F150 hubs
November 17, 2020
Easy install. Quality parts. Fast shipping. Great price.will order from here again
January 19, 2021
Install wasnt to bad. Watched the install video and everything went smoothly. Product worked as described. Very happy with the outcome.
Perfect fit.
February 3, 2021
Solid item. Fit perfectly. Shipping was fast. Not my 1st time using 1aauto and will not be my last.
F150
February 23, 2021
Shipping great, quality looking part, working good.
Great parts at a great price
February 26, 2021
New hubs and 4wd actuators on my 2012 f150 fit and function perfectly thank you!
Highly recommended
March 2, 2021
They came in fast and very good product and with their installation videos it made it easier and simpler to install
perfect fit
March 4, 2021
These hub assemblies fit perfect and were easy to install. Would definitely recommend them and I have had great experiences with 1aauto.
Great product!! Wheel Bearings
March 8, 2021
Showed up on time and the install was outstanding. These went on my sons 2013 f-150 he travels from Virginia to NC because hes in the Navy so the price was right for his budget
Great Quailty and Fast Delivery
April 24, 2021
The wheel bearings went out in my 2013 F150 4x4 and this part fit perfectly. The accompanying installation video was excellent as well.
Watch for free play. These did not work out.
May 20, 2021
Instructions and installation was good but the bearings themselves were not good. I have lost about 4-6mpg with them as they are tight and my wheels are hot to the touch everytime I drive my truck. Now I have a hum coming from the passenger side when making a left turn. These are definitly coming off and being replaced with motorcraft.
Hub bearing
May 20, 2021
these hub bearings were a direct fit great cost an great quality I've used 1a auto in past an had great luck
2014 For Expedition- Hub assembly
June 2, 2021
Fast in time shipping, fit perfect and is working great!
Would definitely recommend
June 2, 2021
Exactly what I needed. The parts arrived in a timely manner.
First time auto part install
July 14, 2021
Definitely not a mechanic but these parts installed perfectly on my 2014 f-150 with the auto-locking hub actuators. I probably could have gotten away with swapping out one hub but for the price the set comes for, I went ahead and replaced both. Saved a ton by doing it myself, even after buying the few tools I needed for the job and only took a few hours!
2 for the price of others 1
July 24, 2021
Excellent prices! Some other auto parts stores were charging the same amount for a single hub. Fast, excellent shipping!
O yeah!
August 23, 2021
They fit great.very smooth.Thanks.
great part
November 5, 2021
Perfect fit, works great!
November 17, 2021
They were a OEM match. Had them a week seem to be working. Only time will tell about quality.
Very satisfied
December 8, 2021
Very fast shipping and super easy install with the help of the video.
You get what you pay for sometimes but not with these.
December 26, 2021
These went in easy and worked great for about 6 months and only about 6000 miles,
Now the same humming noise is back, You get what you pay for with these. I will not buy them again and will spend more for a quality product.
Happy with the product
April 24, 2022
First off Im only rating it 4 stars because Im only a month into driving on these ! They came on time but the shipping destinations were strange being they went an extra 250 miles south before I got them in the opposite direction but no harm or foul on that ! Ive used this brand before on a Buick and had lots of luck with them so when I needed some for my truck it was a no brainer . So far so good they are holding up well but like I said its only been a month so far. So we will see, I do however hope they last like I remember
May 26, 2022
Easy to replace. Parts fit as intended. We'll see how long these last.
Not impressed, would not purchase again.
June 29, 2022
Put these on my 2012 King Ranch F150 at around 59000 miles. I installed them along with a 6 Lift and a complete new front suspension (ball joints, struts, A arms and tie rod ends). I am now at 64500 miles and my front driver bearing is completely shot already.
Very disappointed in this product!! Will not be replacing with this brand even though there is a warranty..
Wheel bearings are a pain to install, so Ill be using a known better product for replacement on this go. Parts were installed correctly with correct torque, and new hub actuators were installed under vacuum.
Perfect fit
July 27, 2022
Got car perfect, however I no longer have car.
Great part
January 6, 2023
Went on like it was supposed to.
??
March 2, 2023
Hubs working great
March 30, 2023
Great product, no problem installing and Great price.
Great price
May 27, 2023
Great price and works as they should.
10/10
August 8, 2023
Great super easy install plus a YT install video very impressed with the quality.
December 6, 2023
Shipping was fast and everything fit as expected! How-To videos help out a ton. Thanks!
Wheel bearing
March 31, 2024
Fit good and works how it should.
Great price, good quality!
September 10, 2024
So far have a out 4k miles on them. They seem good so far. One a little bit louder than other but no grinds on any weird vibrations. But for the price can't beat it. Would buy again and recommend.
Front wheel bearings
October 22, 2024
They were as good or better than factory.
perfect.
October 22, 2024
perfect fit. videos walk you through the whole process.
Ford
October 27, 2024
Hubs work great and they were easy to install. Good factory replacement
Customer Q&A
I have the hd towing package will these support this?
July 21, 2018
10
These will fit the following vehicles:
2011-2014 Ford Expedition 4x4 for Models with 6 Lug Wheels
2011-2014 Ford F150 Truck 4x4 for Models with 6 Lug Wheels
2011-2014 Lincoln Navigator 4x4 for Models with 6 Lug Wheels
July 22, 2018
T I
10
Yes , they will work. Quality product and no issues . Same as OEM.
July 22, 2018
Ron M
10
I think you might have 7 lugs instead of 6 which these will not fit. These are for the 6 lug hubs.
March 18, 2020
H A
10
Yes, As long as you have the 6 lug, 4x4, Mine has the same w/ HD towing.
October 15, 2020
S D
what does limited lifetime warranty mean?
April 19, 2020
10
Hello Amber! In the event this item should fail due to manufacturing defects during intended use, we will replace the part free of charge.
April 20, 2020
T I
Are these already greased if not then what grease do I need?
June 23, 2020
10
These parts will not come as being greased and do not require any special grease. Please do not hesitate to contact us with any further questions.
June 23, 2020
Emma F
10
When I installed these bearings in my truck I only greased the drive shaft itself when I reinstalled it for that I recommend a general waterproof bearing grease it been trukin along with no issues so I don't think additional grease is needed but if you want you can always try to get some more I. There
June 23, 2020
Hamilton J
10
They come ready to install! No need to do anything. Just make sure you torque every proper specs!!
June 24, 2020
D A
Do these come with the axle nut that Ford recommends replacing?
September 28, 2020
10
Thank you for the inquiry. The axle nut is not included and we currently do not carry it. Please let us know if you have any additional questions.
September 29, 2020
Andra M
I have a 2011 ford raptor will this hubs fit?
November 25, 2020
10
Yes, according to the information you provided, this part will fit your vehicle.
November 25, 2020
Emma F
Does this include the iwe actuators?
December 29, 2020
10
No these do not include the 4WD actuators.
December 30, 2020
T I
Does it matter which side they go on? You get 2 assemblys does it matter which side they go on or are they specific driver side passenger side?
October 17, 2022
10
They are not side specific
October 17, 2022
Andrew S
10
It doesnt matter they are interchangeable
October 17, 2022
John S
10
Doesnt matter what side. They are both the same
October 17, 2022
Robert P
10
These parts are not side specific and will fit for both sides.
October 17, 2022
Emma F
10
It doesnt matter they are interchangeable
October 18, 2022
John S
Will this fit on my 2011 f150 FX2?
February 14, 2023
10
Hello, this is listed to fit 2011 Ford F150 Truck 4 Wheel Drive with 6 Lug Wheels.
February 14, 2023
Ricale A
Are these parts homologated by theDOT (Department of Transportation) or the SAE (Society of Automotive Engineers)?
April 9, 2023
10
These wheel hub assemblies do not have these particular certifications.
April 10, 2023
Emma F
does this also replace the IWE?
June 12, 2023
10
Our parts are exact replacements for your vehicle's OEM parts. As long as your vehicle specifications match up with our listing, these parts will directly fit and function like the originals.
June 13, 2023
Kemal S
i have a 2013 F150 XLT supercab 4 wheel drive. will this fit?
January 22, 2024
10
yes I have a 2014 FX4 and they went right on no issues
January 23, 2024
Elwood C
10
Yes they will. I installed mine on a 2-14. Works very well.
January 23, 2024
Austin R
10
I dont know..I'm not a very good mechanic... i installed them on a 2012 F150 4x4 with no issue. They fit up fine and work great. I did watch several vidoes from A1 that were extremely helpful' A lady did the best video just FYI!
January 23, 2024
Daniel W
10
I bought and installed these 4 wheel drive actuators for my 2014 F-150 XLT. They were a straight forward install. I watched a YouTube video which was helpful. They worked great
January 23, 2024
Ken C
10
Yes they will. I installed mine on a 2-14. Works very well.
January 23, 2024
Austin R
10
Yes, this part will fit your vehicle.
January 23, 2024
Meghan R
Will these huds fix my 2012 ford f150 Fx4?
September 5, 2024
10
As long as your vehicle is 4WD with 6 lug wheels these parts will be correct for your vehicle.
September 6, 2024
Nick R
Lincoln is a registered trademark of Ford Motor Company. 1A Auto is not affiliated with or sponsored by Lincoln or Ford Motor Company.
See all trademarks.


