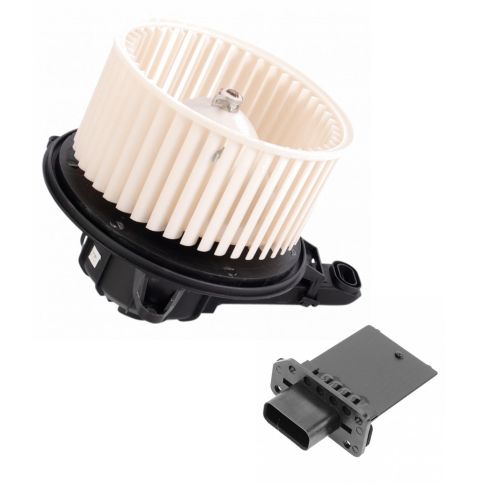
1AHCK00078-Ford Lincoln HVAC Blower Motor Kit TRQ HMA80223

Replaces
2009 Lincoln Navigator From 3/31/09 Production Date Front HVAC Blower Motor Kit TRQ HMA80223

Product Reviews
Loading reviews
4.10/ 5.0
21
21 reviews
Blower Motor F150
February 11, 2020
The blower motor & resistor fit with no issues in my 2013 F150 and it is as quiet as the original.
Rplacement blower for vehicle heater
March 5, 2020
I am a female. I purchased this part to fix the heater in the truck. It was very easy to take the old one out and to replace the new one.
The heater would not heat the vehicle and was making a horrible grinding noise. We figured this might be the problem and it was exactly what was wrong.
Heater fixed and we did not have to pay HIGH labor charges to get it fixed.
Pays to do things yourself!!
Saved $200
April 30, 2020
Fit perfectly. Saved $200 buying from 1A. Wonderful customer service.
First one sent was trash second seems to be good
June 16, 2020
I received the first blower on time. Installed it buy watching your you tube video , it started smoking and sounded like rocks were in it! I emailed you there and you sent me a new one and I didn't have to ship the first one back. So second time installing it works ??. ALL GOOD THX
Works
April 3, 2021
Works good. Pain in butt to install (20 minutes) though.
April 19, 2021
just as good as the factory
October 6, 2021
just right
December 13, 2021
Worked out great!
February 20, 2022
Worked great. Good price. Easy to change out.
2011 Ford F150
April 16, 2022
Have a 2011 F150 and the blower motor went out at 178k miles. The YouTube video was helpful and made the installation easy.
June 29, 2022
Worked fine but then stopped working again after awhile
Perfect!
July 14, 2022
Works like a charm
when the need for other parts arises , A1 will be the first place I look
August 12, 2022
I was very happy all around
The hunt for the part , the description of the part , ordering it and the delivery was all a pleasant experience
Though I did not install it ( far from mechanically inclined ) the video showing installation was informative
Thanks
Would recommend
August 13, 2022
Giving 4/5 because I feel like it doesn't perform quite as well as the original did. But for the price and the quick shipping, completely worth it. As far as installation goes, I had to invest in a 8mm ratchet wrench. The back screw for the motor is barely accessible. Tried with just ratchet and socket, and again with a swivel adapter and finally with just a wrench with no luck. The helpful lady in the video does a great job at explaining how to remove and then reinstall.
February 3, 2023
Not good the plastic frame broke and the squirrel cage flew apart. After 6 weeks. Had to buy another one. It is 10 below zero here. I drive 52 miles to work. Had to take a day off. Will be a little while before I buy again
May 23, 2023
Works good
One year wonder
August 5, 2023
Went out after one year. Back under the dash replacing it.
Another successful repair with 1A Auto parts.
February 29, 2024
The parts arrived safely and packed very well. The video with Sue on the installation was excellent! I wouldn't be upset if she did all the installation videos. In fact, my wife was inspired to help me with the next project because of Sue's video. Except for its location and tight area, the installation went smoothly. The parts looked identical to the factory original except for the branding. The function of the parts so far is flawless. The price was excellent also. Thank you 1A Auto! I would definitely recommend 1A Auto for all DIY repairs. I've never had anything but quality, reliability, professionalism and success from 1A Auto.
Ok not OEM but ok
July 4, 2024
Seems a little bit noisy but works
Obnoxious Whine. Removed after test drive.
July 6, 2024
The motor was obnoxiously loud and whined constantly. I had to remove it and replace it after the test drive.
July 19, 2024
Fast shipping great product. Wish it was made in the USA . But that is what we deal with everyday.
Customer Q&A
Is the fan balanced?
September 29, 2019
10
Thank you for your inquiry! Yes the fan cage is balanced.
September 30, 2019
T I
Is the fan balanced?
September 29, 2019
10
This fan should come as being balanced. Please let us know if you have any further questions.
September 30, 2019
Emma F
Lincoln is a registered trademark of Ford Motor Company. 1A Auto is not affiliated with or sponsored by Lincoln or Ford Motor Company.
See all trademarks.


