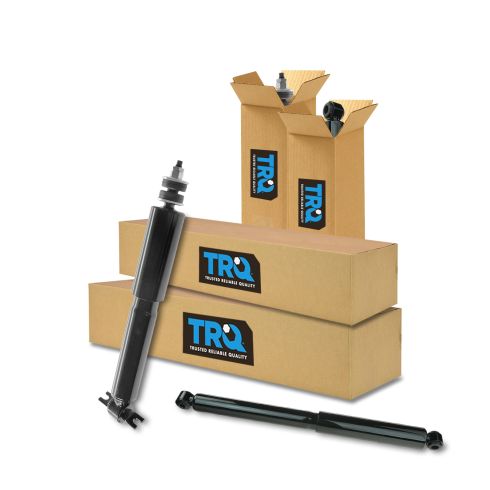
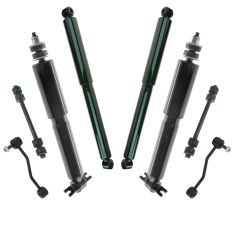
1ASSP00592-Ford Mazda Front & Rear 4 Piece Shock Absorber Set TRQ SBA60284

Replaces
2005 Ford Ranger STX Rear Wheel Drive Front & Rear 4 Piece Shock Absorber Set TRQ SBA60284

Product Reviews
Loading reviews
4.45/ 5.0
33
33 reviews
Fit perfectly
September 25, 2017
These fit my 98 Ford Ranger perfectly and now my truck doesn't bounce down the road.
1A Auto is Great
February 13, 2018
My first purchase from A1 Auto. Fair priced and quick shipping. Good quality merchandise. Would purchase from them again. They even have installation videos to show the correct way to install.
2000 Ford Ranger shocks
November 28, 2018
Got shocks for my 2000 Ranger went on an easy but that wear out very fast I'm thinking they were a cheap part.
Look just like the Motorcraft
July 4, 2019
These look just like the oem Motorcraft shocks we took off my truck and fit like a glove..
Good product easy to install very good quality
July 14, 2019
I bought this product in June of 2019 and its a great product good customer service from 1AAuto and I have been pretty satisfied with the product seems to be good quality. I really like the support system by 1AAuto
Ford Ranger shocks
August 7, 2019
Great prices, product, fit, & packing w/fast shipping.
Shocks 2003 Ford Ranger XLT
September 2, 2019
These shocks fit my 2003 Ford Ranger XLT Extended Cab RWD perfectly. They are a vast improvement over the shocks I removed which were well beyond their useful life. My only potential concern would be that inclusion of new bolts for bottom of front shocks could prove handy. I was able to save and reuse my old bolts but have known them to break.
00 ranger 2wd shocks
September 29, 2019
All 4 were in need of replacement. Install was easy, fitment was perfect and truck rides much better.
Ranger parts
October 8, 2019
Thanks for the good service. Parts arrived quickly. Easy to install.
1ASSP00592-Ford Mazda Front & Rear Shock Absorber Set
April 23, 2020
Although it said if would fit my Ford Ranger, it simply did not. Since the ranger comes in so many different sub models, I recommend always using a VIN number to get the correct shocks for your car or truck. I recommend 1A Auto do the same. I love your videos!
2002 Ford Ranger shock absorbers set
April 28, 2020
Ordering from 1Aauto was easy and straight forward. Arrived quickly, installed them. Now I have a smooth riding truck again. Thanks!
Very satisfied customer
September 7, 2020
I've ordered a lot of Auto parts online in the last six months from other companies and through ordering came across A1 about 3 months ago. I ordered a numerous amount of parts and they've always came on time or before the date of delivery. Items have worked excellent and not a single return. Thanks A1
2003 ranger winter beater
September 23, 2020
best price I could find delivered on time good quality thank you
The part was correct with the 1st order
April 21, 2021
I am satisfied with the product. I purchased 4 shock absorbers at a great price. I replaced all four original shock absorbers, (20 year old original parts on my 2001 Ford Ranger XLT), at the same time. It made a big difference in the ride. Thank you A1 Auto.
Exactly what you need to stop that sloppy ride
June 7, 2021
Packaging was great. Fast shipping even to Hawaii! Install was a breeze as you don't need to remove anything extra. Perfect fit and freshened up my suspension!
Best warehouse supplier in the United States. CUSTOMER FOR LIFE
June 9, 2021
When I got my new shocks and opened them up and measured them against my old ones they were the exact same fit, easy to install. And I only paid like $147 for 4 shocks for my 2003 Ford Ranger xlt 4wd. Every where I looked for 4 new shocks they wanted at least $175-250. 1A Auto is the best place to buy anything from, and their customer service is outstanding and very helpful. I will be getting all of my parts from them, I'll be a customer for life. Thanks 1A Auto.
98 ranger
July 8, 2021
Great value for the price. Seem a bit soft so I dont know how long theyll last, put all four bolted right into place.
05 Ranger
July 13, 2021
Price was great. Way better than several auto parts that I visited.
Too short.
August 16, 2021
Have a 2002 Ford Ranger 4x4 Off Road. The shocks were the correct 'bolt-up', but way too short. Limited travel by 4 inches. They either sent the wrong ones or I have a different kind of ranger. Price was too good to be true, as usual.
December 10, 2021
Work good
Ranger
December 22, 2021
Thanks
January 17, 2022
Great quality and great price. About 2 months in and my 2001 Ranger is waaay smoother
Shocker
February 24, 2022
There are ok . I thought they were a lot more beefeater might get a different set .
March 1, 2022
Fit great, easy to install
Smooth ride
May 27, 2022
Great shocks and rides perfectly all for an affordable price! I definitely recommend.
Noticeable improvement overall
June 29, 2022
2001 Ford Ranger V6 3.0. Had to adjust after riding around a little. Huge improvement in ride quality around brick roads where I live. Likely to replace my whole front end suspension with same brand. Dont forget to get a shop alignment.
January 21, 2023
Arrived on time and performed as expected. Will continue to use 1A Auto
Good direct-fit replacement parts.
February 7, 2023
Price beat the local auto parts store by a huge amount, the shipping was quick, they fit perfectly, and my grandson's truck no longer handles like a grocery cart.
Shocks
February 11, 2023
Easy to install work like a charm
Front and rear shocks for ford ranger
March 15, 2023
Like them fine. Do the job they're meant to do
Perfect
March 31, 2024
Excellent product, easy to install
Renew Your Ride
May 11, 2024
Used these as replacements on a 2010 Ranger XL with 201,000 miles on it. I didn't realize how bad my shocks were until after I replaced them. I had gotten used to the bounce and dip. The ride and handling is now very different. Should have replaced the old factory shocks years ago. Rides and handles like a much newer truck now. Reasonably priced and easy to install. Will buy again in a few years.
Would recommend (2001 Ford Ranger XLT) **Rear wheel drive*"
August 18, 2024
It's a product you can order if you are in a pickle so far so good will give it 5 stars after 10,000 miles. :)
Customer Q&A
How difficult are these to unstall. Is there any special tools required?
April 20, 2019
10
You will need jack stands and a floor jack if you are working on the ground. Just to name a few things you need it will be penetrating oil in case the bolts are rusted, basic hand tools so ratchet, extensions and sockets. This will be a intermediate level install so you will need to be familiar with working on vehicles.
April 20, 2019
Corey M
10
Rather simple. No special tools needed.
April 20, 2019
B L
10
Not difficult to install, but in my case difficult to uninstall the old ones due to rust. PB blaster, heat, time, breaker bar. Before I did it I watched a few youtube videos to get a sense of what is involved.
April 22, 2019
B R
What is the brand of the shocks and struts?
March 28, 2020
10
Thank you for your inquiry. These are manufactured by TRQ, TRQ is a high quality, high-end name brand that we offer and back with our 1A Auto Limited Lifetime Warranty. These will fit a 1999 F250 Super Duty Truck as long as it is 4WD not 2WD. Please let us know if you have any further questions.
March 30, 2020
A C
hi im looking for shocks for my ranger 2005 edge model, why would the majority of the shocks not fit the edge model?
May 6, 2020
10
Thank you for the inquiry. This is not the correct part for your vehicle, but we do carry the one you need as long as it is rear wheel drive.. The correct part number is: MNSSP01003
Please let us know if you have any other questions. Thank you!
May 7, 2020
Christa R
Where are these parts made in?
July 9, 2020
10
China, not the best quality but I installed these bach in 2018 and they still in place.
July 10, 2020
Gene- L
10
Thank you for the inquiry. Our parts are made my many vendors, both here in the US as well as overseas.
July 10, 2020
Christa R
Im not finding my model in the vehicle fit guide . so do these fit n work for XLT 4X4 SUPER CAB? 4.0L ?
October 5, 2020
10
Thanks for your inquiry. This part is specific to vehicles with a particular set of options. We will need more information about your vehicle to confirm the fit.
The information we will need in order to assist you is your VIN.
October 5, 2020
Emma F
Will these fit 2007 ranger sport ? Rear wheel drive
October 22, 2021
10
Currently, we do not carry this part for your vehicle. We're always updating our inventory so please check back soon!
October 22, 2021
Emma F
Would this fit on a 4 inch lift?
May 5, 2022
10
No these will not work on a vehicle with a 4" lift.
May 5, 2022
T I
will these fit a Ranger Edge?
August 4, 2022
10
We would be happy to check. What is the year of your Ranger and does it have 4WD or RWD?
August 4, 2022
Andra M
10
Yes.
August 6, 2022
C O
will these fit my 2001 Ford Ranger XLT rwd? Do you have replacement nuts and bolts for this installation?
February 6, 2023
10
Yes, this part will fit your vehicle. New hardware is not included with this item. You may be able to reuse your original hardware if it is in good condition.
February 7, 2023
Jean O
are these firm? i mistakenly bought monroe truck shocks and they're way too bouncy. feels out of control
July 1, 2023
10
The guy told me they were like factory ones. I could not tell the difference in ride onc installed
July 2, 2023
Mark C
10
These shocks should be able to restore your vehicle back to its original ride.
July 5, 2023
Emma F
Hardware included?
August 2, 2023
10
No
August 3, 2023
Mark C
10
New hardware is not included with this item. You may be able to reuse your original hardware if it is in good condition.
August 3, 2023
Emma F
Will this fit a 04 Ranger Edge with torsion front suspension?
September 11, 2023
10
These parts are not listed to fit a Ranger Edge.
September 12, 2023
Kemal S
Will this fit a 2002 ford Ranger XL single cab?
January 4, 2024
10
These parts are listed to fit a 2002 Ford Ranger XL Rear Wheel Drive .
January 4, 2024
Kemal S
Ford is a registered trademark of Ford Motor Company. 1A Auto is not affiliated with or sponsored by Ford or Ford Motor Company.
See all trademarks.


