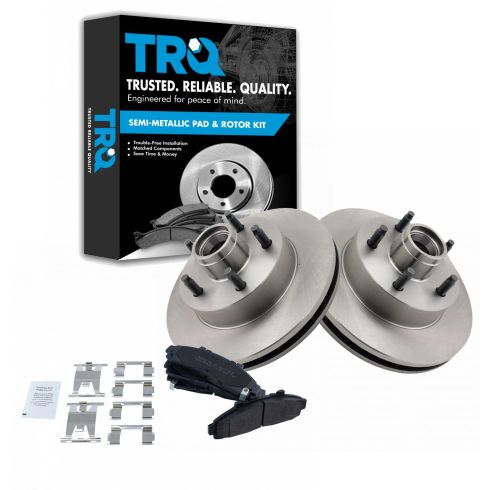
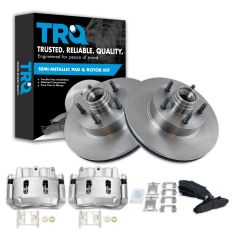
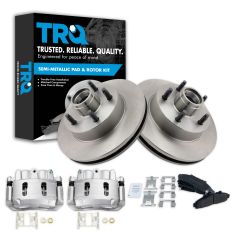
Brought to you by 1AAuto.com, your source for quality replacement parts and the best service on the internet. Hi, I'm Mike Green. I'm one of the owners of 1A Auto. I want to help you save time and money repairing and maintaining your vehicle. I'm going to use my 20 plus years experience restoring and repairing cars and trucks like this to show you the correct way to install parts from 1AAuto.com. The right parts installed correctly, that's going to save you time and money. Thank you and enjoy the video. In this video, we're going to show you how to replace the front brakes on this 1996 Ford Ranger. This is a 2-wheel drive truck. Here's a list of tools that you'll need if you're doing everything, and when I say doing everything, I mean you're removing the brakes, removing the rotors, having the rotors turned down and then putting them back on. You'll only need about half these tools if all you're planning on doing is replacing your break pads.
Okay, to start out there's a little slot in the cover. Take your screw driver, pry that off. Now, you're wheel is held in by 19 mm bolts. If you don't have air tools, you'll want to start on the ground, loosen the lug nuts, then raise the vehicle. I'm going to use an impact wrench to remove. Fast forward here as we remove the lug nuts and then remove the wheel and tire. Now, with the wheel off, we can see our brakes actually are in decent shape on this vehicle. One thing you can do is on the rotors, just run the back of your fingernail up and down both the outside and the inside. Make sure you don't feel any large grooves and then you can see the pads, they've still got probably 10- 20,000 miles on them, depending on how you use your brakes. We'll show you how to remove it and reinstall the brakes anyways. The next thing you want to do is take the caliper off, which is these 2 bolts here. On this vehicle, these bolts are 1/2 inch. These might have been replaced, not sure, but yours could vary in size. They should come off pretty easy. We'll fast forward again as we finish removing those 2 bolts. What you can do to get these off is take a large screwdriver or pry bar and pry out on the caliper. That kind of loosens it up. The caliper comes up and we'll put it right here.
Your brake pads, you see that one came right out and this one pulls out the back. I'm just going to clap the dust off of them and you can see, they are in pretty good shape. This grove right here is an indicator. Once that groove disappears, that's when you know they need to be replaced. The next thing you'll want to do is, if your rotor has a lot of wear on it or is in exceptionally bad shape, you'll want to replace that. I'll show you how to replace the rotor. On the backside here again, you'll want to remove 2 larger bolts here and up here. These bolts are 15 mm and I'm going to use a piece of pipe and put the pipe onto my ratchet and pull for some extra leverage. To get at that top bolt, I turn the steering back a little bit. That clears the way for the socket to get onto that upper bolt. Fast forward again here. Again, use the pipe, put it on the wrench. Also, if you have a breaker bar, that would work as well. Then, pull the bolts the rest of the way out and then the caliper bracket comes off. With a regular screwdriver, I'm going to pop this cap off. It should come off easily. You may need to use a hammer or something. But since this is a grease cap- Inside here, you'll want to use pliers to remove this cotter pin and then this cap comes off and then there's a nut underneath there. Needle-nose pliers. Bring this down. Sometimes the easiest thing to do is just pull and break that off and then the pin comes right up and out and then that comes off. This nut is 27 mm and this part comes right off by hand. That's not unusual. These are not supposed to be very tight at all.
Take that nut off of there. Once that nut's off, you can just give a little pull on the disk and you'll see the washer and bearing kind of pop out. Actually you can see the washer and my bearing come out. I just put my caliper back there, and my whole rotor comes out. On this truck, I do replace the front bearings and if you want to see that in more detail, just check out our other videos and you can see how to get the bearings out. What I'm going to do here is just show you how to put the bearings back in because if you're putting on new rotors, you'll probably need to install the new bearings and races into the new rotors. Now, we're going to clear this of grease. I'm going to take our new bearing race and the thicker end goes inside. This socket was just a tiny bit smaller than the race itself. I put it down in there. This side's just a little lower so when I first tap it, I'm going to tap it and get that side started. Just kind of check to make sure it's going down there pretty evenly. When it's nice and solid just give it a couple taps and make sure it's in there correctly, make sure that the line all the way around is nice and even. That's in there all the way. Get a nice clean paper towel and wipe this out. You don't have to get every little speck of grease, but just make sure there's no dirt or anything in there. The thicker side goes down in first. I do happen to have a proper bearing installation tool, a race installation tool. What you can see me do here is I've put the race down in there and just give it a couple taps. I just want to make sure that it's going in nice and straight and then once I'm confident that it's going in properly, I hit it harder. You do need some time of metal tool that's slightly smaller than the bearing race. You cannot do this with a wood block or anything like that, but a very large socket would work, just like on the front side. As I said, I do happen to have the correct tool to put that in.
Even after inspecting it and I'm confident that it's in, I give it a couple more good taps to make sure. Now take some good quality bearing grease and put it right in. You don't want to get too much on the race surface. I'm more putting it kind of in the middle of the hub and I kind of clear off the race surface with my finger. Now the bearing, I just take it and kind of scrape it off into this channel here, press it in. Do the same thing with the front side, kind of press it into that crack. Get it on the roller surfaces, again not a ton. Here you don't want it all thick and gloppy, you just kind of want to coat them. Then same thing with this inside surface, take any out that's extra and just leave a film. You can see here on the race surface itself, I'm just leaving a film. Then just drop the bearing in and again make sure, on the inside of this surface it's basically just a film as well. Now, you want to put your seal in. We'll put that down. Put a piece of paper towel over it so no dirt gets down there and then a piece of wood or something will do the same trick. There you go. Let's turn this back over. I'll take some grease and pack it in on the inside here. Then a film again, just a film on the bearing race there. So we've got our outer bearing, grease into the crevices and coated the roller bearing side. Put our rotor on. Insert the bearing. If you like, take a little bit of grease, stuff it in there again, right around and pull out the excess. Put our washer on. Put the nut back on. Now what we're going to do is we're going to tighten it. We're going to roll the rotor a little bit, keep tightening it until it's pretty well seated. This just makes sure that you kind of squish the grease out of the way and the bearing's got a good seat.
Now, we're going to back it off and then we're going to pull it to about 3-4 foot pounds, not very tight at all. Then we're going to put this back on. Put our outer pin down through the nut. Nice clean paper towel first, make sure that the front and back surfaces of our rotors are clear of grease. Now use some mineral spirits or brakes parts cleaner and really clean the rotor surface. Make sure there's no grease at all. On this bracket, you want to make sure that these are nice and free. If they're not, you can actually just pull them out, clean them and grease them and then put them back in. We'll just speed it up here as we put that bracket back on and use a 2 larger 15 mm bolt to start it. Okay, we tighten these bolts 80 foot pounds. Now you want to push these pistons back into the caliper, so take your old pad and just kind of put it on there like that, a large c-clamp and the pad takes care of making sure the pressure's on both of the pistons and we're pushing back in as far as they'll go. Again, our pads are in fine shape, so we'll just put the old ones back in. Put them in like that. Bring your caliper down. Now, push in on your slide bolts here. Put the caliper in place. Take your bolts and you might need to twist and slide them a little bit to get your bolt started. These bolts don't have to be too tight. They really just hold things into place. The correct torque is probably around 12 to 15 foot pounds. I'm just going to tighten them further with this smaller wrench. Put our tire back on.
I'm going to thread the lug nuts on by hand just to make sure that they don't cross thread and then I'm going to tighten them preliminarily with my impact wrench. With the tire on, they're preliminarily tightened, you want to just take it and kind of shake it and look for any play in that bearing at all. You shouldn't see any. If you see a little play, then you'll want to tighten up your nut a little more. That looks good there. We'll put our dust cap back in place. Now we're going to torque the lug nuts to 100 foot pounds each and then we'll put our center cap back on. Before road testing, make sure your brakes are working properly. Pump them up a bunch of times to reset the pistons and the calipers and then do test stops from 5 miles and hour and 10 miles an hour before you road test.
We hope this helps you out. Brought to you by www.1AAuto.com, your source for quality replacement parts and the best service on the internet. Please feel free to call us toll free 888-844-3393. We're the company that's here for you on the internet and in person.