Brought to you by 1AAuto.com, your source for quality replacement parts and the best service on the Internet.
Hi, I'm Mike Green. I'm one of the owners of 1A Auto. I want to help you save time and money repairing and maintaining your vehicle. I'm going to use my 20 plus years experience restoring and repairing cars and trucks like this to show you the correct way to install parts from 1AAuto.com. The right parts installed correctly, that's going to save you time and money. Thank you and enjoy the video.
In this video, we're going to show you how to replace the side rear view mirror on this 2002 Mercury Sable, same as any 2000 to 2005. We do the driver's door, the passenger's door is basically the same procedure. Tools you'll need are pretty basic: 6, 8, and 11mm socket with a ratchet and an extension, a Phillips screwdriver, and a door panel clip tool or a putty knife.
Use an 8mm wrench, disconnect my negative battery cable. This helps protect your battery from running down while your doors are open. To remove your door panel, you're going to start by removing a series of screws in the front. There is one here, then there are two down below, two right behind the door pole there, and then there is also two on the back. You're probably going to have to use the shorter screwdriver for this one in the front. I'll just hit fast forward as I remove the rest of them and they are all Phillips screws.
Now you're going to want to use a door panel clip tool. If you don't have one of these, a household putty knife will do the same thing. Put it in behind, and you slide it down until you come to one of the clips, and then pry it out. There's going to be a clip up higher as well. Mine is coming off pretty easy because it feels like it's probably been off before. The door panel clip tool, you use the same way. Get it in behind, then you come to one of the clips, then pull off.
Once you have it loose, then pull it straight out. Pull it up off of your door lock and then off of your door handle here. Now just reach in behind, each one of these has a little tab you press and disconnect. Down under here the tab is on the back side, I'm actually going pulling with my finger like that, then pulling down. Once those are all unplugged, your door panel comes off. A little 6mm bolt right here, remove that. This panel comes off, it should have a little pin there that pulls off, but it looks like this one is broken. Now you can pull this off here. Right here is our connection, press on the little tab right there, pull it up and off. There is three 11mm nuts to remove. Now I'll speed it up a little here as I take those nuts off. Just be careful not to drop them down into the door. Your mirror comes off.
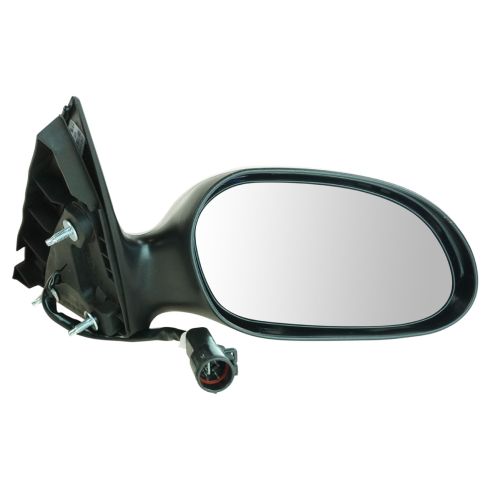
Here's our new mirror from 1A Auto, you can see if you have the puddle light option, it has that. It has the heat and the correct connector. It comes with a separate back and you can just put this on there, or you can paint it to match your vehicle like the original one was. To do that, you can be as crude as just getting some Krylon paint from a hardware store, or you can go to an auto parts store that has a paint department that can match the color for you, put some paint in an air-charged can and match the color.
For this vehicle, the original mirror is fine, so I'm just going to remount that. I don't need to put a new mirror on a car that doesn't need one. To re-install, just reverse, put your harness through here. Make sure you get the mirror in place, hold it on and start your 11mm nuts on. It's a good idea on these two lower ones, put in the socket first, feed it in. Then reconnect your harness. Put the insulator pad back on, then put the little panel on, and start to screw in, then tighten it up. To re-install a door panel, you've got pins in certain places, two up top and there's a couple down here. I'm missing a couple because this has been apart before. You also have these two larger lineup pins. You want to put your door up, put your panel in place. Reconnect all your harnesses, green one goes there, power our mirror goes up here, and these two go into the power window switch. You want to put your door handle through and then slide the panel back. Lift it up, let the door lock push through. Now peek in behind and lineup those large lineup tabs, both the front and the back. Then just make sure that your pins are going in to the holes. Now put your screws back in, starting with the one in the front here.
I'm just going to speed it up here as I put the rest of those screws in. When you tighten them, you want to tighten them nice and firm, but you don't want to over-tighten them. Once you're done this, reconnect your battery and you're all set.
We hope this helps you out. Brought to you by www.1AAuto.com, your source for quality replacement parts and the best service on the Internet. Please feel free to call us toll free, 888-844-3393. We're the company that's here for you on the Internet and in person.