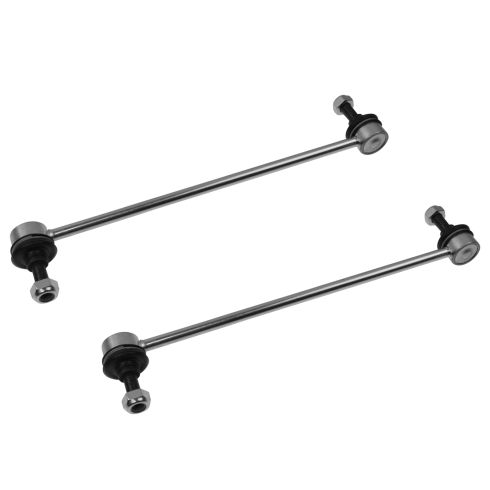
1ASFK00245-Front Driver & Passenger Side 2 Piece Sway Bar Link Set TRQ PSA55625

Replaces
2008 Ford Escape Front Driver & Passenger Side 2 Piece Sway Bar Link Set TRQ PSA55625

Product Reviews
Loading reviews
5.00/ 5.0
13
13 reviews
Sway bar
October 31, 2017
this was exactly what my car needed, the new sway bars were installed and now the care is running smoothly
1ASFK00245
November 13, 2018
I needed the sway bars bad ! I was so glad to get them fast and put them on . Yes they solved the problem . Than you A1 Auto . You will hear from me again soon . Either for me or a friend .
Perfect fit
March 28, 2019
These were so stiff compared to my worn-out ones that for a moment I thought they were the wrong size! Good replacement part. Make sure you tighten them down tight or tighter if you hear any clunking.
Exactly what I needed
September 7, 2019
Fit perfectly, and when on easy. Fast shipping and no complaints here!
April 27, 2020
Easy to install and very helpful video
Sway bar
November 20, 2020
Front end noise was getting worse due to worn and cracked links. Bought these and that smooth ride is back.
Fit perfectly!
May 18, 2021
Products arrived in a timely fashion, fit perfectly, and were relatively easy to install!
April 28, 2022
Ups should be delivering today around 4 PM plus tax ????
Great videos and products
July 30, 2022
Easy to install, did the job. Thank you for the great videos. I have recommended your website to many folks!!
Perfect
January 8, 2023
Perfect fit
Fixed rattle, cheaper than struts!
June 17, 2023
Fast delivery and perfect fit.
Took care of the annoying front end rattle. Glad I got these first instead of struts!
Sway bar ends
April 29, 2024
1A never disappoints me. Fast delivery and the parts are top quality that fit perfectly.
May 16, 2024
Great part I recommend 100%
Customer Q&A
do these need to have grease applied?
March 15, 2019
10
These are pregreased and sealed.
March 15, 2019
Andra M
10
Im no professional but i dont see why not I personally did not tho they seemed fine on there own.
March 15, 2019
Brian G
10
my husband put some grease on them but not a lot. we followed a video on YouTube that showed us how to remove the old ones and how to install the new ones.
March 16, 2019
Myrna S
Do you have a measurement stud to stud? I bought a pair (somewhere else) that were longer than OEM and now the sway bar knocks on the lower control arm
July 1, 2023
10
Actual Measurements are not listed or available. Our parts are exact replacements for your vehicle's OEM parts. As long as your vehicle specifications match up with our listing, these parts will directly fit and function like the originals.
July 5, 2023
Emma F
Ford is a registered trademark of Ford Motor Company. 1A Auto is not affiliated with or sponsored by Ford or Ford Motor Company.
See all trademarks.


