
How to Replace Front Hub Assembly 2006-10 Ford Explorer
Created on: 2017-06-05
Learn how to replace a bad, failed, or noisy hub on the 06-10 Ford Explorer with the steps in this video
-
step 1 :Removing the Wheel
- Pry off the center cap with a flat blade screwdriver
- Loosen the 32mm hub nut
- Loosen the 19mm lug nuts with the vehicle on the ground
- Raise the vehicle with a floor jack
- Secure the vehicle on jack stands
- Remove the lug nuts
- Pull off the wheel
-
step 2 :Removing the Brake Caliper and Rotor
- Turn the wheel
- Remove the 17mm bolts from the caliper
- Pry the piston out with a flat blade screwdriver
- Lift the caliper off and secure it with a bungee cord
- Remove the 8mm bolt from the ABS sensor bracket
- Pull the sensor firmly out of the bracket
- Disconnect the ABS sensor
- Pull the ABS sensor through and out
- Remove the two 21mm bolts from the caliper bracket
- Remove the caliper bracket and brake pads
- Tap the rotor from the front with a hammer to break it loose
- Remove the rotor
-
step 3 :Removing the Hub
- Remove the three 15mm bolts from the hub
- Pull the hub wiring harness out of the slot
- Tap out the hub
- Clean off the hub area with brake parts cleaner
-
step 4 :Installing the Hub
- Apply a thin layer of grease around the hub rim
- Slide the hub onto the axle shaft
- Hand-tighten the 15mm bolts to the hub
- Tighten the 15mm bolts evenly
- Torque the bolts to 90 foot-pounds
-
step 5 :Reinstalling the Rotor and Brake Caliper
- Attach the ABS sensor to the knuckle
- Clip in the ABS sensor to the clips
- Connect the ABS sensor
- Tighten the 8mm bolt to the ABS sensor bracket
- Apply grease to the hub
- Clean out the rotor with a wire brush
- Press the rotor to the hub
- Tighten a lug nut to the rotor
- Clean the caliper bracket with a wire brush
- Install the bracket to the rotor
- Tighten the caliper bracket bolts
- Torque the bolts to 122 foot-pounds
- Apply grease to the contact points on the clips and brake pads
- Press the pad into the caliper bracket
- Check the play in the slide pins
- Lower the caliper to the rotor
- Tighten the caliper bolts
- Torque the caliper bolts to 53 foot-pounds
- Remove the lug nut form the rotor
- Hand-tighten the 32mm axle nut
-
step 6 :Reattaching the Wheel
- Slide the wheel into place
- Start the lug nuts by hand
- Tighten the lug nuts preliminarily
- Lower the vehicle to the ground
- Tighten the lug nuts to 100 foot-pounds in a crossing or star pattern
- Tighten the hub nut to 184 foot-pounds
- Reattach the center cap
Tools needed
-
Jack Stands
Pry Bar
32mm Socket
Paper Towels
21mm Socket
Ratchet
Anti-Seize Grease
Torque Wrench
19mm Socket
Socket Extensions
17mm Socket
15mm Socket
Flat Blade Screwdriver
8mm Socket
Bungee Cord
Wire Brush
Floor Jack
Hi, I'm Mike from 1AAuto. We've been selling auto parts for over 30 years! We're dedicated to delivering quality auto parts, expert customer service, and fast and free shipping, all backed by our 100% satisfaction guarantee. We've created thousands of videos to help you install our parts with confidence. That saves you time and money, so visit us at 1AAuto.com, your trusted source for quality auto parts.
Use a small flat blade screwdriver and pry your center cap off, and then just work your way around. Use a 32 millimeter socket and a nice big breaker bar, and you want to move hub nut. Now with your vehicle still on the ground, just loosen your five lug nuts with either your tire iron or a 19 millimeter deep socket. Raise and support your vehicle. You'll use jack and jack stands. We do have available vehicle lift. Take your lug nuts off the rest of the way and remove your wheel and tire.
Make sure your axle is free, and this one just pushes nice and easy. You don't want to hit the axle a lot with a hammer because you can mess up your CV joints. A lot of times if it is just stuck, one good hit with a hammer will break it free, and then you can push it on. Turn your wheels, and just get access to the back side. You'll want to remove the bolts that hold your caliper in place. These bolts are 17 millimeter. You want to use a good size ratchet with some leverage. Use a large screwdriver. You just want to pry the piston out a little bit. This will help you remove the caliper. The more you pry this out, the more it sets here and back in. We'll take this, and we will secure it with a bungee, so it doesn't fall down and press our lines.
Give it a little bit center bracket, which is the bolt of eight millimeter. Pick that up there. Pull this from this clip here, and also hold firmly on that cliff. Pull that up there. The ABS sensor connects right in the hood, right underneath the back of the air cleaner box right here. You probably can't see it very well, but there's just little tab. Push it on the tab and disconnect. Once you disconnect it, just pull it through. Pull the lead out and down and free. Now remove these two 21 millimeter bolts that hold the caliper bracket onto the steering knuckle.
Again, you want a good size bar for some leverage. Once all the bolts are out, your caliber bracket and shoes come out. You can also take the brake pads out of here before you reassemble. If need be, you can hit the rotor from the front just to break it loose. Because you want to be careful if you're going to hit it from the back, you don't want to put any dents or dings in it and make it unusable.
It's a good idea to consider a new set of brakes from 1AAuto.com at this point as well. Three 15-millimeter bolts hold the hub in from the back, just see through here. There's another one on the front, and then we're going to use a 3/8” ratchet and 15 millimeter socket and extension to break those free. Just turn your wheels, so you can get to that front bolt. That last bolt coming out. Now for some reason, our hub is coming out easily. I'm going to pull your harness from here. Many times, you'll have to use a hammer. Hit it from the backside where it's clear here, and bring it out. We'll use some brake parts cleaner and really clean up the hub or the steering knuckle before I call the new one.
We have the original hub here on the right and our new hub from 1AAuto.com. They're all exactly the same. The ABS sensor goes in the same. All the mounting points are exactly the same, and the connector is the same. The harness has all the same grommets and moldings to mount the same way. We're going to put the new on. We're just going to put a thin layer of grease, even though you'll probably never have to replace it again. If you do, it'll come apart.
Put it on with the ABS sensor kind of towards the back top. Going to put it on the axle. Push it in, and we'll start one of the bolts in. We'll place a little thread lock on the bolts before we put them in. Now we'll use our socket and ratchet, and tighten these up evenly. You don't want to tighten one all the way. And then the other ones, bring that one in a little bit. Go to the top one, and just keep working your way around. Torque these bolts to 90 foot-pounds. Just be careful that you don't damage your CV boots. Now attach our ABS sensor. Put the armor into that clip.
This comes up here, and that touches on here. The little ear should go in there, and then the bolt goes through. Keep going up, and that clips in there. Ours has a new clip for her, so we'll pull that out and put the new clip in.I'm pointing it up through here. Find your sensor. Pull it up through, and feed it down between the AC hoses and through. Make sure it's not touching your engine, and reconnect it. Brake rotor from sticking to it too much in case you need to get the part again. Okay again, great time to consider new brakes from 1A Auto. If you're putting your old brakes on, make sure your wire brush is trying to clean that out a little bit, so it goes on nice and easy over the hub. Then we'll put a lug nut on just to hold things in place. Great to install new brakes and slides. If you're not, at least clean up the slides with a brass brush before installing the caliper bracket.
Go ahead and install the bracket. Put some intakes. Put some thread locker on the bolts. Move them in and start them. Then we're going to tighten these up and torque them to a 122 foot-pounds. Now put some caliper brake grease on the slides. Carefully not to get it onto rotor itself, inside and out. Great time for new pads from 1A Auto. If you're installing your old ones, make sure you grease the contact points. Then the one with the two circles will be your inner pad, and the pad that has kind of the M shape on it is your outer pad. Make sure that your slide pins are nice and free. If they're not, you can pull them all the way out. Clean them and grease them before you put it back together.
Take our bungee cord off, carefully lower the caliper down. If you were installing new brakes, you need to press your pistons back into the caliper. Use a C-clamp and an old pad, and press them into the caliper piston to reset it. We're reinstalling our old pads, so just put it down, or both in. These are designed so that there's a flat spot on the slide. That slides right in there and holds it in place while you tighten it. Make sure the slide is nice and flush against the caliper. You don't want it to look like that. You want it to look like that, and torque the bolts that go into the caliper to 53 foot-pounds.
Remove your lug nuts. Start your 32-millimeter nut on. You can tighten it preliminary. Best to have a new one, but you can reuse your old one.
Put your wheel and tire back in place, and start on your lug nuts, and tighten them preliminary. We'll tighten our lug nuts to a 100 foot-pounds using a star pattern, and we'll tighten our center nut to 184 foot pounds, and replace the center cap.
Thanks for watching. Visit us at 1AAuto.com for quality auto parts, fast and free shipping, and the best customer service in the industry.
Shop Products


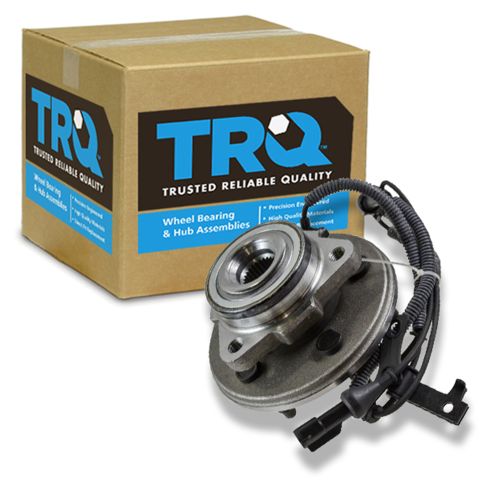
Ford Mercury Front Wheel Bearing & Hub Assembly TRQ BHA53999
- 71 mm
- 82 mm
- 27
- 4.5 in
- 160 mm
- 5
- 6.3 in
- No
- Yes
- Yes
- Triangle
- 2.78 in
- 3.22 in
- 3
- 114 mm
- 1/2-20 UNF
- Taper
- Gen 3

How to Replace Front Wheel Bearing 2000-06 Toyota Tundra
How to repair, install, fix, change or replace a worn out, vibrating or groaning wheel bearing hub on 00, 01, 02, 03, 04, 05, 06 Toyota Tundra

