
How to Replace Front Struts 1994-97 Honda Accord
Created on: 2010-09-21
Learn how to replace clunking or bouncy struts on your 94-97 Honda Accord by watching this tutorial video from 1A Auto.
-
step 1 :Remove the wheel
- Loosen the lug nuts
- Raise and secure the vehicle
- Remove the lug nuts using a lug wrench or 19 mm socket and ratchet.
-
step 2 :Loosen the strut tower brace
- Remove the six 12 mm bolts so that you can move the strut tower brace around and out of your way.
-
step 3 :Remove the front strut shock
- Remove the brake lines from the strut using your 12 mm socket and ratchet.
- Remove the 14 mm bolt and 17 mm nut from the strut bracket.
- Drive the strut out of the bracket using a hammer.
- Remove the three 14 mm bolts securing the top of the strut.
- Pull out the strut.
-
step 4 :Install the new strut
- Put the bracket into place, working it into the bracket.
- Hand thread the bolts in on the bracket.
- Torque the bottom 17 mm nut to 65 ft lbs and the 14mm bolt should be torqued to 50ft lbs.
- Jack up the control arm to alleviate some tension and tighten up the bolts.
- Bolt the brake lines back on to the strut using your 12 mm socket.
- Bolt in the top three 14 mm bolts and torque to 45-50 ft lbs.
- Tighten the strut tower bolts back up.
- Put the wheel back on, lower the vehicle and torque the lug nuts to 75-85 ft lbs using a star pattern.
Tools needed
-
12mm Socket
14mm Socket
17mm Socket
19mm Socket
Flat Blade Screwdriver
Ratchet
Brought to you by 1AAuto.com, your source for quality replacement parts and the best service on the internet.
Hi, I'm Mike Green. I'm one of the owners of 1A Auto. I want to help you save time and money preparing and maintaining your vehicle. I'm going to use my twenty plus years' experience restoring and repairing cars and trucks like this, to show you the correct way to install parts from 1AAuto.com. The right parts, installed correctly: that's going to save you time and money. Thank you and enjoy the video.
In this video we will be replacing the front strut on this '95 Accord, exact same as any '94-'97 Accord, and very similar for a lot of different Honda vehicles. Tools you'll need are just various millimeter sockets with ratchets and extension. I do make one little mistake. I think I say that the lug nuts on this car are 18 mm, they're actually 19 mm.
Start on these aluminum wheels by removing the center cap. Next, if you don't have the benefit of air tools you want to loosen your lug nuts while your car is still on the ground. Then after you loosen the lug nuts, jack it up and support it. You always want to use a jack and you want to use a jack stand. Then remove the lug nuts and the wheel. These are 18 mm bolts. You need to unbolt the strut tower brace so you can move it around to get to other bolts. This is six 12 mm bolts; two here, two in the middle and two on that side. Now you remove the brace around. You don't need to take it out of the car, you just want to be able to move it.
Once you have your wheel off you want to remove the brake lines bolted to your strut in a couple places. Right here actually, it looks like this was replaced and that's been broken off. These are either 12 or 13 mm bolts. Now you need to loosen this bolt up here and then remove this nut down here. This is a 14 mm; I believe this is 17 mm.
Take a 17 mm socket and you're going to want to hold the bolt on the other end here with a wrench. There's the nut off. What you want to do is basically just pull this bolt right out. There's the bolt out. Now, the bracket's unbolted. What you want to do is you want to use a hammer and you want to contact it right here, and also a little bit up here, and drive this off of the strut. Just push the strut back and out of that bracket. The next step in removing the struts is to remove the three 14 mm bolts around the edge. You can see them very easily over there on the driver's side.
Now bring it down some, pull it out beyond your tie rod here, give it a shake and your strut is down and out. Here's the new strut from 1A Auto. Here's the strut out of the car. The beauty thing about these loaded struts is they go right in. You don't have to worry about compressing the spring. You can see all the brackets on the bottom are all the same. It's going to bolt in all the same. This actually appears to be pretty much a new strut from the car. I'm not one to waste so I'm just going to reinstall this strut.
Installation is pretty much the same. Put it up and in. There's a little bracket back here it likes to get stuck on. Shake it up into place. Make sure you turn it so the bracket you bolt your line to is facing kind of forward. You can hang it up in there. I'll put my three nuts on top. I'm just going to put them on kind of finger tight just to hold it in place.
Now that you have those nuts in at top, push your strut back, pull this bracket over. Pull your strut in. Slide the bracket up. You can put your bolt, line everything up well. Put your bolt in from under here. You might have to push it down on the suspension a little bit. Make sure everything's good. Put our bolt in here. Put this nut on.
Before you tighten up the lower bolt and that pinch bolt you want to support your suspension, put all the weight, and you can see the weight is on the suspension, not on the lift. Now you can tighten up these bolts. You want to tighten these bolts with the weight on the suspension, not the suspension just hanging down. Yes, I know. Do as I say, not as I do because I am tightening it up here without the jack underneath it. You want to have the jack under the suspension as you're tightening these bolts.
Nice and tight. You want to bolt this right here with the 12 mm nut. Very important that these get bolted back together because this is your brake line and you do not want them rubbing or chaffing on anything. You want to make sure you do bolt these back up correctly.
Now we can tighten up the top bolts here. These should be pulled tight, about 45-50 foot pounds of torque. The bottom bolt, the one at the very bottom, the bolt that goes through and then the nut, that should be about 65 foot pounds. The bolt that goes in to hold the clamp on the bottom of the strut, that's about 50 foot pounds.
Now we can bolt our strut tower brace back on, put the wheel back on and we should be all set. Now we can put the wheel back on. Then again I'm just going to use my impact wrench, tighten them up a little bit. Once you have the car down on the ground use a nice big wrench. Generally lug nuts you want to tighten up between 75 and 85 foot pounds. I usually just use a breaker bar and get them tight. Take your cap, goes back on and you're all set.
We hope this helps you out. Brought to you by www.1AAuto.com, your source for quality replacement parts and the best service on the internet. Please feel free to call us toll-free 888-844-3393. We're the company that's here for you on the internet and in person.
Shop Products


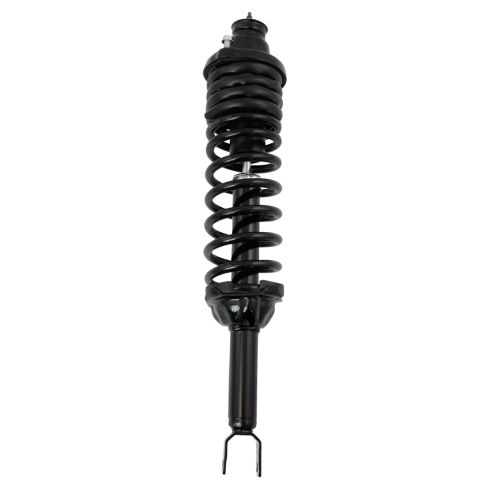
1994-97 Honda Accord Rear Driver Side Shock & Spring Assembly TRQ SCA70119
- Threaded Stud

How to Replace Rear Shocks 2007-10 Hyundai Elantra
Check out this video to learn how to replace the rear shock absorbers on your 07-10 Hyundai Elantra. 1A Auto shows you how to do it yourself!

