
How to Replace Passengers Side Axle 2000-11 Ford Focus
Created on: 2019-07-31
Check out this video to learn how to replace the passenger side axle on your 00-11 Ford Focus. 1A Auto shows you how, step by step, so you can DIY!
-
step 1 :Removing the Wheel
- Loosen the 19 mm lug nuts
- Raise and support the vehicle
- Remove the lug nuts
- Remove the wheel
- You may replace one lug nut and pry the wheel from behind if it is difficult to remove
-
step 2 :Removing the Passenger Side Axle
- Remove the 32 mm axle nut
- Rethread the axle nut loosely, then hammer the axle end to loosen it
- Remove the axle nut
- Remove the 15 mm lower ball joint nut from the T50 pinch bolt, and remove the bolt
- Remove the 16 mm tie rod end nut and remove the tie rod end from the knuckle
- Hammer on the lower control arm to loosen the ball joint from the knuckle
- Push the axle out through the wheel hub while pulling the knuckle out away from the vehicle to remove the axle
- Remove the two 13 mm carrier bearing bracket nuts, and remove the carrier bearing bracket
- Hammer on the axle joint to remove the axle shaft from the transmission
- Have a drain pan ready as transmission fluid will leak out when the axle is removed
-
step 3 :Installing the Passenger Side Axle
- Insert the axle shaft into the transmission
- Hammer on the end of the axle until the shaft is seated properly in the transmission, and the carrier bearing is flush with the bracket mount
- Reinstall the carrier bearing bracket with the two 13 mm nuts
- Pull the knuckle out away from the vehicle and insert the axle into the wheel hub
- Reinstall the lower ball joint with the sheild into the knuckle
- Reinstall the T50 lower ball joint pinch bolt with the 15 mm nut
- Torque the 15 mm nut to 37 ft-lb onto the T50 pinch bolt
- Reinstall the tie rod end into the knuckle with the 16 mm nut
- Torque the 16 mm tie rod nut to 35 ft-lb
- Install the 32 mm axle nut
- Torque the 32 mm axle nut to 233 ft-lb
-
step 4 :Installing the Wheel
- Slide the wheel onto the wheel studs
- Install the 19 mm lug nuts by hand
- Lower the vehicle with minimal weight on the wheel
- Torque the 19 mm lug nuts to 93 ft-lb in a crossing pattern
- Lower the vehicle completely
Tools needed
-
13mm Socket
Torque Wrench
Hammer
15mm Socket
Rust Penetrant
Pry Bar
16mm Socket
19mm Socket
T50 Socket
32mm Socket
Locking Pliers
Anti-Seize Grease
Ratchet
Hey friends. It's Len here at 1AAuto. Today I'm working on a 2001 Ford Focus and I'm going to show you how to do a right front axle. It's going to be a very easy job and I want to be the guy that shows you how to do it. So, if you need this or any other part you can always check us out at 1AAuto.com. Thanks.
Okay, friends. So, here we are. We've got the vehicle supported off the ground a little bit but the wheel is still on the ground, everything's nice and safe. We're going to go ahead and loosen up these lug nuts, they are 19 millimeters. I'm just going to take a 19 millimeter with a long ratchet. All I'm doing here is breaking them free. I'm not taking them all the way off. I don't want the wheel to go off kilter, damage the rim or the lug studs. Now that we've got those loose we can raise the vehicle, make sure it's safely supported, and we'll move along.
We've got it raised and supported safely. Now I'm going to remove these lug nuts with a 19 millimeter. I'm going to use my air gun. You can use a ratchet. The reason why I showed you how to break them free on the ground with the long ratchet is just in case you're using something besides an air gun to take off the lug nuts. So safety glasses, hand protection. Hold that wheel so it can't fall off. Roll this aside. We can move along.
So, now we're getting to the point where we're going to be taking off the axle nut which is this right here, it's the big nut. This is a 32 millimeter. If you're not using an air gun you're going to be trying to use a ratchet with a socket. You're going to find it hard to remove this because it's torqued down very tight. So, when you use the ratchet, you try to spin it, it's probably just going to turn this. An easy solution for that would be lower it down closer to the ground, use some sort of long pry bar, just stick it in between the studs like that. You want to make sure that it's as flat as possible going with the threads not sitting at a diamond or anything. You want to go more square so it's just flush. Then once this is on the ground pressing up against it you'll be clear to turn this and the rotor won't be able to turn. Okay.
I'm going to be using the air gun with my 32 millimeter. I'm just going to take this nut off. That's your axle nut, big old socket. I'm just going to take this and I'm going to put it on just a few threads here, a few good threads. I'm going to take my little hammer and just give that a couple of bonks so it's going in through the wheel bearing. If you needed to, you could use a little bit of penetrant in there. This one seems like it went back okay. That's nice. I'm just going to put this on, blast that off again. As you can tell, the axle pushed its way through a little bit. We can take care of that.
Now, I'm going to take this flex hose. It looks like it needs a flex hose. I'm not going to worry about that for the purpose of this video. There's a nut right here, 15 millimeter, I'm just going to blast it right off. Right now what's happening is the bolts spinning so I'm just going to use a torque bit and get it in there. All right. That's what the nut looks like. We'll set this aside. Take the bolt out. That's what the pinch bolt looks like. Could put both these together and it came through from the front to the back. That's the way it's going to go back in. Try to remember that.
So, we've got this out. We've got this free. Now we're going to come over here to the outer tie rod nut. I believe that's a 16 millimeter. Just grab my socket. Yup. It fits on there great. Here we go. That's what that nut looks like. We'll put this aside. Now what we need to do is we need to break the outer tie rod end free from the knuckle. To do that you want to make sure that you hit right on the knuckle. You don't want to hit the boot here. You don't want to hit the tie rod and you definitely don't want to hit the stud. It could peen over those threads and that'll become an issue. I mean generally speaking you could probably just tap them out and they might be fine or you could be buying yourself another tire rod so let's skip that.
If you're underneath the vehicle and you're working and you don't want to get hurt you could just take the nut, put it on a few threads that way there when I bonk this and it does drop down it won't come swinging down and hurt myself, or me, or anybody else. I'm just going to give this a few bonks. That pulls right down. This is your outer tie rod end. Put that nut back up there. If you want to you could put the nut up here. It's up to you. It might help you remember where they go. Okay, we're cruising.
We're not replacing this lower ball joint at this point so you want to be careful not to damage the boot when you try to separate this. A good way to do that would be let's see if I can turn the wheel. Essentially what we need to do is we need to hit on the lower control arm to try to get this to bonk down. You could try using a hammer. You want to be careful for your axle. If you hit your axle boot you might pinch a hole into it and cause an issue where you're spraying out grease and your axle goes bad so you want to be careful for that. You can use an air chisel with a hammer bit, try to drive it down. That's probably the way I'm going to try. There's a couple different options. You could even use a big punch so you have more swing room, completely up to you. I'm going to grab an air chisel with a hammer bit and I'll show you what I'm talking about.
Okay, friends, here we go. We've got our air hammer. This is a performance tool available at 1AAuto.com. We've got a little nice hammer head flat bit there. This is going to help drive down on that lower control arm for us. It's going to give good vibration. I'm going to apply pressure as I go. Hopefully it'll drive the ball joint out of the bottom of the knuckle. Come around here and see if I can get it on. You want ear protection of course, eye Protection. It looks like it's working. That's great. That's a quality tool. Very nice. We didn't cause any damage to the ball joint. That tool came in handy.
I'm going to take my pry bar or whatever you happen to have in your hand, you can use a screwdriver. We're just going to push this axle through the bearing. Okay. And we're going to pull this at the same time and then we're going to try to take the axle, slide it out here. You want to be careful when you're pulling. You don't want to put too much pressure on your flex hose. Flex hoses and everything like that are high pressure for your braking system. Super important that they're in good condition. I'm going to push this, try to grab my axle, slide it to the side. Perfect. Now we're clear to move on to the next step. I'm going to get underneath the vehicle and we'll start tearing apart the center there.
So now it's time to remove the carrier bearing bracket. There's a nut here and a nut up there, 13 millimeters. You're going to remove those. Take off this outside bracket. Now we can move along to the next step. I'm just going to get this loose. I'll leave it on there a little bit. Nice and loose. That's what we're looking at. Just two nuts, a little plate. If it looks like this thing's rotted, getting thin, you might want to replace it. That's what holds your carrier bearing in which keeps your axle from being able to move around, so super important. We'll set the stuff aside.
So, I'm under the vehicle. I've got my eye protection, ear protection, hand protection. I've got my air chisel quality performance tool 1AAuto.com. I'm going to try to go right here, right on this little piece of the axle. Try to drive it out with the air chisel. If you're not replacing the axle you want to definitely try to stay away from the bearing. If you are replacing the axle it comes with a new carrier bearing. So, if this is easier for you to get onto you can go ahead and get that a bonk. Essentially this axle has to come out straight because it goes into the transmission right over here. Going to come in like this. The bearings separating from the housing plate right here so it's getting ready to come out. At that point, the axle is going to get heavy so you want to make sure you have a hand on it at least. Just going to keep on trying here.
Something to remember when you remove the axle is fluids going to more than likely come out from your transmission so you want to make sure you have a nice catch bucket under there, protect the environment, make sure you collect any chemicals that you can and recycle them properly. This axle is going to be a little heavy so you want to be careful not to hurt yourself. All we're going to do is try to shake it around a little bit, going to pull it out, and there is your right front axle.
Okay friends, a quick product comparison for you. Over here we have our original right front axle out of our 2001 Ford Focus and over here we have our brand new quality 1AAuto part. As you can tell they're both the same length which is super important. The new axle comes with a brand new carrier bearing which is also super important partly because how are you going to get this old one off and put a new one on, you need special equipment for that. The new axle comes with it, brand new boots, clamps, everything like that. Even comes with a brand new nut. It's got the splined end over here. This part goes into your bearing. You can follow it down, get your outer CV shaft, inner CV shaft, carrier bearing, and then this is the splined area that goes into your transmission. Everything looks great. I don't see any reason why this wouldn't be a quality part to install into the vehicle so I'm going to go ahead and do it. If you need this or any other part, you can always check us out at 1AAuto.com. Thanks.
So, now it's time to install the right front axle. I'm just going to come in over here just like this. Just going to come up here. Start sliding into the transmission. Now it's going to sit into the carrier bearing bracket on the carrier bearing bracket. You come around this side, maybe it's easier to see. There's a little lip right there pretty much along where the edge is there's a lip and that stops the bearing from going in further. Once you get the bearing to that point that means you've gone in as far as you need to for the axle seal and everything's ready to go. You can go ahead and button that up and then move along to the outside. So, to get this to go in you can try to push it. Sometimes they don't want to push. So, what I'm going to do at this point is I'm going to grab a rubber mallet. I'm to give this a couple of bonks right here and help it along.
So, I've got my rubber mallet. I'm going to bonk this in and I'm going to pay special attention to how far in I go. Once it seems like it stopped I'm going to make sure that I check it. We don't need to go any further than we have to here. Let's see. It's like we can go a skosh more. It sounds audibly different. It's like where we're right up on it. Cool, so we're far enough there. Give it a little spin here. That feels good. We'll get our bracket with our 13 millimeter nuts. We'll tighten this up on here and we can move along.
We've got our carrier bearing bracket and our two nuts, 13 millimeters. We're just going to get it up on here just like that. Get these started on here, not going to tighten either of them down until they're both started of course. There we are. If you want to use a little bit of thread locker you could do that. That one's bottomed out, just going to do the same to the other one and then I'll go ahead and snug them both. Okay snug. Just a little bit tight, tight. The axle is sitting inside the seal where it's supposed to be. The carrier bearing is right up against the edge. Looks good. All right. We can move on to the next step.
I like to put a little Copper never seize on the splines of the axle where it goes into the bearing. It's just going to help us along if ever we have to take it back apart someday. Hopefully the axle won't be frozen inside the bearing assembly. There we are. Now we're just going to grab this, we're going to pull it out. Once again paying special attention to our brake hose. Just going to grab it, pull it. I'm going to try to get it right inside the back of the bearing there. Right in here. If it seems like it doesn't want to fit you can give it a little twist. Maybe the splines just needed to be lined up. This is just a little boot cover thing in case you're wondering what's jiggling around. There we are. The axles coming through, it means we're looking pretty good.
Now we're going to pull down on this arm right here and we're going to try to get the ball joint stud inside the knuckle. Might be easier if I take this off and put it directly on the knuckle that way it's one less thing I have to worry about jiggling around. Let's see, grab a pry bar, turn this a little bit. Let's see if this helps me pull it down. It does. Got the ball joint stud. Let's see what it looks like. Looks like we are pretty close. There we are. Just great my rubber mallet again, give it a couple of bonks. If it doesn't seem like it wants to go in you can just wiggle it. A lot of times it just goes at an angle. Okay, it's in. We still got our boot cover. That's sitting right where it needs to be. Very nice.
We've got our pinch bolt. We remember this went through from the front to the rear. If you want to you can put a little bit of never seize here, probably help it out down the line. There we are. Easy peasy. We've got our nut. This goes on the backside, 15 millimeter. I'm just going to get this started and then I'm going to go get the torque spec for you and we can bottom it out and then torque it down.
We're going to go 37 foot pounds with our torque wrench, 15 millimeter on the backside nut there. Then I'm going to hold the front side using my torque bit 50. It's a little star looking thing. Same thing we used to remove it. 37 foot pounds with a 15 millimeter. There we are, just grab it one more time just in case. Lower ball joint pinch bolt is tight. Now we can move ahead. We can grab this outer tie rod in and force it up in there. We've got the nut. It's got a little neoprene locker on there. If you want to go ahead and use a little thread locker you can.
I'm just going to bottom this out and then we'll torque it up. I was mistaken. There we are. I'm just going to grab my torque wrench. We're going to torque that down to 35 foot pounds. There we are. Just going to go ahead and hit it again. Torqued. Torqued. We'll grab this, flex hose, get it back sitting where it needs to be. If you don't it can flop around like this, rub up against your wheel, rub a hole. It could be very bad. There we are.
We'll go ahead and we'll get this started on the axle nut. You can see it's got these little peened over areas, that's for locking the nut onto your axle. If you see something like that you don't need to add any thread locker. It's already set up to be locked on. So, now we'll just take this, we're going to snug this up and then we're going to torque it down. Okay. So, we've got this nice and close to the ground. We're going to go ahead and get this axle nut bottomed out. The torque spec for it is 233 foot pounds. We use a long handle pry bar just like this. I'm going to bring the rotor around, lock it in. That's going to prevent it from spinning on me while I go ahead and try to snug this axle nut up.
Once I feel like it's pretty bottomed out I'm going to go ahead and switch over to the torque wrench. Tighten it down, 233 foot pounds. Do it one more time, tight. There we are. Now we're clear to put the wheel on. It's time to get the wheel up on here, bring it over, bring it up close to your leg, lift it up with your leg and the ab muscle. Four lug nuts. Let's start it on there. We'll just bottom these out with our 19 millimeter socket and then we'll bring it down on the ground so the wheel is just barely touching. We'll torque these up to 94 foot pounds, crisscross pattern. Time to torque them down, 94 foot pounds with our 19. One, two, three, four. You want to go around again go around again. Tight.
Thanks for watching. Visit 1AAuto.com your place for DIY auto repairs for great parts, great service, and more content.
Shop Products


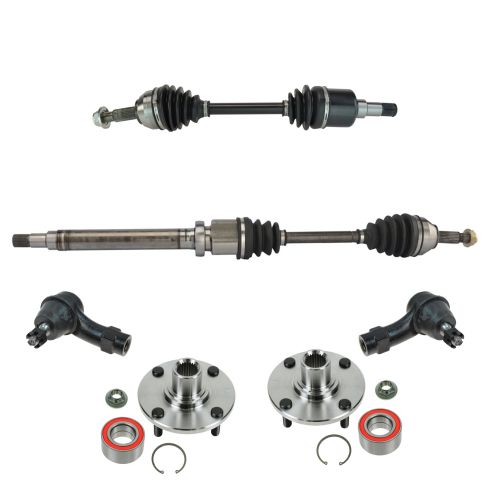
Ford Focus Front 8 Piece Steering, Suspension, & Drivetrain Kit TRQ PSA59875
- (2) Front Outer Tie Rods
- Ball Bearing
- (2) Front CV Axle Assemblies
- 8 Piece
- (2) Front Wheel Hubs
- (2) Front Wheel Bearings

How to Replace CV Axle Shaft 1995-2005 Chevy Cavalier
Check out this video to learn how to replace the CV axles on your 95-05 Chevy Cavalier.

