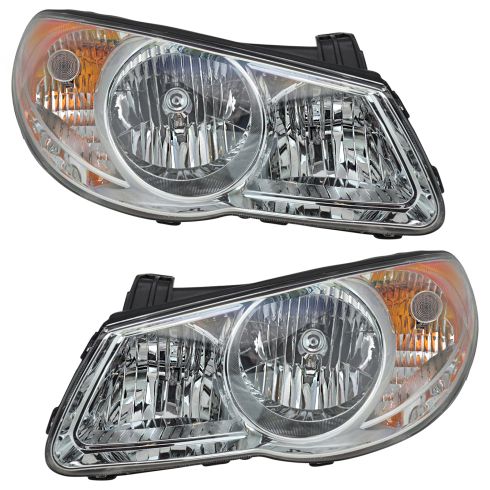
1ALHP00948-Hyundai Elantra Driver & Passenger Side 2 Piece Headlight Set DIY Solutions LHT03698

Replaces
2010 Hyundai Elantra Sedan Driver & Passenger Side 2 Piece Headlight Set DIY Solutions LHT03698

Product Reviews
Loading reviews
4.81/ 5.0
16
16 reviews
Great support
January 24, 2017
I bought a pair of OEM style headlights for my Hyundai. Got them within a week and installed them the following Saturday. However, I discovered that one light didn't work. Troubleshooting pointed to a defective product. Called 1AAUTO that same day. After a short explanation, the support person said she would have a new light shpiped on Monday. Good to her word, I received the replacement within the week and it works perfectly.
I appreciate the help and rapid response to my needs. Thank you for your assistance.
Great Products
October 19, 2017
I ordered from them some headlights. Actually, my daughter did, and they were of great quality. Unfortunately, my daughter put the wrong year of the vehicle in and I had to send them back. My husband found 2 correct headlights at the Salvage company so that they could be put in immediately for a brake and light inspection for registration. They did arrive in 3 days and were wrapped perfectly for shipment. I will definitely order again from them. Great customer service. I will update on how the refund experience goes.
Perfect fit
February 21, 2018
At first I was worried they wouldn't fit but the did and I didn't even have to worry about the wiring becayse it's the same as the stock
Great for the price
March 6, 2018
Installed easily and worked well. Great headlights especially for the price!
Perfect fit replacement headlamps
October 24, 2019
I recently ordered replacement headlamps for my 2007 Hyundai Elantra. They arrived in a very timely fashion. I had my local auto repair shop replace them for me, they are a perfect fit, look beautiful and I can see again at dusk. Thank you 1A Auto!
Good Quality
December 10, 2019
These headlights are really good quality and the price couldnt be beat.
Hyundai Elantra Headlight Pair
January 13, 2020
Exact fit - easy removal and replacement
Plug n play
July 31, 2020
Perfect, came with bulbs and work perfect. Shipped on time
Fantastic replacement assembly! Superior Customer Service!
December 4, 2020
Im not a robot.. I'm a guy that cant stand people that cant deliver.. I Installed in 2 minutes each side, came with all bulbs and were a perfect fit at a great price! Originally they sent me 2 passenger sides by accident but 1 phone call to customer service she had them shipped that day and I received the replacement for the driver side the next day UPS!!! Couldn't have asked for better customer service.... Thank You 1A AUTO! You get my business from here.. Matt Upstate NY
January 3, 2021
I received the headlights for days after ordering and install them. It was like an instant facelift from my car 10 years newer
Not to impressed
August 13, 2021
I had to remove and install both assemblies several times before I could get all the bulbs to function due to multiple pins recessing when either the low beam bulbs or the main wiring harness was installed/connected. I am an aircraft electrician so I do know a little about installing bulbs and hooking up connectors. I did finally get everything to work but I do worry about the connections deteriorating from the vibrations going down the road. I will say that I had previously ordered a set for another vehicle and they worked just like they should and I've been very satisfied with them. I'm not really satisfied with these though.
Helpful video, great product.
December 9, 2021
I was nervous at first to buy something online without being able to check the fit, but I shouldnt have worried. The assembly took about 30 minutes total, including aiming them correctly. It went so smoothly Im thinking of getting some for the other car.
March 2, 2022
quick and easy install no adjustment needed
December 5, 2022
FAST DELIVERY UPS
EASY INSTALLATION
BULBS WERE INCLUDED?
Correct part, saves time and money.
January 3, 2023
Right fit unlike the others I bought.
Most satisfying purchase in a long time!
December 22, 2023
Great product and video tutorial.
I replaced both headlights in 15 minutes! All light work great: headlights, high beam and fog lights.
They look brand new (no more foggy plastic)
They make the car look new!
Great experience
Customer Q&A
Hi there I was wondering if your lights were made in Taiwan and if they were eagle eyes??
May 11, 2021
10
DIY solutions brand parts are manufactured by various aftermarket companies specifically for us and built to your vehicle's exact OEM specifications.
May 11, 2021
T I
Hi there I was wondering if your lights were eagle eyes and made in Taiwan??
May 11, 2021
10
DIY solutions brand parts are manufactured by various aftermarket companies specifically for us and built to your vehicle's exact OEM specifications.
May 11, 2021
Corey M
Hi do u have just the lens cover for both? Hyundai elentra 2009 model
December 24, 2021
10
COMES AS A COMPLETE ASSEMBLY. NOT JUST A LENS. EASILY INSTALLS IN MINUTES.
December 24, 2021
W P
10
Hello, I apologize we only sell the full headlight assemblies.
December 24, 2021
Ricale A
Hyundai is a registered trademark of Hyundai Motor Company. 1A Auto is not affiliated with or sponsored by Hyundai or Hyundai Motor Company.
See all trademarks.


