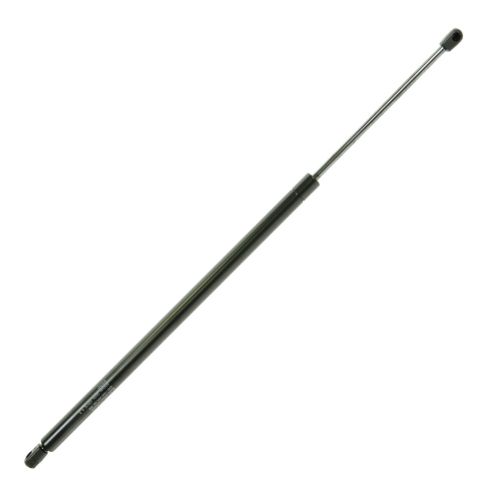
Install Tip: Keep & reuse your original hardware, new hardware is not included with this item.
Item Condition:New
Attention California Customers:
WARNING: This product can expose you to chemicals including Lead and Lead Compounds, which are known to the State of California to cause cancer, and birth defects or other reproductive harm. For more information, go to www.P65Warnings.ca.gov.
Lifetime Warranty
This item is backed by our limited lifetime warranty. In the event that this item should fail due to manufacturing defects during intended use, we will replace the part free of charge. This warranty covers the cost of the part only.
FREE Shipping is standard on Orders shipped to the lower 48 States (Contiguous United States). Standard shipping charges apply to Hawaii, Alaska and US Territories. Shipping is not available to Canada.
Expedited is available on checkout to the United States, excluding Alaska, Hawaii and US Territories as well as P.O. Boxes and APO/FPO/DPO addresses. Final shipping costs are available at checkout.
How to Replace Lift Support 1997-2005 Chevy Venture
Created on:
Tools used
Flat Blade Screwdriver
T30 Driver
Assistant
Block of Wood
1. Accessing the Hatch Lift Strut
Prop the hatch open with a piece of wood
Remove two T30 Torx screws from the taillight
Pull the taillight off by hand
Lay the taillight aside
2. Removing the Hatch Lift Strut
Enlist an assistant to hold the hatch open
If no assistant is available hold the hatch open with one hand
Undo the hatch strut clips with a flat blade screwdriver
Pull the hatch strut off by hand
3. Installing the New Hatch Lift Strut
Push the bottom of the hatch strut into place
Lift the hatch with one hand
Clip the top of the hatch strut into place
4. Reinstalling the Taillight
Attach the taillight wiring clip
Line up the taillight studs with their holes
Push the taillight into place
Insert the two T30 Torx screws
Repeat this procedure for the other side
Brought to you by 1AAuto.com, your source for quality replacement parts and the best service on the Internet.
Hi, I'm Mike Green. I'm one of the owners of 1A Auto. I want to help you save time and money repairing or maintaining your vehicle. I'm going to use my 20-plus years experience restoring and repairing cars and trucks like this to show you the correct way to install parts from 1AAuto.com. The right parts installed correctly: that's going to save you time and money. Thank you and enjoy the video.
In this video, we're going to show you how to replace the rear hatch struts on this '99 Venture, same as any '97 to '05 GM minivan: Venture, Montana, Silhouette. This will fix that problem if your rear hatch tends to sag down. Tools you'll need are a T-30 Torx driver and a small flat-blade screwdriver.
If you recognize the piece of wood holding up the tailgate, this is probably the video for you. You don't have to do that anymore. What you want to do is replace these lift supports. After time, they wear out; the gas leaks out a little bit and they don't lift up as well. Pan down here. To do that, you need to use a T-30 Torx bit and go ahead and remove the 2 screws on the inside part of the taillight. We'll speed it up a little bit as I remove those screws.
Once you have those screws loosened up, grab a hold and pull your taillight out. The screws will not fall out. Let your taillight hang down. Now what you want to do is use a small flat-blade screwdriver to pry out these clips that are in this slot. As you pry out, pull the strut off and the same thing up top here. You can actually see the little slot. Pry right out and then pull it off.
I'd suggest having a person help you do this. What I'm doing right now is I'm holding up the tailgate with my hand and prying that clip out. Pull that off and let the tailgate rest down on the piece of wood. Then the same thing over here, pry out and pull that off and there's your strut off.
Here's the new strut from 1A Auto. It's the same length and mounts in the exact same way. You want to put it right on and then you have to twist it and this piece of wood is going to fall down as I lift up. Then it's in. You can see it's already holding the tailgate up better. Obviously, once you replace the other side, then you'll be all set. You want to put the tail lamp back on. When you reinstall the tail lamp, just make sure this clip is in. There are two studs on the taillight that line up with these holes. Then reinstall your two T30 screws and we'll speed it up here and finish it up. Obviously, do the other side. We always recommend replacing them both.
We hope this helps you out. Brought to you by www.1AAuto.com, your source for quality replacement parts and the best service on the Internet. Please feel free to call us toll-free, 888-844-3393. We're the company that's here for you on the Internet and in person.
GSA08881
In Stock
Product Reviews
Loading reviews
There are no reviews for this item.
Customer Q&A
No questions have been asked about this item.
Customer service
877-844-3393
Monday - Friday 8:00am - 9:30pm ET Saturday - Sunday 8:00am - 4:30pm ET
Pontiac is a registered trademark of General Motors Company. 1A Auto is not affiliated with or sponsored by Pontiac or General Motors Company.See all trademarks.
Enter Vehicle Year Make Model
Specify your vehicle's year, make and model to guarantee fit.
Year
Make
Model
Options
Drivetrain
This part doesn’t fit a . Select from parts that fit.