Hi, I'm Mike from One A Auto. We've been selling auto parts for over 30 years.
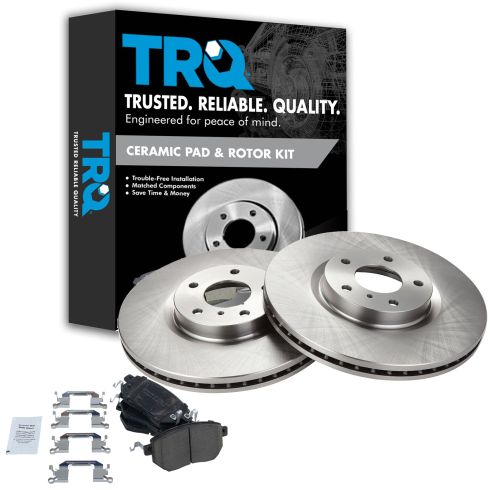
Hey, everyone. Sue here from One A Auto, and today on our 2010 Murano, we're going to do front brakes. If you need this part or any other part for your car, click on the link below and head on over to 1aauto.com
I have the vehicle somewhat supported, 21mm socket and I'm going to take the lug nuts off with some weight on the tires. Just going to break them free. This has a wheel lock, so I've got the wheel lock key lined up. Now I'm gonna raise my vehicle on two posts lift. You can use a jack and jack stands at home. And we'll take the tire off. Now the vehicle is in the air and I could just take the lug nuts off off by hand. Take the tire up.
I turned the steering wheel all the way to the left. This way I have better access to the actual caliper mounting bolts. First thing I'm going to do is make sure this bleeder screw opens up. Take the rubber boot off. I'm going to prespray it. Make sure I have a catch pan below and I'm going to open my bleeder screw. 10 millimeter wrench. Work that so that it opens up. Perfect. Look at that. I'm just going to snug it. I just want to make sure I can break it free once the caliper is dismounted.
14mm socket or wrench to loosen up the actual caliper bolt slider pins. Examine the hardware and make sure the bolts are in good shape. Nothing is stripped. It looks good.
Now I'm going to just mount the caliper from the caliper bracket and I'm going to take my welder pliers, welder clamp pliers, locking pliers, and I line up the piston because I'm going to push it back. But first, I'm going to break open that bleeder screw now. Make sure it aims at that bucket. Now I can push my piston back.
Lot of air. There shouldn't be any here.
Now the piston has bottomed out. Now I'm gonna take a good view and examine the piston dust boot, make sure there's no tears, any water can get in there, cuts, and no fluids coming out. This one went back moderately smooth. I don't have any concerns about that.
Now, I can take one up my bleeder screw. 10mm wrench. Undo my clamps. Now I'm going to use my trusty hook that I got from One A Auto and hang it up. Perfect.
Now with a 22mm or wrench, I'm going to break free the caliper from the knuckle, the bracket caliber. And before I take that bolt all the way out, definitely break the top one free. There we go. So the reason why I said break the top free once you've broken the bottom free, make sure they're both freed up and not frozen in there is a one day I watched somebody do a brake job and they broke the bottom bolt completely out, took it out of the bracket. Went to the top one and they used an air gun and he put it on there and spun it and because it was frozen, this bracket came up because the bolt wasn't in place down here. The bracket came up and smacked him right in the chin. A bloody lip later and a lot of pride probably taken away. But you know physics, that's what it comes down to. It is basic physics.
So now, I can take the caliper bracket to knuckle bolts out. I'm just using a socket by hand on the top just to give me a little bit better leverage. Nice. Now we can remove the bracket. Let's dismount the rotor.
We're going to take the pads out of the caliper bracket. Set those aside. I'm going to clean the bracket. The first thing I'd like to do is while the tins are in the actual caliper bracket, I'm going to use a wire brush and clean the top surface of them. These ones are a little tricky because they have the anti-rattle clips made part of the actual hardware. The tins, shall I say. Clean both sides.
Now spray some brake clean on it. See if I can get the dust down to a minimal. Now I can take this 10 off and just use a small pocket screwdriver. I don't want to damage or bend them because I'm going to reuse them. Do the same both sides.
Now, I see the bracket itself, I'm going to to clean up. You want to make sure you have no rust, no build up, a nice smooth surface. You have to take a small screwdriver, scrape any rust buildup. Do this to both top and bottom part of the bracket.
I'm going to clean up the bottom part of the tins where it sits against the bracket. Just take your wire brush to him. Both sides. Clean them up. I'll let those hang and dry. And now I'm going to do the slider pins. So I just pinch the boot and pull that pin right out. I'm going to clean that up. I take the boot off and I examined the boot. Make sure there is 0.0 tears, rips. You don't want any water getting in there and then to that slider.
I'm just going to take my pocket screwdriver and we're just going to go in. Look at this bone dry. There's no paste in there, so we're going to fix that up and take it another brush and just wire brush around where the boot actually sits on this lip.
While that drives I'm going to take my silicone paste or caliper grease, you can use either, and I'm going to fill in my boot. I want that boot to get some silicone paste right in those grooves. They sit inside the grooves here, that'll lube up that pin until the next brake job. Every time it moves. Let's quickly dry this up a little.
On this particular caliper, the wide side, it has no inner lip on it, so that's where the caliper bolt will slide and this one with the mini lines on it goes against the bracket. It slides right on. Now we'll take our new slide pin, wipe it off, put some new silicone paste on it. All right, with a spinning motion, I'll just seat it right in there. Do the same to this side.
So now we have both the pins taken care of cleaned up and we're ready to put the tins back on. I'm just going to put a light coat of silicone paste on the bracket itself where the back of the tins sit on both sides. Then you take your tin, line it up. Let me see if I can get it right here. You just snap it right down into the plate bracket. Going to do that same on both sides. Okay. There you go. There we go. Now we're ready to install this on the car and put the pads in.
Okay, before I install the new rotor, I'm just going to take some lubricant, anti-seize, and coat that hub so it doesn't rust. Install our rotors, these are the high performance rotors. You've got the air cooled slotted freeze type. The fans on the inside are straight on. They're not a swirled spin. So there is nondirectional, these can go on either side. It's just on your preference of the way you wish for the the slotted to grab. I like it to go into the pad at this angle instead of the other way.
Now we're going to put the caliper bracket on, attached it to the knuckle. Just slide it over the rotor. Grab one of the mounting bolts, you can line the threads up because you can see pretty much. Start it by hand. If you need to, you can use two lug nuts to hold the flush to the hub. I'm going to hold it with my hands. It just helps everything seat to faster, less strain against the bracket. Okay, so both bolts are snugged. Now I can torque it to the specs. The bracket to knuckle bolt is 122 foot-pounds.
So, I'm going to put the anti-rattle flip on the top on the outside pad, and I'm choosing to put it on the bottom on the inside pad. The best way to do these is basically to line up the pads, push against that anti-rattle clip on the hardware, so go at an angle, and then slide it right in.
Now we can put the caliper on the caliper bracket. Screw in the bolts onto the sliders. We'll torque those down to 22 foot-pounds. So the torque on these is 22 foot-pounds and it's a 14mm socket. Now we're all set to open the bleeder screw.
10mm wrench, and I'm going to open up that bleeder screw and let it gravity bleed. Got my catch bucket down there. We're just going to keep a close eye on it and make sure that no air comes out.
So now I can close the bleeder screw. I'm going to the lower the car. I'm going to pump up the brakes, see how they feel. Pump up your brakes, make sure it feels nice and firm, it doesn't sink down. You're also going to want to check that. We're going to go check for leaks, confirm theirs no leaks, clean it up, put our wheels on. During a road test, come to a stop after you been driving for awhile, hold it for a steady two or three minutes. And if that pedal starts to travel down slowly, real slow, you have air in the system. We bleed your brakes.
So now we can come up to the master cylinder and top it off. Look at the cover, it'll tell us the type of fluid. This says DOT three break fluid. So I'm going to take the cover off, make sure I try not to get any dirt in there. You want to just clean as possible and I'm gonna bring the level up to where it needs to be. Then I can replace the cover. Make sure it locks down.
Now we're going to remount the tire. Put your five lug nuts on. I like to start at the bottom one, that way I can snug it in and hold the rim study. There we go. Even though I'm still doing it by hand I always do everything by hand, I always do it in a star pattern. It just becomes a good habit and it keeps the rim snug up against the hub. Now we can lower it and torque it to the specs.
2010 Murano, the wheel torque is 80 foot-pounds. I'll put my wheel lock key on. And starting in a star pattern, start on the bottom. One more time. Ready to go.
Thanks for watching. Visit us at 1aauto.com for quality auto parts, fast and free shipping, and the best customer service in the industry.