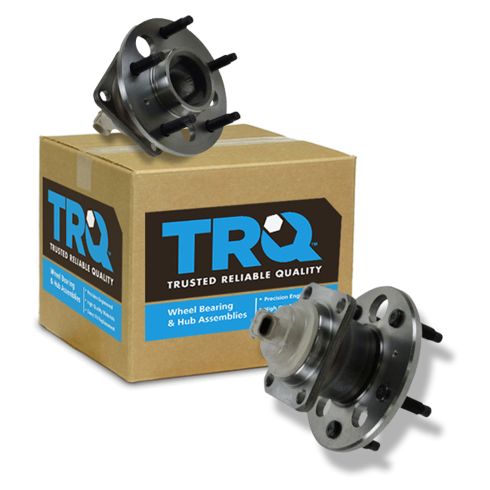
1ASHS00209-Rear Driver & Passenger Side 2 Piece Wheel Bearing & Hub Assembly Set TRQ BHA53462

Replaces
2005 Pontiac Aztek Front Wheel Drive with 4 Wheel ABS Brakes Rear Driver & Passenger Side 2 Piece Wheel Bearing & Hub Assembly Set TRQ BHA53462

Product Reviews
Loading reviews
4.70/ 5.0
30
30 reviews
Parts shopping made simple
August 28, 2017
Needed rear hubs for my daughters car. Auto parts store wanted $250 for the pair. I just couldnt pay that. I have purchased quality parts from 1A auto be for. Difficult parts like exhaust manifolds. A pair of hubs were $71. A no brainer in my opinion. These parts were exact fit which made in easy to install. Fast ship to. Sorry but auto parts stores are ripping everyone off for there convenience.
The Best 1AAuto
December 4, 2017
They are the best I don't have problem with them thanks to 1AAuto that's were everyone should buy there parts they the best and they not expensive they are real low price thanks 1AAuto
Great Product
April 16, 2018
Great product for a wonderful price! Had a friend put them on my car and did not take long at all. I have not had any problems with them yet and I do not miss the noise my old ones made.
Great quality for the price
September 8, 2018
Pre load felt right. No faulty ABS sensors. Zero runout. Great fit.
Extremely satisfied!
September 16, 2018
Fast shipping. Awesome price! Better warranty that brick and mortar store and lower price. Will definitely be buying parts from 1A Auto from now on!
Grand Prix parts
September 21, 2018
Was worried at first. Came on time as directed. Parts replaced Factory Parts with no issues would recommend anybody buying them if they own a Grand Prix. Thanks 1A Auto
Wheel hub/bearing assembly
November 24, 2018
Part fit perfect. I've put this brand on my daughters car too. I've gotten 75000 miles out of the Timkin brand, but was much more expensive. Im hoping this brand will last too. Right now im satisfied with the part.
Wheel bearings
May 13, 2019
1fit good, look as good as other Brand'
I buy hubs
July 16, 2019
This was a really good price for a pair of hubs assembly for my impala and they fit just right ??
Second time buyer
July 16, 2019
Fast shipping and great costumer service.
Awsome!
November 19, 2019
1A auto is the best place to buy my auto parts because the price is right and the quality is absolutely great! I have never had to return a part and my orders have always been exact!
Wheel hub assy
February 17, 2020
Very pleased with delivery time and communication, will order same product again,great fit
Rear wheel hub assembly
April 21, 2020
So easy to install. After watching your video on how to put them everything went well. Thanks so much.
Wheel hub
May 22, 2020
Great parts, had Wheel hubs on for about a month now n so far so good
Great service!
June 26, 2020
I always recommend 1Aauto to anyone who may have car problems! Best parts that are reliable and for a good price!
August 3, 2020
great products
Great bearings
August 15, 2020
Great bearings at a great price and had them waiting at my house in 3 days
Great timing
November 2, 2020
I got what I expected, quality parts! Shipping and customer service were as expected. I will use again.
Inspect items before installing
March 1, 2021
Little disappointed in 1Aauto.com but this only the first time so I'll continue to business for now. I had recently purchased these wheel bearings, but i was also replacing my complete rear suspension at the same time. After 8+ hours of getting these guys installed and wheels back on there's a grinding noise first I thought it was just brake dusting plate.. after getting the wheels back off and going over everything my mechanic and noticed the wheel hub had substantial play in it. Nobody's perfect i get it. Like I said it's only the first bad product I've ever received from 1Aauto and I do quite a lot of business with them. Just sucks when you got to local and spend more money just to finish a project.
June 4, 2021
My mechanic was pleased with the parts and so am i thanks for being prompt in sending supplies.
All Parts I Have Ordered Received And Installed Are Well Made And Working Well To My Expectations
July 29, 2021
All Parts are solid and appear to be well made, installation was easy and my Chevy is running smooth
Bob H.
2009 Impala rear hub assemblies.
December 6, 2021
Using for a couple weeks now, and no complaints on install and driving.
Great parts
March 29, 2022
Perfect. My customer has no problems. Car rides smooth
Good deal on the set.
April 1, 2022
Good fit and so far working fine.
May 19, 2022
I received my parts in a timely manner and they were good quality and corrected my problem.
Meh
May 25, 2022
Very noisy, they arent much quieter than the ones replaced with 150,000 miles on them.
January 10, 2023
Everything you need work great for me
Very satisfied with the wheel bearings
August 18, 2023
Product installed easily well built , 3wks no problems , would recommend especially for price , would buy again .
Constant Buyer
January 2, 2024
No issues and great prices with fast delivery
Perfect match.
March 11, 2024
Fits perfectly. You might need to purchase a "hub buster" to get the old one out.
Customer Q&A
Is this item only one assembly? Description is kind of vague.. looking for quality parts. Thanks!
April 1, 2022
10
You get two of them!! Very good quality!
April 1, 2022
E R
10
I bought 2 at once. I believe the item says 2 for the price. Look at other prices here and you should be able to figure if its for 1 or 2 items. They seem to be good parts and are working fine for now.
April 1, 2022
S G
10
They seem to be good parts and are working fine for now. It says quantity 2 in the description.
April 1, 2022
S G
Will this part help rectify faulty ABS sensor?
October 15, 2024
10
This will rectify an ABS or Traction Control dash light as long as the built-in wheel speed sensor is faulty. I replaced the wheel hub ass'ys/sensors and the dash light did not go off.
In this case there was a bad harness ground that I eventually found. When I replaced the ground terminal, the ABS light went off. Try to find the harness ground that is bolted to the front bell housing on the engine/transmission. That ring terminal sometimes corrodes where the wire is crimped. This effects the ground. The ground is still intact but it is not 100% so the ground is only partially working.
October 15, 2024
Richard W
Pontiac is a registered trademark of General Motors Company. 1A Auto is not affiliated with or sponsored by Pontiac or General Motors Company.
See all trademarks.


