Brought to you by 1AAuto.com, your source for quality replacement parts and the best service on the Internet.
Hi, I'm Mike from 1A Auto. I hope this how-to video helps you out, and next time you need parts for your vehicle, think of 1AAuto.com. Thanks.
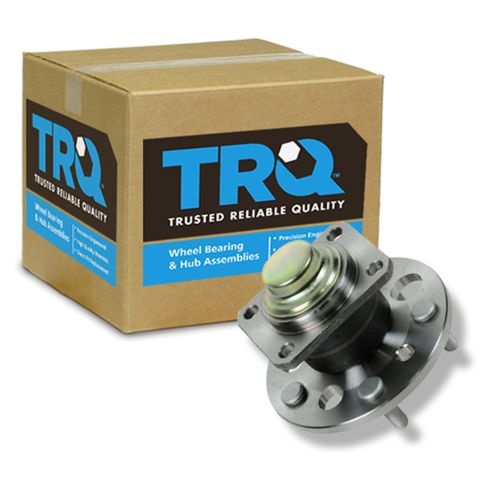
In this video, we're going to show you how to replace a rear hub on this 2003 Chevy Monte Carlo. It's the same part and process on these Monte Carlos from 2000 to 2007. We show you on the passenger side, but the driver side is the same procedure. The items you'll need include a new rear hub from 1AAuto.com, a 10mm, 13mm, and 19mm socket and ratchet, T30 torx bit and a ¼ inch wrench, flat blade screwdriver, hammer, wire brush, jack and jack stands, and a torque wrench.
Start off by loosening up these lug nut caps and removing the hub cap. If you don't have air-powered tools, you're going to want to loosen the lug nuts while the vehicle is on the ground, then jack it up, and then remove the lug nuts the rest of the way. If you do have air-powered tools, it's fine to remove it while it's up here. Just pull the wheel off.
Next, remove these two 13mm bolts that hold your caliper into place. Now pry your caliper off and set it aside. Pull the rotor off. Now, through these holes on the hub, you can see there's 10mm bolts in there. There's four of them, and you just have to turn this to the one you want to remove. We'll just fast-forward as Mike removes all four of those.
Next, you want to remove your e-brake shoes. To do this, you want to just pry this out on the clip here into that slot, and then you can just remove the slot from the other side. It's a small little tab a round part and it's got a pill in it. Make sure that stays inside of it, and then you just want to pry off your e-brake shoes. This does take some time. Just use a flat blade screwdriver to angle it down and around the hub. Pry out on the spring, disconnect it, unhook it from the other side, and then unhook this lever from this cable, and pull that down and out.
Then, to unhook this cable, you need to pry out on this clip. And it actually helps to just push from the other side while you pull on it, and it will pull free. Then you want to remove these two T30 bolts. Unfortunately, the easiest way to do this is by using a T30 bit and a ¼ inch wrench just over the bit, and just loosening it and removing them that way. It does take some time, but it's the only tool we could find that would actually fit in there to remove them. Now, hammer at the hub while pulling on it, and it will pull free.
On the left is the old hub; on the right is the new one from 1A Auto. You can see they're identical, and they'll fit exactly the same. Clean out the inside where your hub goes using a wire brush, put your hub into the backing plate, and push the hub into place. Replace the first bolt by hand, and just hand tighten it so that it holds the hub into place. We'll just fast-forward here as Mike replaces the other bolt along the top of the hub, and then tightens both of those up. Push this back into place, replace your adjuster, and replace those two lower bolts on the hub. We'll just fast-forward as Mike does this and tightens those up.
Now replace this bracket and those T30 Torx bolts using your wrench and your T30 bit. Re-clip the cable back into place. Push the lever back into the adjuster, re-clip the cable to it, clip on the spring, and then pry the spring back into place and into that hole. Then torque those four 10mm bolts to fifty foot-pounds. Now push your brake shoes back down into place, use your flat blade screwdriver and just pry it back around and behind the hub. Push this cap back into place, and into that lever on the inside of the adjuster.
We want these shoes to go down off of that clip inside of there, and those two 10mm bolts go on the top and down into the two slots on either side of the adjuster. Make sure those slots are lined up with the caps on the brake shoe. Now, you want to just adjust the adjuster with a flat blade screwdriver, and you can tap it with a hammer. You can turn that, bringing the brake shoes in, and you want just a little bit of resistance with your rotor. Then put the caliper back into place, and hammer it on. Then replace the bolts on the back of it, and tighten them up.
Make sure you push your sway bar link back into place and replace that 18mm nut. Replace your wheel. Then replace the lug nuts and tighten them preliminarily. Then lower the vehicle and tighten them the rest of the way, and then torque each of these to a hundred foot-pounds in a crossing pattern. Replace your hub cap, and tighten up these lug nut caps.
We hope this video helps you out. Brought to you by www.1AAuto.com, your source for quality replacement parts and the best service on the Internet. Please feel free to call us toll-free, 888-844-3393. We're the company that's here for you on the Internet and in person.