Hi everyone Sue here for 1A Auto, and today we've got a 2008 Saab 9-3. I'm going to show you how to do front brakes. If you need those parts or any other parts for your car, click on the link below and then head on over to 1aauto.com.
The first thing we're going to do is take the wheel off. This has plastic caps on it and there's a little tool it comes with. I don't know if you have the same thing but it just snaps on. You hear it click because it's two little indents on that cover. Squeeze and pull the cover off, that's how easy that comes off. That way you don't scrape your rims with a screwdriver or a pair of pliers. This is a 17 millimeter, and Saab is studs not lug nuts.
I like to set these aside because with one left it can be cumbersome to get this off. Make sure it doesn't fall. These calipers are good. Before I take the brakes apart, I'm just going to make sure that the bleeder screw opens because I have to bleed the brakes due to the rear calipers being new, so I have to do at least all four and I want to make sure that I can get this bleeder screw open. Yep. I'm just going to just give it a slight little snug so it doesn't leak. That's a 10 millimeter socket or wrench.
Now we have the boots that cover the sliders, we're going to pop those off. All right. Conveniently the front sliders are the same size as the rear so we don't have to use too many Allen head sockets, we just need one for the front. That's mighty nice of them. It's a seven millimeter Allen head socket. Break them free. These are the slider pins. Break them both free. I've broken those free so I know they move, before I go any further I'm going to take my anti-rattle clip off. Flathead screwdriver or pry bar, just pop in there, and pull it out. Pulling the last slider bolt out. Okay, now we can just lift the caliper hopefully right out. There you have it.
You can see that the pad is worn down quite a bit, getting ready to be almost metal to metal. This is the inner pad that has the anti-rattle clips that go inside that piston. We're just going to take it with two thumbs and just wedge it out. Just slide this one out. As you can see, it's nice and clean. Now these have been on there for quite a few years and probably at least 40,000, and see how there's no grease there because you don't want it there. This is a sliding type. It needs a clean surface. If you put a silicone on there or anything, caliper grease, dirt collect, and this is going to get stuck right on that bracket.
Now it's time to take our caliper bracket off our knuckle, and this is another inverted Torx, that's what it looks like. It's an E20. Take a half inch. Now this is going to be all the way like this because the threads have been loaded up with a thread lock from the factory because this specific car, a lot of GM style vehicles, even though it's a Saab it was taken over by GM, when they have aluminum on aluminum and steel they like do a lot of Loctite. it cuts down on vibration and possible loosening, loosening of a heavy duty bolt. There's our caliber mounting bracket. See all that little like pink-ish powder? That tells me that this is a heavy duty, the red thread locker. I'm going to clean those threads when I go to reassemble and use the red thread locker for strength in the front.
Top bracket mounting bolt, slide that bracket right off. Now we have to remove the rotor from the hub and this comes with a Allen head, not a Torx bit head. It is a five Allen metric. Grab the rotor here and just break that free, hopefully. I don't like to use the transmission, it is in Park but I don't recommend that. You have your Park pin, you have a lot of fragile things inside that transmission. Putting torque on anything when it's in Park is not exactly the ideal situation. What I might do here is I'm going to get to lug nuts or the studs shall I say, partially put them in, and then get a pry bar and use that as leverage or a long screwdriver. There you go. Get these out of there. We're going to reuse that so set that aside. Let's take that rotor off.
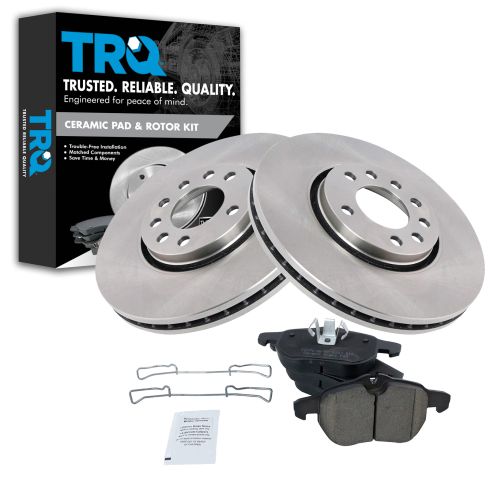
Here we have our brand new brake set from 1A Auto. I got the nice thick brand new pads and they come with the shims already mounted on the back and they fold them over because the caliper or European calipers don't have sliders on them, so it goes right on the bracket nice and slide over it just like the factory pair. Look at this thickness difference. They got every dollar out of that didn't they?
The inner pad comes with a self anti-rattle clip, so that goes right inside the piston and the pad set does come with the caliper anti-rattle clip, that mounts on the outside. Our rotor is nice cross-cut. It has the inverted in depth just like the manufacturer for cooling. The fins go straight through and they are coated with a nice surface on the back cross cut, the same set up as the actual manufacturer's. Nice beveled on the inside right here, the way it mounts on the hub. If you need this part or any other part for your car, click on the link below and head on over to 1aauto.com.
Now we're going to clean our hub with a wire brush and get rid of all that raw surface all the way around. Okay, so I took a nice wire brush to that. I got it all cleaned up, I even Brake cleaned it. We get a nice smooth surface. There's no rust build up so I know it's not flaking. I'm going to spray it with some anti-seize, a little copper spray. You can use a silver paste. But you just want to go light coat just like that before you put your new rotor on. That will stop it from building up big rust and water repellent.
I like to put the rotor on like that, backwards, and then I'll take my parts cleaner and clean off the packaging oil and my grease handy prints. Handy prints, that's a new word, grease handy prints. My grease hand prints, clean rag, just give it a quick wipe down. It dries really quick. Now I can flip it around. Let's line up that mounting hole. I see it right there. I'm going to mount that nice and firm before I spray it with any parts cleaner. Parts cleaner and get off that oil base and my hand prints, my handy prints. That's the goal.
Here I have my caliper mounting bolts. I've cleaned them up with a wire brush and I'm going to reapply some red thread locker because that's the grade that was on there, much heavier duty bolt than out back. Come on. There you go. I just like to put it right into the threads. This is a paste so it doesn't drip. I like that. Now I can just get my bracket and I'll mount it up.
Before I mount this up there, I want to take my wire brush and I want to clean where that pad is going to sit. You can see see the brake dust come right off. Get some parts cleaner or brake clean and hit it with that and make sure there's nothing staying behind. That looks nice and clean, nice and smooth. Get our top bolt and slide it right in there. I'm going to put this down as far as I can because the torque on this is 155 foot pounds, so I'll snug it right down with my hand. All right, let's get that torque wrench.
That's a E20 inverted Torx bit socket and I'm going to do 155 foot pounds. Here we go. That was one. That's two. Now it says an additional 30 degrees, so we're going to give it our best effort. We know what 45 would be. Obviously if it was here it would be straight up this way. I'm just going to do it halfway and let's see what happens. That's the most I'm getting out of that. I think we're safe to say that she's tight. Yeah, I'm not too worried about that.
Now we have to push back our caliper piston. I like to use a pair of locking welding clamps, they're pretty easy to get in there. I know my bleeder screw is already loosened up because I did. Now you don't have to, some cars you do, I do to all the cars because I'd rather just make sure that I don't put any brake fluid in reverse with anything that has ABS. You're just going to keep squeezing that piston. Make sure you have your catch bucket.
Don't forget these pads are pretty thick. They're a European pad and I would have to say they're close to almost an inch thick, so you want to make sure your piston is nice and flush. This also tells you if there's any internal damage because you can tell how smooth it goes back. You can feel it and then you can examine the dust boot and make sure there's no ripples or tears in it. Now it's locked. I know that that's as far as it goes.
Now I'll tighten this up, 10 millimeter. You don't have to rank too much on it because you're going to have to bleed the brakes. Take the tool out. Now we can get some Brake Kleen, clean the area, and look at that dust boot too. I know that fluid is from me pushing back the caliper because I looked at it prior and there was no fluid down there.
We'll take those slider pins out and we have to clean these up, so push them all the way out. See that ridge line right there? That's just a build up of the slider grease and sludge. You want that clean. If you've got a wire wheel, definitely use it. If you don't, you can use a wire brush. You don't want to make grooves in it because you want it to have a nice sliding surface so all of this has to come off.
Okay, so on our caliper slider boots, right in here, I'm just going to add some nice silicone paste. Clock it right in there in both of them. You can use caliper grease. I just want to make sure those pins move nice and smooth. I'm going to put the pins in. I cleaned them up pretty good. I'm going to put them from this side so that way I don't get any of the silicone paste on the threads. There we go.
Now we can get our inner brake pad and install that right there. The inner pad is the one that has the clips, the three ear clip, it goes right into that brake piston, the caliper piston. I like to line it up, center it right there, and just give it a good squeeze. Sometimes you have to rock it back and forth. If someone told me today this was going to be the difficult part, I wouldn't believe them. There you go. Whew, I'm glad I ate that Wheaties this morning.
Just bring your caliper around, slide it right on. I just push those so that they line up with the threads. Get our Allen socket and we'll tighten her up. This is 21 foot pounds, so we're just going to bottom them out lightly and then get our torque wrench and torque them up to 21 foot pounds. We'll put the caps on and we just put our anti-rattle clip on and we can get ready to bleed these brakes.
Okay, so align the top ear right up, and I just take a little hammer ... When you apply the brakes and pump the brakes up, that's going to push that piston out and so these are going to come out more so this will have a bit of mounting surface. I always re-check these after I'm done bleeding the brakes and pumping the brakes up because I know everything's seated and that way I can assure that pin is all the way in.
Now we've bled our brakes. All we did was open our bleeder screw and had a partner in there pump open and close. Just pay attention to this manufacturer's ... You can find it online but I'll tell you. The driver's seat, that wheel is wheel one, the left front is wheel one. Then they want you to go to the right rear, that's wheel two. The right front is wheel three and then left rear is wheel four. You trust that, wheel four. That's how you're going to bleed the brakes.
You can either do a gravity bleed, which I strongly recommend because it takes its time. It does a good job. If you have a partner in crime, have them pump them up, hold them while you open the bleeder screw. Look up that video if you don't know how to do it. Now we're all set. The brakes are bled. I'm just going to take a hammer and I'm going to double check and make sure these springs are seated in there. Sometimes I'll use the round side. I saw those go in quite a bit. Just double check your work. Make sure the caps are on and everything looks good. Let's install the wheel.
Now we can put our wheel on. Grab our lug studs design, 17 millimeter socket, just snug them up in the star pattern. We're going to lower it down and torque it to the manufacturer's specs. The wheel torque is 81 foot pounds. Give it a double check.
Thanks for watching. Visit 1aauto.com for quality auto parts shipped to your door, the place for DIY auto repair. If you enjoyed this video, please click the subscribe button.