Hey, everyone. Sue here from 1A Auto and today have an '08, 2008, Saab 9-3. I'm going to be doing rear brakes with calipers. If you need those parts or any other parts for your car, click on the link below. Then head on over to 1aauto.com.
Take your wheel right off. Here we have our rear brakes. I've already looked at these, because I wanted to make sure if we need calipers or not. And we do. The piston will not screw in. This is a screw type because it has the e-brake bracket to it. So every time you pull up on the e-brake parking brake, this bracket will move. Let me see if I get a pry bar, gave that to move for you. See, it pulls on in like a corkscrew screws that piston out onto the rotor in the pads.
So what we have here in New England, we have conditions where corrosion happens all the time. This is an aluminum caliper and this is an aluminum bracket. And the parking cable is just a steel shank. There is no clips. Doesn't lock in. It just pops through. Well now you have the steel shank on an aluminum caliper, and in New England this is like a typical mother nature weld. That's what I call it.
I've soaked it a couple of times, sprayed it, and I'm going to show you how to take the cable off of the bracket. And then hopefully you guys, because you can't get a--you get a core on these, and they can range anywhere from 20 to I've seen them up to $60. So you want to return the old one if possible so you can get your money back.
So first thing we're going to do is take the cable off. I just take a pry bar, pull on the arm and lift the cable right out. So now that's disconnected. This is supposed to pull right out. I do have some movement. That is great. So I have been soaking it, like I said, to see if I can get some movement. Let's see if I don't have to cut, because if so, I'm going to have to cut this aluminum loop and then there'll be no core for this caliper. So I'm going to make a little noise, going to hit it with a hammer, and see if I can rattle some of that.
And it is aluminum. So the more I hammer it, it can also soften and squish down, which is not the goal here. You can see it's really bad in there. There you go, I'll put some light on the subject. I'm going to take a small screwdriver, see if I can chisel away a little bit. So it's up to you the value of this here in time and effort. So I know for a fact that the core on this caliper is only $20. So now I have to say to myself, "Is it worth me doing all this for $20 and save it?" Yeah, it's worth me giving it an effort. But for $20 I got other things I could do once I get this brake job done and continue. So that's not going to move. So I'm going to take my cutting blade and I'm going to cut open a little ear, pop it open, and slide that right out.
So I got my safety glasses and I'm just going to cut a little V mark in this caliper. Being careful that I don't go all the way through because I'm not replacing the parking brake cable. Can't even just probably spread it being that it's aluminum. I have to cut some more. I got it this time. And that's how you do that one. It's still in there pretty good. Well, that's a proven fact that that would not have came out if I didn't cut it.
So after some perseverance of hammering away the ear broke off some more and that's how the cable comes out. But now you can get a good close up look at the corrosion that happens. I wish they could have made some sort of maybe a rubber boot, but that still in New England doesn't always protect things. It's just, it is what it is. It's mother's nature as weld, steel and aluminum do not mix.
So now with that out to the side we can get free to take this caliper out. The first thing I'm going to do is move that anti-rattle clip on the outside. Once again, I'll just use a little pry bar, just push it right in there and pop it out. You'll see how this goes in, two tabs or at an angle, and the caliper comes with two little point holes. So that goes in there. See the pressure point?
So now we have two mounting bolts in the back that are called caliper sliders. We're going to take those off. These have protective boots on them. Take those caps off. I'm going to just put my fingernail on this. Sometimes you can get a flat edge screwed over in there. Pop that off. This particular model is Allen head and I'm using a Allen seven millimeter. So it's symmetric. I can break the bottom one too before I pull that pin all the way out.
Now just take your Allen had socket or Allen head wrench. Take the slider pins completely out so I can just grab the socket now, probably twist and pull. Sometimes I'll grab a small screwdriver or anything that's got a sharp point on it and you can push on the pin. See? You don't have to ... You just want to clear it out of the way, both top and bottom. Perfect.
So you can see how I had an air tool that cuts and I just sliced that with my, some call it a whizzer or cutter. If you're at home, being aluminum, it's in your favor because you can use a nice hacksaw blade. Just a couple of strokes, probably take it right down, and then hammer it off like I did. Now we're just going to pull the caliper off of the pads. I'm going to leave the hose on until I get everything mounted. I can do that last because it makes such a mess.
So there we go and set that aside. That doesn't have much weight to it. It is aluminum. Usually on steel ones, steel calipers, I'll hang them. I don't want stress on the hose. I'll usually use a hook, but here I'm not too worried about it. All I can say is she needed brakes pretty good, right down to nothing. The pad is completely gone. That's steel. And look at what happened to the back. That's because that's a twist style piston and it just was so old and rusted. It just every time it twisted before it seize, it just twisted that right up.
So now we have to remove our caliper bracket off of the rear knuckle. And these bolts, mounting bolts are what they call it inverted torx. So that's what the socket looks like. It's not a 12 point. It's not a 18 point. It is an inverted torx and it's number 18. I'm going to use a big half inch breaker bar ratchet to snap those free.
The top one is somewhat challenging because of the suspension bolt. Another thing you're going to notice while we disassemble and assemble, even the bolts, once they're broken free, they don't come out easily because of their steel on aluminum. They also like to put a lot of threadlocker on there, so it's pretty typical. The manufacturer did that. We're also going to reapply some and torque these to a high torque spec that the manufacturer recommends.
There's the bottom bolt. You can see all the blue thread locker in there, so that's medium strength. The red is for heavy duty. We'll clean that bolt up before we reapply it. Now the top one. Here we go. It's going to come at a slight angle and I'm going to hope that it doesn't pop off, that I can at least break this free. Because I've got to clear that stud of that suspension bolt.
See that's why I usually never take bolts completely out. I was ahead of myself. I'm so excited to show you the thread, thread sealer. There we go, just tight. Now I can. Because you had the socket kind of at an angle, it kind of comes to a point where it won't let you go any further. As far as it goes taking this bolt out, it keeps falling out. See? So I'm going to move and take the rotor off. And when I take the rotor loose, I can actually move this bracket a little bit better.
So the rotor has a little Torx head mounting screw and I've got a T30 here. I'm going to break that free, holding the rotor. You'll see now that I can get the thread out of that bolt and I'll bring that bolt in from further this way so I can get a good hold on it with the socket. Brings the bolts in more. I'll put my hand here because I like my toes. Take that bracket out of the way. There we go.
So we're going to reuse these bolts but not the bracket because I got a new caliper bracket. It came with the caliper. Take your rotor right off. You can see the hub. It's pretty rusty, so we're going to clean that up before we install the new one.
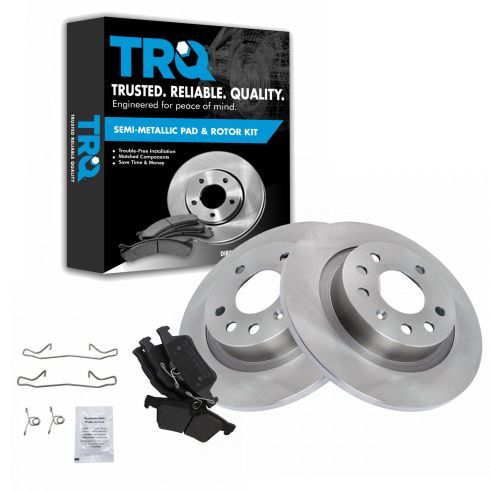
Here we have our new set of brake pads and rotors for our '08 Saab. So the pads come with the nice rear shims mounted to them, already has an anti-rattle clip right into the space. It's got a nice angled cut to help the brake dust disperse and a cooling slice that keeps the pad nice and cool. I'd love to compare it to the old ones, but we're limited on what we have.
So this one's completely gone. You can see here there was no beveled edges and there is no slice down for the cooling of it. There's plenty of thickness there still, but you should see some sort of line. But because they probably don't have that cooling line, you can see now it's starting to lift too from the heat. And that's probably what happened to this right one. The bonding comes undone from the heat and it just pops off while you're down the road and you're like, "I swear, I didn't hear noise yesterday." That's why.
Our new brakes come with the anti-rattle clip, comes into set with the brake pads and our rotors are nice cross-cut, has the hole for the mounting to the hub, and it's a solid rotor on this particular model, no vent needed. It comes with the manufacturer's specs for the diameter. So if you need this part or any of the parts for your car, click on the link below and head on over to 1aauto.com.
So now I'm going to clean this surface and get rid of all that rust. I'm going to use a wire brush and really get in there. Now just finish it up. Make sure that you definitely get in here because that's where that rotor sits nice and flat on that hub. You want it to be mounted, surface clean, everything flat so you get no brake pulsation from it not sitting correctly.
I have a actual can of copper spray that is like an anti-seize. You can use the brush paint, paint stuff. I'm just going to put a coat on there, light coat, make sure I get it all around. So you can take your rotor and you can place at this and have fun driving. No, I'm just joking. Now I can spray my brake clean parts cleaner on here. Get the little oil coat that they do for packaging. It just helps it from getting rusty on the shelf. So now that side is done. While that's drying, just flip it around. I'll line up my mounting screw to that hole. There it is.
That's a T30 torx bit. I'm just going to grab the rotor surface right here, hold it to spring with the hand and then tighten it, just like that. Get my cleaner, clean the outside. Let that air-dry. Get ready to mount that caliper. I'm going to go get the new one out of the box.
So here we have a caliper that we're going to go aftermarket. Our company does not sell it, 1A Auto. I want to show you how to get ready to mount it. I'm going to take out these new slider pins, which is perfect. All new caliper should come with. That's that Allen head. That's in there pretty good. Try not to hurt yourself. Not that you would.
That's supposed to be 22 foot-pounds. I think it's a little over. Before we take those slider pins out, I'm going to take this anti-rattle clip off. I'm just going to take a small screwdriver pry bar. Here you go. Easy peasy. Now I'll take the pins the rest of the way out.
And there we have the caliper bracket. We're going to mount that on prior to putting the caliper on, and this is the caliper piston. Has those two point holes because that is an actual twist piston. There's a spring in there and it spins. You can't compress it this way. Your sliders, they came nice and clean. If yours aren't, if your caliper's good and you're not replacing the caliper, make sure you clean up these sliders. Use a wire wheel brush or a wire brush, clean it up with some brake clean, and then use some nice caliper grease. Load up that rubber boot with caliper grease. Do the same to both sides.
Inspect your boot. Make sure there's no tears in that. It is a dust cover. Some people say, "Oh, it's not a big deal," but it is because dirt gets in there and it's going to ride on that piston as it spins and it will blow the seal internally. Then you have to do this job all over again. So if you see any tears on this, just to replace the caliper. You can probably get a set of slider boots. If you see tears there, you want that to move nice and smooth. So if you can keep of getting the boots and you just want to do those, I would recommend it.
Our caliper came with a nice new Bandra bolt and copper washers. So let's go and install our bracket. Then we'll get ready to put our caliper on. Here we have our rear caliper mounting bolts. So like I said earlier in the video, Saab/GM for this year make and model, they love to put, especially if you have an aluminum caliper, steel bolts aluminum bracket. They want to put a lot of threadlocker on there in the rear. They recommend the blue, which is a medium strength. I have a nice gel. That way it doesn't make a mess. It's cleaner and I just embed it in the threads. So when I throw that in, and now there's no dry time, I don't have to rush. I can throw that right in and then have time to torque it.
Line up my new bracket. Put the bottom bolts in. Hand start it. If you remember the socket doesn't fit on this. So I'm going to take, put the top one in as flush as I can. So I know my socket will fit. Now that the threads have been cleaned up you can do that. So this is the inverted torx. It's a T or E, sorry E18 and the torque specs for this is 96 foot-pounds and then an additional 45 degrees.
There's the bottom. And the top one's tricky because you've got to try to get it in. I might not. I might have to get an extension. Oh, I got it. Let me go. Okay, so now I'm going to transfer over to my long half inch ratchet and try to get this extra 45 degree angle. So I'm starting here, 45 degree. Basically it's going to be straight down. I think that's going to be good enough. So now we have to break our flex hose. Bend your bolt, break it free. I'm just going to pre-mount it. It's a 13 millimeter socket. Hold it there. Make sure you have a catch bucket underneath because brake fluid will come out.
So I'm going to let this hang. Make sure my bucket's right underneath it and I'm going to grab my new caliper and mount that. So first thing I'm going to do is I'm going to put the pads in. I found that if you look at that, that piece, that butterfly sits right in that groove. So I found it to be on the inside. Then put it on the inside one. Line that up. I do not like to put any grease or anything here because I don't want dirt gathering there. As long as it's clean metal, we should have no noise. We have our shims.
Find the top pin up, mind the bottom pin, get my Allen socket, thread it in by hand. Get the top one started. The reason I'm doing this is because I want to throw that hose right on as soon as I am bolted completely from that caliper.
Okay, so now I know where my spot is right there. I've got my new Bandra bolt and washers ready to go. Set that caliper down in there. Take the old bolt off and make sure that I get all the washers out of there. See on the flex hose. See that washer is still there. You want to break that free. I like to just go this with the old Bandra bolt and usually pops right off.
New Bandra bolt. New washer. Goes on the outside. Put the new washer on the inside and then line that right up. Make sure you hold onto the hose because it will, it could cock itself into seating there. You want to make sure it's flush and it doesn't get caught up on anything. Okay. You want those copper washers to sit. Perfect. So now I'm going to finish tightening up the caliper slider pins. Once they're bottomed out, it's 21 foot-pounds. I'll get my little three-eights torque wrench. Okay, 21 foot-pounds. Cannot get it. That didn't go. Let's see if I can get it this way. Perfect.
Now I'm going to put my outside anti-rattle clip on. Don't forget to put the covers on. Nice slider boots. Keep them clean from the elements. And here's where the fun begins. So line one up. I like to find the other one and spring load it. So I have that lined up. I have my thumb on the bottom part. Tap it right in.
So now we, all that's left to do is put this e-brake cable on. I'm just going to take a brush, see if I can get some of the rust chunks off all the way around. I'm going to spray that with that copper spray. So hopefully the next 50,000 miles someone doesn't have to do what I did. I can get it to slide right up. See, it seats itself. Perfect. Now as far as that cable goes, I'm just going to get my little pry bar. You can use pliers because everyone does this differently. Is that easy.
So now we've done the brakes. We have our new calipers. So I want to bleed those. We already did it. I put a bucket down below. I opened the bleeder screws, let it gravity bleed a little bit. Then I closed them, went inside, and on the corkscrew type, any spring loaded caliper where the piston is a twist, you want to grab your e-brake first, pull up on that couple of times. You'll feel it get real firm. That adjusts that e-brake, brings that piston out as far as it's going to go before it bleeds out. So then you can make sure that bleeder screw's closed, pump the brakes up, come out, open it up and get the air out. Or if you have a partner in crime, they can hang out inside and do it with you.
So just quick note on the Saab. It's a bleeding situation where it's one, two, three, four. It is in a sequence of one being the left front, two being the right rear, three being the right front, and four being the left rear. That's a sequence in bleeding these brakes if you have to do all four.
So now before I put the wheel on, I like to take a hammer. Now the brakes we pumped up. I've got a good pedal. I just tap on my anti-rattle clips because I want to make sure they're seated all the way in.
We're ready to put our wheels back on. These being the wheel studs, no studs [inaudible 00:24:31] now the studs. Center it. 17 millimeter socket. I like to start at the bottom, tighten in a star pattern. I just bottom meanwhile because now I'm going to go get the manufacturer's specs and I'm going to torque these wheels. So the wheel torque is 81 foot-pounds. Double check. We're ready to go.
Thanks for watching. Visit 1aauto.com for quality auto parts shipped to your door, the place for DIY auto repair. And if you enjoyed this video, please click the Subscribe button.


