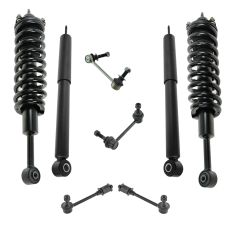
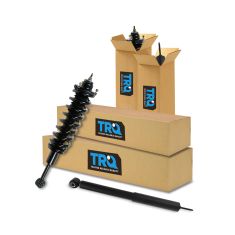
Hey friends, it's Len here at 1A Auto. Today I'm working on a 2007 Toyota FJ Cruiser. I'm going to show you how to do rear shocks. It's going to be a very easy job. I want to be the guy that shows you how to do it. If you need these or any other parts, you can always check us out at 1aauto.com. Thanks.
So here we are, friends. We've got the vehicle's weight mostly supported off the ground, the wheel, just barely touching. We don't have very much of the weight of the vehicle at all on the ground. I'm going to take my 21-millimeter socket, and all I'm going to do is I'm going to break all these lug nuts free. You don't have to unscrew them very far. We just want to make it nice and easy so when we have the wheel up in the air, it's not spinning while we're trying to break these free. They're all nice and loose. They're not super loose.
Now we can go ahead and raise the vehicle so the wheels off the ground, we'll take off all the lug nuts and get the wheel off safely. We're going to hold the wheel and leave this lug nut on just a little bit and remove my last one here. 21 millimeters. Set this down, roll it out of the way so it's in a safe position. So we're going to remove this lower bolt right here. 17 millimeter. Use your air gun, use your ratchet, use a wrench. Whatever you want. 17 millimeter. Come on, baby. We'll set that aside.
We're going to move along to the top. Let's try and pop this out of here first. That's pretty much ready to come out. We just got to loosen up the top a little bit, and then it should be ready to wiggle right out of there. So I'm going to hold right here with some locking pliers, and then I'm going to try to turn this nut up here. 17 millimeter. Let's try to tighten that up a little bit. Yeah. Cool. Use a wrench. All right, I know what I'm going to do. I'm just going to bring this right around. Here we are. So now it's hitting up against the frame right here. It gives me a little bit of extra.
So I'm going to go ahead and apply a little bit of heat right here on this nut. You want to always make sure you pay special attention whenever you're heating something up, that there's nothing behind it that's going to get damaged by heating. Of course, we got a fuel tank here, right here. If you think you smell fuel, obviously, don't make any type of spark or anything like that. I don't smell anything on this. I felt behind it. I don't feel any lines. There's no brake lines right there. There's no fuel lines right near here. There's literally nothing. So, I feel confident that I should be able to heat this up without any issues.
I'm going to use something like this, just a small little torch. Apply some heat. I like to move it around as I go. I'm going to put on a little bit of penetrant. It's going to create smoke. Obviously, you don't want to breathe any of that in so I'm going to stop talking for a second.
Here we are. Just going to wiggle it. Nice and freed up now. If you wanted to, you can get your head out of the fender well and take a break from breathing in the smoke. So all I'm going to do that. So let's continue getting this off here. Let's just pry this off of here. Just like that. A little bit of brute force. Okay. Shock and move around. This right here is holding this up. There we are. Can move this all around now. Cool. All right.
Let's continue with that nut. 17. Let's get this off of here. We'll finish taking that off. Just going to use my ratcheting wrench at this point. I don't have to worry about it getting stuck. Here we are. There's our rear shock. Grab our old bushing off the top there. Just goes here. So bottom of the frame, top of the frame, nut. Easy peasy.
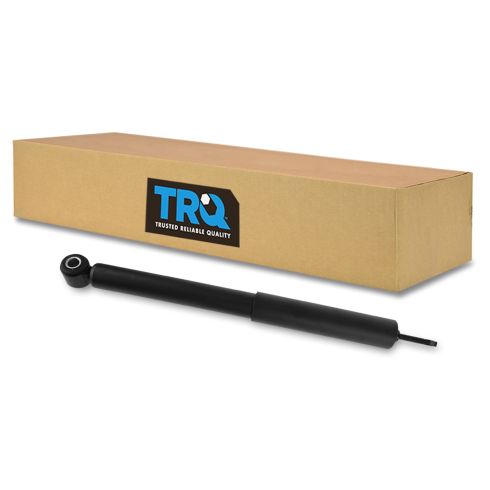
We just took out the rear shock. It was fairly easy. Took a little time, but whatever. It's easy. Over here, we have our quality 1A Auto part. As you can tell, it comes pre-compressed. I'll show you how to go ahead and get that all gassed up in a minute, but I want to make sure that you know, it comes with brand new mounting rubbers, okay? This is important for mounting. You want to make sure you have a locking nut, which it came with. We've got our washer and the two rubbers: one for on top of the frame and one for underneath.
Over here, you'll notice you get the same mounting hole, okay? And of course, you've got your mounting shaft up here. So I don't see any reason why this wouldn't be a quality part to install in the vehicle, so I'm going to go ahead and do it. So if you need this or any other part, you can always check us out at 1aauto.com.
So here we go. It's time to get this gassed up. All right? All we're going to do, we're going to push down on this plastic piece, I'm going to put on my safety glasses in case I slip. I don't want to poke my eye. Safety glasses, push down. I'm compressing the shock. It's going to come up nice and slow. I'm just going to get this out of the way. I'm going to leave it in the upright position. Let it completely come up. Now I'm going to take it, I'm going to bring it back down.
What this is doing is it's getting the gasses all mixed up in there. You just want to do this basically three to five times, nice and slow. Let it do its thing. You don't want to do it laying down. You don't want to have it laying this way, and you know, do your chest exercises or whatever. I mean you can if you want. I would buy one separate for that because it'll be a good chest exercise for sure. I want to do it this way. It's good for your lats. So there we go. Let's say we did it three to five times. Now you're clear to install it into the vehicle.
Let's talk about our bag of goodies. It came with two washers, two rubber mountings and one neoprene locking nut. It's very important to have this facing up, okay? It doesn't go on this way. I'll show you what we're going to do. We're going to grab our shock. We're going to take this off. It's handy for when you're pushing down with your hand, but we don't need it on the shock now. Take one of my fancy washers. Put it on there. Get it all the way down to the bottom. Take one of these, okay? We're going to put it on here.
First, we want to look at our hole. Make sure that we don't have our old gasket up in there or mounting rubber. If this was sitting up on there still, obviously, you want to take it off, okay? Or maybe one sitting up here. Shake that off. It's nice and clean. Now we can take a peak at this. What size is our hole? Is it a little teeny one? Not so much. The bigger one? Yes. So we're going to put the big side facing towards the frame, just like that. Now when we go to install, we're going to have the big side facing towards the frame, like that. And then this and then neoprene facing up. Frame. Easy peasy. This part right here, it's going to of course slide over that stud down there. So let's do it.
Take these off, come over like this, put it up in there. I'm going to get started on the bottom shaft here. Let me give it a little spray. Hopefully, that'll just help it along. What we can do, let me show you this. Let's see if we can get it to happen. I'm going to try to compress it. There we are. Now I'm going to go ahead and put it in. Try to get it slid over this, at the angle it wants to be at, and then let it go up, do its thing. There we are. Big side, facing down, just like that.
What you'll notice is the shock doesn't come all the way up to the frame, and that's only because the suspension's hanging at this point. If you're working on the ground and you wanted to just throw another jack right under here, you could jack this up and lift up the axle in which point, it'll bring this up, and you can go ahead and put on your washer and your nut. If you're hanging in the air like I am, I just went with a ratchet strap. I went around the axle tube. Very careful for the ABS wire, and I came up here. Now I'm just going to give it a couple of cranks. As you can tell, it's bringing up the differential too. I think that's high enough. We'll get our washer on there and our locking nut, and as we tighten it, it should bring it up the rest of the way on its own. I can get that started on there. There we are. Cool. All right. Let's get to tightening that up.
So we're going to tighten this up. Our new nut is a 19 millimeter. I'm just turning the shock at the same time here. It gives me a little extra throw. I'm sure at some point, it's not going to want to spin, but as for now, I might as well. Now comes the tedious part. Just little little bitty turns, over and over. All right.
These bushings are looking good. As you can tell, they're starting to compress or squish down. You don't need them to be completely squished down and flattened out, obviously. You just want them so that they're touching, okay? It's a neoprene locking washer so it will not back off on its own. So I would say that that's good. Once you see it's starting to compress and squeeze up against the frame, you're good to go.
So let's move ahead, and we'll get down in the bottom. We've got our 17 millimeter head bolt there. We're going to screw it right in here. Can use some thread locker if you'd like. It's your prerogative. There we are. Nice and tight. Feels good.
All right. We'll get our strap off of here. Being careful for our ABS wire of course. This is your ABS wire, by the way. Okay. 17. We're going to torque this down to 72-foot pounds. Torqued.
Now we're going to take our wheel, lift it right up our leg, use our ab muscles to lift it up and put it on. There we are. Hold the wheel. Got one lug nut started on there. We know the wheel can't go anywhere now. We'll grab the rest. We'll put them all on, bottom them out, and then we'll torque them down.
So we've got our 21-millimeter socket and our torque wrench set to 85-foot pounds. We're going to tighten down these lug nuts. We're going to go in a star, or I guess in this case, a snowflake-type pattern. You never want to go around in a circle. You want to crisscross. Just like that. You want to go around again, go around again. 85-foot pounds.
Thanks for watching. Visit 1aauto.com for quality auto parts shipped to your door, the place for DIY auto repair. And if you enjoyed this video, please click the subscribe button.
