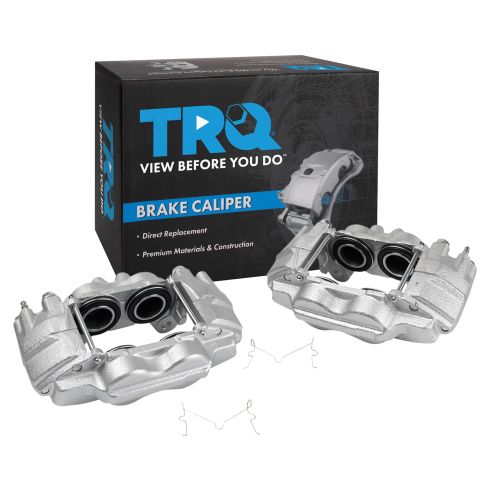
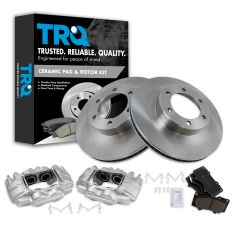
Hey friends, it's Len here from 1A Auto. Today we're going to be working on our 2006 Toyota 4Runner and I want to show you how to remove and install a front caliper. As always, if you need these or any other parts, check us out, 1aauto.com. Thanks.
Okay, friends, so it's time to remove our wheel. To do that, you're going to remove all of your lug nuts. You're going to use a 21 millimeter socket. If you're going to be using a ratchet, it might be easier to do this while the wheel is still on the ground so it can't spin while you try to loosen up your lug nuts. I'm using an airgun, so I've got my eye protection, my hand protection. Here we go.
On this one I'm going to leave on a few threads, now I have a spare hand. Try to wiggle this around. A lot of times on Toyotas they don't want to break free right away. It's not really that big of a deal, you could use something as simple as a rubber mallet or if you have a pry bar. Either way, what you want to do is make sure you have a lug nut on, at least a couple of threads, but it's still nice and loose. I come right under here, I'm going to bomp right on the edge of the rim. If you're using a real hammer that's not a rubber mallet, definitely don't hit your rim, you'll mar it up, cause issues. You can try bonking on a tire, you just have to be careful because when you bonk it's going to want to come back.
Rubber mallet right on the rim. There we are, that lug nut did its job, made it so the wheel didn't come falling off and hurt anybody. That's super important. Safety's number one. We take our wheel off and we'll roll it out of the way. Okay, so one of the first things we're going to need to do is grab a little bit of penetrant. This pin right here is going to need to come out to get the pads out. Same thing with this one. All right, so I just like to use a little bit of penetrant spray. Get everything prepared here. I'm going to do my line just like that. And if you were planning on opening up the bleeder screw, which we're not because we were replacing the caliper, of course you would spray that as well at the same time.
I'm going to grab some cutters because that's going to be easiest to grab this with, maybe a nice small flathead screwdriver as well. Try to get out these clips right here and then we're going to push these pins through. So I'll grab a small hammer as well. Once we get those going through, we should be able to continue. Okay, so I've got my pocket screwdriver, just something nice and small. Come like this, see if I can grab onto these. You need to have these, so if you destroy it, you're going to need to get some new ones. More than likely your new caliper will come with some. If it does, generally speaking, it's a nice idea to just keep these if you have a junk drawer or a baggy you can put them in because it's fairly common for them to get lost when you're doing a break job. So who knows? Maybe later on down the line, you're not replacing your calipers, you're just doing breaks, you go to take out the clip, it goes flying into the grass or wherever you're working and you can't find it, you're going to have some extras.
So we've got both those out now. I'm going to take my small hammer and go right on the edge there. Just try to knock this pin through. Same thing up here. Cool. There's one pin. You can see where the hole was that that clip went through. This one has a little clip. We're going to take that off first, I'll show you what it looks like. This right here, what this clip does, and it needs to go in on when we reinstall the new caliper, this just kind of separates the pads so when you release your brake pedal, the fluid can kind of get pushed back into the caliper a little bit and it relieves the pressure from the pads on the rotor. So I like to just go right along here. It's got a little lip and it goes into the hole in the pad. Same thing on the other side.
Awesome. That pin came out nice and easy. I'm going to very slowly just try to push the pad back. That's going to push in these calipers right here, caliper pistons I mean, sorry. Same thing over here. Let's try to get it so it pushes back the pistons just a little bit. Cool. These pads are going to be ready to come out soon. So now what we're going to do, we're going to loosen up the line right here. Before we do that, we want to make sure that no fluid can come out, or at least minimal amount, so I'm going to use these hose pliers right here. When you crimp them down they only go so far, and that's important because you don't really want to put a real pinch on your brake hose, you just want it to be kind of crimped off so it squeezes the hole that the fluid goes through the line and it's going to help prevent fluid from traveling down this way. So we're going to grab our wrench and we're going to try to remove this right here from our caliper.
So I'm just going to continue spraying this a little bit. I'm going to give the line a couple of love taps here, and that's just a hope to try to break the line free from the fitting that's in there.
A lot of times moisture gets in between and it'll make it so the line's stuck in the fitting. And then as you try to loosen the fitting, the line's twisting. As the line twists, it's going to crimp off that hole and you're going to have restricted brake fluid and/or the line will actually break and leak, which both ways would be bad. So I can't really say which way is worse because both ways are bad. At which point if that was the issue and this line either twisted, became bent over or anything like that or even broke, you would just take off this side right here, this side right here completely, get yourself a new piece of line and watch our video on how to make new brake line flares. I like to just go back and forth like this, try to help the penetrant in.
Cool. So before I get this out all the way, I'm going to grab myself something to put on the ground to collect any fluid that may come out because there is of course still fluid here and inside the caliper and it's going to be wanting to make its way out. So I'll grab a little bucket and we can move along.
I forgot to mention that when I'm doing these lines, I like to use a tool that looks like this. I'll just clean it off real quick so it looks a little better for you.
This is called a flare wrench. Okay? As you can tell, it's much better than a regular wrench when it comes to grabbing onto things because you have more areas of a grabbability. If you look at the difference, you can tell that there's a very big difference. If you use something like this on one of these and maybe it's really stuck in there, it'll just kind of slide right off. So get yourself a set of these, we sell them at 1aauto.com. Once you have it loose, you can use whatever you want for a wrench really. Sometimes even the open-face is easier than a flare.
Right up here where this line comes up in through here and into your flex hose, there's a little clip, it looks kind of like this and it just goes like this, right over this. So what we're going to do is we're going to get this clip out of here and that's going to make it so this line can move around. So make sure you get your eye protection on. That's what our clip looks like and that just sits right in the groove of the flex hose right in here. Okay? So that holds the flex hose into this bracket.
Some people would choose to take out this bolt right here and that would be your prerogative, the only problem with removing this bolt is a lot of times they break. Once it breaks, you're going to have to drill it out, re-tap a hole. Some people go the easy way out and they'll use a couple of wire ties. And I guess that would be up to you, it would be your opinion on if you wanted to. I don't consider that to be very secure and if that wire tie was to break and this could just flop around, there's good chances that it could get caught on something. So best results, take this out, it gives you plenty of room. You could do what you need to do.
Now that we have that out of the way, we're going to remove the mounting bolts that hold the caliper onto the knuckle right here and right there, 17 millimeters. You can either use a straight socket with a nice long ratchet, try and get them to break free or just use your airgun. If you don't have an airgun, we sell them 1aauto.com as well. Sometimes you're going to them and they're going to be tight like that. I'm going to start the other one, see if this one will come loose. That happens sometimes, that's okay. I'm going to grab our socket, a nice long ratchet and we'll get it right off there.
So now we're going to use our 17 millimeter socket and a nice long ratchet, get it on here. Get this off of here. I'm just going to continue with this. It's a little quicker. You can continue with the ratchet. One bolt. All right. At this point I'm going to make sure that I'm holding the caliper because this is the last bolt that's holding the caliper onto the vehicle. Grab our caliper, take it off nice and easy, and then of course make sure we get off any extra fluid that might be inside that caliper.
Now that we're at this point, we can take our pads. There's one that looks like it's reusable and you were so inclined you could reuse it. Or now would be a great time to do a front brake job if you got the extra cake. Let's see if I can get this out of here. There's the other pad. Oops. Awesome. So here's our caliper.
Okay, so it's a good idea before you were to take off the caliper and get everything moving around, just take one of your lug nuts, just put it on your rotor all the way down so it's hitting up against the rotor here, and that's just going to prevent the rotor from moving around too much and potentially getting rust in between the rotor and the the wheel bearing that's behind there. All you need is a teeny little flake of rust behind there, it's going to throw your rotor off kilter, you're going to find a break pulsation and possibly even a wheel shake. Put on this lug nut theoretically before you take off the caliper. If you do it now, like what I just did, that's okay too. If you wanted to, you could even take this off completely and then clean up the backside of the rotor and the hub. That would be optimal. We're going to be doing a brake job on this later on in another video. So if you want to see how to do that, check it out.
Okay, so it's time to prep our brand new caliper. To do that, we're going to take out our little clip, set it aside, grab our pin, set it aside. Same thing for the other one, pin, I'm going to put them next to each other so you can see they're the same exact pin. You don't have to worry about mixing them up. The clips, same exact clips. Also, you don't have to worry about mixing them up, keep them together. So now you need to think about where the pads are going to be touching on your caliper, any contact point between your pad and your caliper needs to have a light amount of lubrication. So when we removed our pads, we remembered that they were hitting up against the caliper pistons of course, because that's the part that squeezes the pad against the rotor. And then also when the pads were inside here, they were hitting up against this and down there. Same over here and here. And then of course the upper portion of the caliper in the same areas.
I'm just going to use a little bit of caliper grease. You can use whatever you want. I would definitely use something that's heat resistant because brakes get hot. And if you use something as basic as like Vaseline or something like that because maybe you don't have caliper grease, that'll just liquefy and it could cause breaking issues if it liquefies and gets in between the friction surfaces of the pad and the rotor. I'm just going to go along the pistons just like this. Looks pretty good. You don't need very much, it's not about putting puddles of goo on here or anything. Of course the more grease you have on the more dust and gunk accumulation you might have. And that's why we only put it on the contact points. You don't need to put it anywhere else because it's just going to make it so dirt sticks. So we've got that side done, I'm just going to turn it over, right along here and here. We've done the pistons. Yeah, pistons are all good. This caliper is prepped and ready to be installed.
All right, so we brought our caliper over to the truck. We're going to get ready to start mounting this in. It's important to make sure that you can spin your fitting. Okay? You can do it just by hand. If you can't, just hit it with a little bit more penetrant and spin it with your wrench a few times until it's nice and loose. That's going to be important because at this point we're going to have to bring the caliper up and we're not going to start in any of the mounting bolts yet. We're just going to have it so it can move around. You still got the line loose up at the top there at the strut or knuckle I guess. Sorry. I'm starting in the fitting here and make sure that I have a whole bunch of good threads. You don't want just one little thread and then that's it.
This is in there pretty good at this point I'm going to leave it loose and now I'm just going to bring it down. I'm going to line up my mounting bolts, the hole's there so I can grab the bolts. If you want to use a little bit of thread locker, it's your prerogative. You do you, boo boo. I'm just going to put this in here. Get it started. Do the same thing to the top one. Awesome. So now we're just going to tighten these up. We'll torque them down to manufacturer specifications and then we'll continue on to putting on all the rest of the stuff.
All right, so let's bottom these out real quick. I'm just going to get them so just barely touching, not putting the hammer down or anything. Now we're going to use our 17 millimeter socket with our torque wrench. We're going to torque these to 91 foot pounds. All right, let's just double check them. Tight? Tight. Those are definitely tight. Let's move along.
Okay, friends, it's time to tighten up our line. We're going to use our flare wrench. All right, that felt like it bottomed out, I'm going to give it a teeny bit more and then that's it. Give it a wiggle. That feels good. We're going to make sure that we recheck this. Once we're done the brake job, we'll pump up the brakes and make sure no fluid's coming out of there. If it is, we'll just try tightening it up a little bit more. If it still does, there must be something wrong with the line, in which case we'd replace it.
Let's continue on. We're going to do this clip up here. Just take your brake hose. I like to squeeze the line like this cause it helps pull it through. Now I'm going to take my little clip. I've got the lip right here on my thumb. I'm just going to slide it through just like this. Okay? I'm going to grab my hammer. Just give it a couple of loving bonks. There we are. That's clipped in as far as it'll go. I'm going to take this off of here. Awesome. Let's move ahead to installing our pads.
Okay, friends, so now it's time to install our pads. Here's our original pads, right? Yeah, they still have plenty of meat on them. That'll probably last you, I don't know, it depends on how you drive, but it could last you another year. But you have your breaks apart, now would be the time if you wanted to do your breaks, that would be the difference between a new pad and an old. So you can notice the difference in the thickness of the pads just by where this pad comes up to you and where that one does. This one's already more than half worn, I would say that it's a decent time to replace them. If you're not and you just wanted to install your old pads because they're still reusable, we're going to do that and this is just a video for instruction purposes only.
So we've got our pads, whether they're old or new. If they were a new, of course, I'm sure you would have a brand new rotor on here as well. I probably don't need to tell you that, but if you're replacing pads, you replaced the rotors at the same time. We've got our old pads, I'm just going to slide them in so the holes are all lined up. I'm going to take my brand new pins. These are going to go from the front, straight through all four holes and then through like that. The same thing for this one. Oops. We've got one more thing, our spring. So when you look at this, you're going to see that there's a little ear that comes up along this edge right here. Same on this one, and you get these little prongs right here. Those are going to be very important because you're going to put your pin through this slot right here. Okay? I'm going to put this just like this. So it's holding up against the pad on both sides. I'm going to go through just like this.
Now you're going to take your clip and you're going to put this little pin through the ear in the pad. Same thing for this one, just pull it through, put it on there. Awesome. I like to just go like this a little bit. If you notice that this is coming down and it's hitting up against, maybe you have some rust flakes on your rotor, you don't want this hitting. So what I like to do is once this is all clipped in, just give it a little tug. Just kind of help it along. You don't want it to come straight up like this or anything, that's going to cause another issue, but as long as it's kind of up like this and it's not hitting up against the rotor, you're doing all right. This is going to do its job. So when I squeeze, you step on the brake, you let go of the brake, squeeze, let go. That's what this clip is for. Let's put on our little safety clips there. There's one. It's going to go through the hole in the pin just like that.
Just make sure it's sitting in the groove. If it isn't, just pull it straight up and then try again. Same thing for the other one. These are very important. If you don't put these in, maybe you lost it and you're like, "Whatever, no big deal." Driving down the road this would be bad if this was missing. That's no good. All right? You need to have the safety clip there. If you lost it for some reason, you're just going to have to go out and purchase yourself one. We'll put those in, or I guess you could actually just use the old ones from the old calipers if you still have those.
So that's in, these pins can move around like they're supposed to. Right? But those pins are keeping them in. This looks great. At this point, we're going to take off this boot again, assuming it's on there, you're going to open up your bleeder screw. I'm going to grab a eight millimeter wrench, I'll open that up and we're going to wait for a trickle of brake fluid to come down through.
So I have my eight millimeter box wrench here, it's just the other end of this side. Put it up on there, give that a bonk, break it free. Now we're just going to wait for fluid to make its way down through here because of gravity. Fill up the caliper and that's going to come make its way up in here and it's going to force air and then fluid and it's going to come trickling down into our collection receptacle. This could take a few minutes. If you have a vacuum bleeder, you could put it on here, apply a little bit of suction and that'll help it along and as well. So we'll just leave this for now until it's ready to start coming out.
Okay, we've got a good gravity bleed going on. The fluid made its way all the way down this hose into the caliper, filled up all these areas and is now pushed all the air out, or the majority of the air, and we have a steady trickle of fluid. I have a gloved finger so I can touch this brake fluid, if you're not wearing gloves, do not touch the brake fluid. Let's see if I can get this thing so it's snug back up. Perfect. Okay. Just wipe it down real quick.
At this point you would go over the other side of the vehicle and you would finish up your service if you're replacing the caliper on the other side as well, at which point once you've done both sides, you can get up inside the vehicle and you're going to do a manual bleed at this time. If you don't know how to do a manual brake bleed, go ahead and check out our video on YouTube.
Now we're going to grab our wheel. These wheels can be heavy and I don't want you to hurt yourself, so instead of grabbing your wheel like this and trying to lift with your back and potentially hurting yourself, I'll show you a little secret. You take your leg, I'm assuming you're not worried about your pants getting a little dirty, I'm just going to grab it like this, roll it right up your leg, and now you can use your leg/ab muscles to lift it right up, and use your leg to hold it, balance it. See? That works pretty good.
I'm going to take my lug nut, my socket, put it right on here. Now that we know we've got one locked in, we can release it. Grab the rest of our lug nuts. We're going to start all these on. We'll bottom them out and then we'll torque them down. All right, so let's bottom out these lug nuts. Perfect. We'll get this down on the ground and we'll torque them down to manufacturer's specifications. Okay, friends, let's get our torque down. We've got our 21 millimeter socket. We've got our torque wrench set to 83 foot pounds. We're going to go in a crisscross manner. Okay, I'm just going to go around one more time. It's a small price to pay for safety. Awesome.
Thanks for watching. Visit 1aauto.com for quality auto parts shipped to your door, the place for DIY auto repair. And if you enjoyed this video, please click the subscribe button.
