Hi, I’m Mike from 1A Auto. We’ve been selling auto parts for over 30 years!
With the vehicle on the ground, I'm going to remove the center cap. On this one with a steel wheel, the center cap pops out from the center. From the front, just take a small flat-bladed screwdriver and pop it off. It'll come right off. If you've got an alloy wheel, you may need to take the wheel off. Pop the cap out, then put the wheel back on.
I like to have the wheel on the car, and the car on the ground to remove this axle nut. It's a lot easier, because these axle nuts have a lot of torque to them. Then trying to do it with the vehicle on the jack stand, and also you'd have to have some hold the brake to prevent it from spinning. This way, it's all on the ground. It's not going to move or rock back and forth. The axle nut is staked.
It doesn't have a cotter pin, so you need to take a flat-bladed screwdriver or the appropriate sized punch. This one is a little bit too big. I'm going to get a smaller one. I'm using a worn out, old, flat-bladed screwdriver, just kind of work it in here. You don't have to get it fully bent back out, just enough that you can get on there and then turn it. Just going to use a little ball pein hammer. The screwdriver might not be enough to do this. It's not really meant for it, but if you don't have the small chisel or punch to get in there. If you are just taking off this axle to get to some other component, you'd need to replace this axle nut. So since we're replacing the whole axle, it does come with a new axle nut. We're going to spray it with some rust penetrant to help it spin.
Use a 30mm, 12-point socket on the end of the breaker bar. This might take some force. Go. I'm just going to loosen it up. I'm just going to get it just so the end, just so the end is beyond the axle, and this should be so that when I've got it up in the air, it'll be easier to spin it off. I won't be fighting trying to spin the thing off the whole axle. Use the 21 mm socket and the breaker bar, loosen the lug nuts.
Raise and support the vehicle. Use the socket to remove the lug nuts that are loose. And remove the tire and wheel. It seized itself to the hub. Put a couple lug nuts on here. A couple threads down. This way, the wheel doesn't fall off. Going to hit it with a dead blow mallet right in the bottom. It takes a couple good blows with it. It'll come right off. Put this aside.
Take some rust penetrant. I'm going to spray it in here. There are splines in here for the axle. I want to make sure it's free. I'm going to tap it with my dead blow because I want to make sure the axle is going to move free before I loosen the lower ball joint and this is all moving around on me. It would be easier to free it up this way. Perfect. That's going to slide right out. We're just going to turn this out of the way so you can see what we're doing.
Need to remove these two nuts here, and the single bolt that's holding in the bottom of the ball joint. Spray some rust penetrant on here and the top off that bolt. Use a 17mm socket and the breaker bar. That one started. The other one and the bolt. There's the bolt. Going to use our pry bar to pop this ball joint out of the lower control arm. That way I'll have enough swing to slide this axle out of the back of the knuckle. I'm going to finish removing the axle nut. It's still a little stuck. I'm going to use the ratchet. Spin that right off. I'm going to pull the axle out. Actually pull the whole knuckle this way, and then pull the axle out. Let's see, just like that.
To remove the passenger side CV axle, you go underneath the vehicle. It is mounted in this little carrier-bearing pedestal. It's bolted to the side of the engine block. You should be able to unbolt these two bolts and the back separate, and the whole axle should go out this way. It looks pretty rusty. If it's seized up, I'm going to have to remove the whole pedestal and then press it out with the shop press. I'm going to spray some rust penetrant on here, and the back side of the bolts are exposed. Let's see if I can get to the top one.
Use a 14mm to break them free. Switch to the shorter ratchet space. That's one bolt. Looks like the bolt thread through the flange, so I'm going to put the bolts back in. Not thread them all the way in. Leave them kind of out.
I'm going to take a punch and put it on the end of the bolt and tap it in. This is so seized together, I'm going to end up taking this whole pedestal that's bolted to the back of the engine. I'm going to take it right off. It'll come out with the whole axle. It's held on with a 14mm bolt in the bottom and then two 14mm bolts at the top. Spray some rust penetrant. They are going into the aluminum engine block, so hopefully they're not seized in there. The top one, I really can't see. I'm going to kind of feel for it.
There's that one. It does sit on some little mounting, some very shallow mounting studs. I'm going to use a pry bar to just pry it off, just like that. I'm going to hit on it here and try and knock it out of the transmission. You might want to have a drain pan ready because some transmission fluid might leak out from here. I'm going to take a block of wood and put it up here and take my dead blow mallet and try and pop it out. There it goes. I'm going to now guide it out of the engine compartment. This is on this pedestal thing, so it's not supposed to come out with this, so you kind of have to wriggle it out, careful of this brake line.
Here's our whole axle assembly. This lower flange should be able to separate and allow me to press the whole axle assembly out. It's riding on a bearing that kind of sits inside of it here, but part of this flange here goes over the bearing. The bearing is made out of steel. This is steel. It seems to have rusted together. There is a seam here.
I just sprayed some rust penetrant in here to let it sit. I've got the bolts sort of threaded in, but not all the way. I'm going to try with a punch because I don't want to damage the head of the bolt. Put it right in here, and I'm going to hold the axle too at the same time. It's not clamped to my vice very well. It's kind of awkward. I'm going to try to tap the bolts on each side and try to get this flange to separate. Let's see. Add some fire and heat.
Try to get this lower collar separated from this upper collar because the bearing that this rides in is held in with this lower part. It's got threaded holes only on one side, so I'm going to try something. I was hitting on the top of these bolts. I'm going to take them both out, and then I'm going to thread them in from the bottom, and maybe it'll give me a little bit better surface to hit.
So I'm just going to thread them in and bring them up to protect the threads that are inside because this top part is smooth. This bottom part has the threads in it. I do that for both sides. We can use our punch. Go in here. Ball pein hammer. It's starting to separate. I'm just going to keep going back and forth. Spray a little bit of rust penetrant in here. There it is. Slide this out of here.
I'm going to remove this from the vice, this bracket, and we'll put that aside. We can reuse it and clean it up afterwards. Put our axle on the vice this way. There is a snap ring in here. So the end of the snap ring is right there. I'm going to use the pick to kind of work around it and clean any dirt and some rust penetrant. I'm going to use a small pry bar. Pop that out of there. Just work your way around it. Try and get it out. Just keep going that until you get the snap ring free. That's going to stay in there.
Now we need to get the bearing out of this. The outer bearing that's in here is steel. This part is steel, so they've rusted together. You could try to hit on these ears and separate it if you kind of go evenly and you had it in a vice, or if you supported these ears, you could to try to hit on the axle shaft in a vice and pop it out.
We're going to use the press because that's the best way to do it, and you can see this is why I removed the brackets that it sits nice and flush in the shop press, and hopefully this comes apart. We may need to apply some heat to this, but we're going to try it just now, using the press. And there it goes. So it's starting to move. It's just rusty. There it is. We can see our bearing. It's all rusty, and is stuck inside that housing. Get that snap ring off of here.
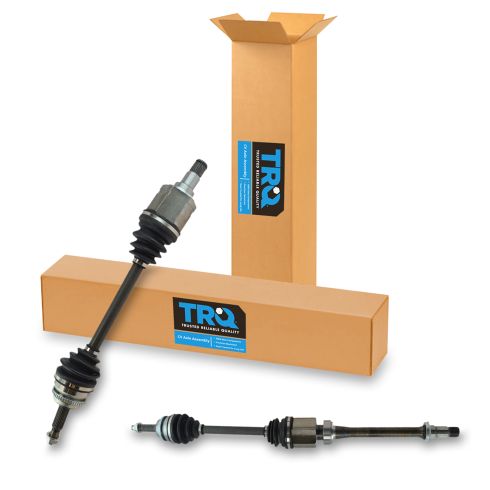
Here's our original CV axle. It came with a carrier bearing. Here's our brand new one from 1AAuto.com. There's no core charge on this. It's just ready to be installed. It has a new bearing already installed on it. It has this dust shield. Same exact design. Exact length. Comes with a new axle nut. This will great fit and work great on our vehicle. We want to reuse these parts. They've got some rust on them.
Just going to clean them up, and use some rust penetrant on them, some emery cloth, a wire brush, a pick, and just get them all cleaned up so I can reuse them, and they slide together easily. This should not have to be pressed onto the axle, so just going to make sure that the space in here where it rides is fairly clean. This is one actually isn't too, too bad. Just spray a little rust penetrant in here.
Take emery cloth, clean around it. I'm also going to clean the groove where the snap ring rides using this pick. Take a rag, just wipe it out. So just repeat that until you get the inside nice and clean. I'm going to clean the outside of this collar because it's got to go in here. Both sides have a lot of gunk in them. So I'll spray some rust penetrant. On this one, I'll use the wire brush and just clean it up. It doesn't have to be perfect, but you want to get most of the rusty stuff off so it'll slide together easily. We'll put that aside. I'm going to do the same for the inside of this one.
We're going to get our cleaned-up snap ring in place. Going to spread it over the axle. Bring it down over the bearing just like that. We'll take some white grease. So this part is going to go on over the bearing. There is an actual stop here, and the shiny metal part is where the bearing's going to sit. It should just slide right one once I've cleaned it up. It might go on a little tough because of the rust.
I'm going to use a small ball pein hammer and just tap it on. Kind of go around and do it evenly. It should be seated down there. We've got our snap ring. It does not have a beveled edge on either side, so we can go in any way, so I'm just going to get it lined up and get started on one edge. Just kind of push it in. I'm going to use the little pry bar. I've got part of the snap ring in the channel. I'm going to try and lock it in there by wedging it against it, and then I want to push this side in. And then hopefully it will allow me to go along and push it in because there's not a lot of spring tension to this, but enough. All right, so that's part of that. Just keep pushing that in. That one to get started. Just pull it into the groove.
Now what I want to keep doing is I'm going to keep that held there, and I can see where it's popping out, and push it in like that. Okay. Now it's starting to go in the groove. Make sure it's going in all along the edge, and use a little pry bar and just pry it up into the groove just like that. I'll spin this over. There we go. It's difficult to get this snap ring in here, and you're just going to have to work at it. But now it's in there. Now the bearing support.
This pedestal needs to go on to here. I'm going to take some more white grease just help it slide together. I did my best to clean up the rust. It might not slide together perfectly straight. There's a dowel pin here. It's going to line up with the dowel hole here. Just make sure those are lined up. It's chamfered. We're going to slide that together. Now I've got it close. I'm going to put the bolts in.
I'm actually going from the side. Start to get them caught. I'm going to use the bolts to pull this together. That one's started. I'm going to start at the other side. Just pull them down evenly. Now this is ready to go back into the car. I'm going to guide the CV axle into the engine compartment. To catch it on the rubber brake hose here. Lift your arm and grab it. Spin the bracket up. It does have some dowel pins, two in the top, that it needs to fit into. I also need to guide it into the transmission. We'll need it lined up. Get it lined up. It'll go right into the transmission.
There's no circlip on this so it should slide right into place. Now it'll sit like that. And the bearing pedestal is already lined up pretty well. Adjust it a little bit. Get it on the dowels. It should sit right over them just like that. I'm going to install the bolts. Going to tighten up these bolts. These are steel bolts going into the aluminum of the engine. I don't want to over tighten them. I'm just going to get them snug. Make them a little more, and that should do it.
Get the bottom one and then the top two. With the axle in place, we'll just take the axle nut off if you have it on there. I'll put that aside. Put the axle back into the hub. I'm going to push the hub out. Grab the axle. Turn it. Just kind of have to force it out, and you might have to turn this a little bit as you feed it in to catch. Just like that. I'm going to put the axle nut on here just loosely so that as I move this around, it doesn't pull all the way out. I'm using a large pry bar. This vehicle does have a new ball joint on it. It's pretty stiff. I've got it pushed up. I'm going to try to flip it over. There it is.
Reinstall all your ball joint hardware. Just going to tighten these down. I'll come back and torque them afterwards. Reinstall the bolts. I'm going to torque them to 76 foot pounds. Bring them down evenly. It clicks. It's torqued. I'm going to tighten up the axle nut. I'm not going to torque it yet, but I am just going to tighten it down. I'm going to just do this by hand at first. I'm going to use the axle nut socket, snug this down.
Now reinstall the wheel. Our steel wheel has the center cap off. If you've got an aluminum wheel, you want to make sure the center cap, which is the part that's right here, is removed, before you install it. Usually they need to pop out from behind because what we're going to do is tighten up the lug nuts, lower the vehicle down, and then torque this with the vehicle on the ground. The center cap can be installed afterwards. Start the lug nuts by hand and get them tight. We'll torque them with the vehicle on the ground. Torque the lug nuts in a cross pattern to 76 foot-pounds. Torque the axle nut to 217 foot-pounds. Since this doesn't have a cotter pin, we're going to stake it using a punch to bend the axle nut flange into this opening in the axle. You can reinstall the center cap. It just snaps into place. It'll be the same for an aluminum wheel. It might just be like this big, and you just pop it right in.
Thanks for watching. Visit us at 1AAuto.com for quality auto parts, fast and free shipping, and the best customer service in the industry.