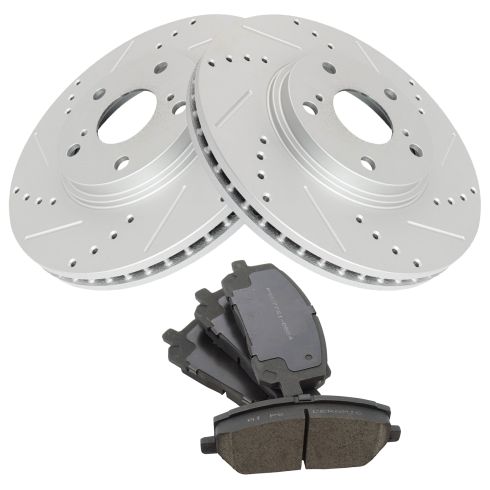
Hi, I’m Mike from 1A Auto. We’ve been selling auto parts for over 30 years!
Use the 21mm deep socket and a breaker bar. Loosen the lug nuts with the vehicle on the ground. This way the wheel doesn't move on you.
Raise and support the vehicle. Remove the lug nuts and take the tire and wheel off. We're using our two post lift, but you can use a jack and a jack stands. Use the socket to remove the rest of the lug nuts. See if this wheel comes free. It is a steel wheel. Of course the rotor that it is touching is also steel, so it's a good possibility that these have rusted together. Yeah. It's on there pretty good. So what I'm going to do is pop this center cap off. Take a large flat-bladed screwdriver. There's a little slot right here. It'll pop right out.
This is the hub. Obviously these are the wheel studs. There's a lot of corrosion and rust in here. That's basically where it's seized up. I will take some rust penetrant. I'm going to spray it along the edge here. I'm going to spray some into these lug openings to try to get some hopefully between the wheel and the brake rotor. Take two lug nuts. You can use one. I like to use two. Just thread them on real lightly. Because now to get this free, I'm going to take a dead-blow mallet. I'm going to hit on the tire and try to pop this wheel free. The lug nuts are on there so the wheel doesn't fall off. Sometimes it takes one hit. Sometimes it takes ten hits. You just got to hit it until it breaks free. Now you take the wheel off. Put this aside.
Before I touch anything on the brakes, since this is so rusty, I'm just going to spray some rust penetrant between the brake rotor and the wheel hub. Just spray some rust penetrant in here and let that soak while I work on the rest of the brakes. To make this brake caliper easy to remove, I want to compress the piston that's in here. I'm going to take a long flat-bladed screwdriver. I'm just going to wedge it into the rotor and push on the caliper. Pull it outwards. That's all I need to do is just compress it enough so that when I loosen these up, the caliper will slide right off. You can also see the slide pins seem to working out right. There's two caliper slide pin bolts.
One on the bottom and one at the top. I start by removing the bottom one. I'm going to use the box end of my 14mm wrench. Loosen them up. Loosen the top one. This caliper’s going to come loose. I'll have a bungee cord handy so I can pick it up. I don't want to let it hang by the rubber brake hose. Hook it back up. I'll hang it around the strut spring. It can sit just like that. Now remove the original brake pads. It should just slide right out. Take out the back one. Do the same for the front one.
Need to remove the caliper bracket bolts. There's one on the bottom and one on the top. These are 17mm. We're going to use the 17mm box wrench. These can be on here pretty tight. If you can't pull on them, you can use a dead-blow mallet and hit on the end of your wrench to break them free. Get this one loosened up. Going to use my open end. That one's loose. Now I'm going to get the top one loose. You can also use a 17mm socket and a breaker bar. I'm going to switch to a 17mm socket and ratchet to make this removal a little quicker. Put that bolt aside. Now it's just the top bolt holding it in. I'm going to hold onto the bracket so it doesn't fall.
It's loose enough that I can take it out with my fingers. There's our bracket. Let's see if our rotor will come free. It's pretty stuck on there. I'm going to take a lug nut and thread it on. Take that dead-blow mallet we had and tap around the rotor. Tap it from behind too. I'm going to take the lug nut off. This one is so seized to the hub, I'm going to have to put pusher bolts into these threaded openings.
I'm going to push the rotor off of the hub. These threaded holes are M8-1.25. You'll need some bolts that will fit those. These are so rusty that I'm going to spray some rust penetrant in here. I'm also going to spray some behind the studs. Then I'm going to use a metric tap to clean out the threads so I can put a bolt in there. Just do this for both of them. They're not going to go very deep. Don't use this tap to push the rotor off. You'll damage the tap. Okay.
Now I can get some bolts and start pushing this rotor off. Just going to put a lug nut on here so the rotor doesn't fall off. Find some appropriately sized bolts. Get them threaded in. These particular ones have a 13mm head on them. So I'm going to use a 13mm socket and my ratchet. I'm just going to turn these in evenly. Spray some more rust penetrant in here. Just keep taking these out, putting them back in. Spraying some more rust penetrant in there. I switched to a longer ratchet because these are really tight. I think it's starting to move. I'm going to do this evenly. Give it a couple turns on one side, a couple turns on the next side. There we go.
This rotor is so seized, and the threads are so small in here that they stripped. Now I'm going to use a torch and heat up around the hub here and try to get the rotor to expand to release from the hub. I'm going to switch to a metal hammer, try to break it free. The rotor is really hot right now. I'm going to let it cool before I try to remove it. Remove the lug nut. Just really hot. Oops. Take our rotor off. Put that aside.
This hub flange is very, very rusty. I'm going to spray it with some rust penetrant. See it's still warm. I'm going to take a wire brush and just scrub this all loose. Just going to try to clean this up as best I can so that the new rotor doesn't get stuck and it seats nice and flat. Going to spray some more oil on here. Can also use emery cloth and clean this up. Pop the brake caliper hardware out using a flat-bladed screwdriver. Repeat that for both sides. It’s a little stuck in there.
Take some brake parts cleaner. Take a wire brush and clean them all up. Wipe them down. Now we're going to clean up where those clips sit on the caliper bracket. More brake parts cleaner and a wire brush. Wipe those out. Do the same for both sides.
Now I want to check the operation of the slides. They should move nice and freely. That one moves pretty freely. That one moves pretty freely as well. If not, you can just pull the boots back. They'll pop right off. Pull it straight out. I suggest you do these one at a time so you don't mix them up. Those look to be in pretty good shape. Wipe off the grease. There's no rust or pitting. Pop this out. Just pull it straight out. It looks pretty good in there. I'm just pop this back in.
Use our brake caliper grease, and I'll grease these back up before I reinstall it. Slide it back in. The boots just going to slide up and over that little bump there that's going to hold it in place. That little, there's a rubber grommet on the end of this that makes the movement a little bit stiffer on this one. But it moves nice and free. I'm happy with that. Do the same thing with this one. Reinstall this.
Reinstall your hardware kits. You want to make sure you install them with this... curved part, this little clip part to the outside, not the inside. If you install it to the inside, you could touch the rotor and I will make noise. There's a flatter one that goes on the inside. This one goes here, that pointing out. This one goes on the other side with that part pointing out. Going to do the same for the other side. Take some brake parts cleaner. Clean up all the oil and rust that I knocked free.
Going to put the rotor on backwards. Going to spray it down with brake parts cleaner. Get rid of the oil it comes packed in to prevent rust. Wipe down any excess there. I just need to take this off for a second. Going to put some copper anti-seize around the hub to prevent that getting frozen again, rusted. Put the rotor on the correct way now. Use a lug nut to hold it in place. Going to spray down this side with brake parts cleaner. Put a little copper anti-seize on the bolts. They're going to hold the bracket.
Install the bracket. Hold it in place, and get the top hole caught. Going to have to move the bracket around. There it is. Let's get it lined up. Thread it in by hand. Get the bottom one caught. Going to use my ratchet and socket to tighten these up. I'll come back and torque them. I torque these to 79 foot-pounds. Going to give this a quick spray with some brake parts cleaner. Don't need to soak these in brake parts cleaner. Just need to spray them real quick to get any dirt and grease off of them.
Of course, don't touch these while you're installing them. Put a little bit of brake grease on the ears. This is where they ride in the caliper on the clips. The one with the where indicator is going to go on the inside. I like to place in the bottom clip first, then feed them into the top one. Push them right against the rotor. Just repeat that for both sides. Make sure that you're matching this curve.
The outside of the pad has a wider curve just like the outside of the rotor. You don't want to try to install it this way. It's not going to work for you. You need to install it this way so the curve matches. That's the same for both the inside and the outside. Just kind of slide it in there. Before this caliper will go on, the piston needs to be pushed back into the body of the caliper. This way you can slide it over the newer, thicker pads.
When you do this it will just push fluid back into the reservoir. If your reservoir was already pretty high, and you're pushing this back in there you might have some leak out. You don't need to remove the cap. You can if you want. You don't have to. You want to clean up any leaks. If your brakes were really worn, and these were pushed way far out, you may not have anything leak out. But when you're all done, we'll check the level. You don't need to crack the bleeder screw in these.
Take an old pad. Place it inside the rotor. Use a C-clamp. We're going to gently turn on it. It should go back in with a little bit of resistance, but nice and smooth. Pads going to bottom out. That's perfect. Take our bungee cord out of the way. Take it out of the suspension. Don't forget it. Put our caliper down in place.
These slide pins have a curved side and a flat side. The flat side rests against this little ear at the top and bottom of the caliper. You may need to turn them so they'll line up. Otherwise, you won't be able to slide the caliper on. That one needs to turn like that. A little copper anti-seize on the caliper slide pin bolts. Put the caliper in place. Catch the top one.
Now I'm going to do the bottom one. Get these threaded in by hand. Let's see how this caliper moves. It moves freely, but not very far, because the pads are nice and new and thick. Torque on these is 25 foot-pounds. Kind of go evenly. Move this up so I'm not interfering with the fender liner. Once it clicks the torque is reached, and you're all set. There we go.
To prevent the wheel from seizing to the rotor again, I can kind of see the outline where it was rusty. I'll put some copper anti-seize there around the inside of the hub. I'm going to take this lug nut off.
Reinstall the wheel. Thread the lug nuts on by hand. They do have a cone seat. They'll line up the wheel. Tighten them down with a socket and seat them. Now you lower the vehicle to the ground and torque the lug nuts. Torque the lug nuts in a cross pattern to 76 foot-pounds. Now you reinstall the center cap. It just clips into place. Before we start and drive the car, we're going to gently press on the brake pedal, not all the way to the floor at first.
We need to pump it up and let the pistons come out to meet the pads, because we compressed them into the caliper. You'll feel the pedal start to get harder as the pistons come out to meet the pads. That's nice and hard.
Now we can check the fluid level and top off as necessary. This fluid is just below maximum. Minimum would be down here. We can add a little bit of fluid to bring it up, and we'll be done with the brake job. Going to remove the cap. It just pops right off. I'll put a funnel in there. Just add our brake fluid. It won't take too much. Watch that level come up. Once the fluid's at the right level, remove your funnel. Wipe it down. Wipe up any spilled fluid. Reinstall your cap.
Thanks for watching. Visit us at 1AAuto.com for quality auto parts, fast and free shipping, and the best customer service in the industry.


