Hi, I’m Mike from 1A Auto. We’ve been selling auto parts for over 30 years!
Before you remove the brake caliper and brake pads, make sure that you disconnect the negative battery terminal. There is an electric brake controller that if the door is opened, the driver's door or even if you accidentally touch the brake pedal, it will activate the braking system and potentially you could have the piston come out of the caliper if you've got this disconnected, so you just want to make sure that the negative terminal of the 12-volt battery is disconnected and put aside before you touch the brake system.
Need to pop the hubcap off. You can use a large, flat bladed screwdriver or a small pry bar. Just kind of work it under the edge of the hubcap. It should pop right off. You can use the 21 mm deep socket and a large breaker bar to loosen the lug nuts of the vehicle on the ground so the wheel doesn't spin on you. This will make it lot easier to take them off once it's up on the jack stands. You're going to raise and support the vehicle. You can do this with a jack and jack stands but we're going to use our two post lift. Finish removing the lug nuts using the socket, and put the wheel and tire aside. Just going to hold onto the wheel because it wants to fall off once I get this lug nut loose. With the wheel and tire off, put it aside.
Before you can remove the caliper, you need to unhook the parking brake cable. I'll just spray a little bit of rust penetrant on here. That'll just help it slide apart. Take some needle nose pliers, grab onto the cable, and at the same time, going to try to pull it up and out. And so we're kind of just popping it out of this little seat where it's sitting. There it is. Pull the cable down and out. So the parking brake cable will just sit like that. Need to remove the parking brake cable from the bracket that's mounted to the rear brake caliper. It has a one-way clip on it.
I'm going to spray some rust penetrant on here. Take the box end part of a 14 mm wrench, slide it over the cable. Go down, it's going to push the clip together. You might have to go in a little bit if you can, and then it's going to pull the cable out. All right. Now I can slide the cable out of the bracket. We'll let it hang there. Now we can remove the lower and upper caliper slide pin bolts. They are 14 mm. Use the closed end of the wrench to loosen them up. Same for the top one. Spin them out by hand and slide the caliper off.
You can't pre-compress the caliper because it does have the parking brake assembly in it, and it will have to be spun back into the caliper to retract it afterwards. So we'll put this aside and it will actually just sit right here on the suspension. You can pop the brake pads out. Push them apart. You'll loosen the lower and upper bracket mounting bolts, so these are 14 mm. Break these free. They might be in there really tight. Can use a 14 mm socket and a long ratchet to get some leverage on these. Got that one loosened. We'll loosen the other one. I actually got them loose enough. Loosen them by hand. We'll hold onto the bracket so it doesn't fall. Put that aside.
And this rotor, it's already pretty loose. If it wasn't, you could spray some rust penetrant along here and then insert some 8 mm bolts and push this off, but it's going to come free, come right off there. Put a bungee cord around the caliper just to hold it in place. Here's the original brake rotor and pads we pulled from our vehicle.
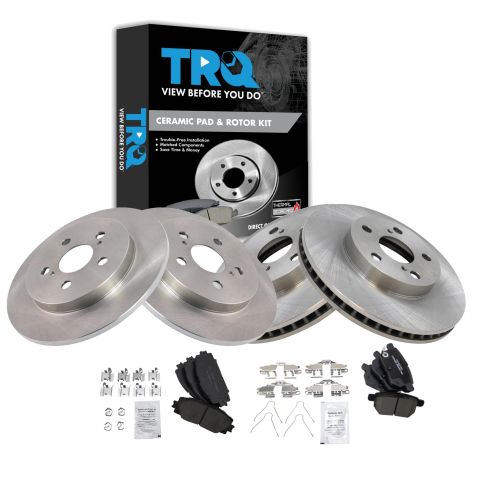
Here's the brand new ones from 1aauto.com. Same exact style, solid rear disc. Same style pads. These particular ones come with new hardware. This will work great and fit great in your vehicle. So inside your brake caliper bracket sits your pad hardware. These are stainless. If you need to, you can reuse them. Use some brake parts cleaner and a wire brush, and you can clean them up. These have little tabs, so I'm going in one direction. Do the same for both sides. Then you can clean them up with a rag and they'll work just as good as new for you. If you have replacement ones, you could take a flat bladed screwdriver and just pop them out. I'm going to pop these out because I do have replacement ones. You'll want to clean where they sit, so again, brake parts cleaner, wire brush. Knock off some of the loose rust. Do the same for both sides.
Install the new hardware. Push them into place. This one's got a little bent. Just bend it back. Next, you can check to make sure your sliders are moving nice and freely. This one's moving pretty freely. This one's really stiff. So if that hardware comes out, that's okay. I'm going to put that aside for now. I'm going to use the 17 mm wrench to try to turn it and get it to move freely. Try to pull it out. Carefully pry back the boot.
Once it's out of the boot, try to work it out of the caliper, out of the caliper bracket. I'm going to put one of the caliper slide bolts in here, help give me a little extra place to grab onto. I'm going to take this hardware out. So this slide pin you can see is really dry. It's corroded. This should be really smooth, nice looking metal with some grease on it. This needs to be serviced because it didn't want to move. This one moves really nicely. Usually the ones with the rubber end move a little bit slower, but they will move, and this one didn't want to move at all. It was very difficult to get out. I'm going to clean it with some brake parts cleaner. Try to brush off some of the buildup. Worst case, you'll have to replace this caliper or at least the slide pin bolts. You can use a scouring pad, brake parts cleaner. That looks a lot better.
I'm just going to clean inside where that slide pin went with some brake parts cleaner. Take some brake caliper grease, grease up this slide pin. Push it back in. Now you can see it moves nice and freely in and out. Make sure this one moves, but I am also going to lube this one up. You can see this one came out. This also had a rubber stopper on it. Sometimes only of them will have that. This one had both, but you can see how this has grease on it. That's why it was moving nice and freely. Just clean off the old grease.
I'm not going to worry about cleaning inside there because it was full of grease and it was moving freely, so I'll just reapply some more to this one, fresh stuff. Put that back in. It moves nice and freely now. Much better. Push these clips into place.
This is ready to be reinstalled on the car. I'm going to reinstall the rotor backwards and just spray it with brake parts cleaner to remove the oil that it's shipped in so it doesn't flash rust. I'm going to make sure this surface is nice and clean. You don't want any oil or dirt contaminating your new brake pads. So I'll just touch the edges and flip it over. It doesn't matter where this is installed. I'll put one of the lug nuts on here so the rotor doesn't flop around while I'm trying to reinstall the brake caliper bracket, and spray down this surface to get rid of the oil coating with brake parts cleaner. Now it's sitting nice and flat. It's not touching the dust shield, so it's not going to make any scraping noise. If it was touching, it might make a noise, and you can just bend that dust shield away.
I'm going to reinstall the rear brake caliper bracket. Get it lined up in place. Got the bolts in my hand, get them threaded in my hand first. Might have to move the bracket around. Same for this one. Going to torque the caliper mounting bracket bolts to 42 foot-pounds. Once it clicks, you're all set. Do both. Just give the brake pads a quick spray of brake clean. You don't need to soak them. Just want to make sure there's no grease or oil on there. Take a little bit of caliper grease and put it on the ears, where they'll slide in the caliper hardware. And push them into place. Make sure the wider part of the pad goes towards the outside. Push them in place. Same for the other pad. So these little return springs were missing when we originally took them off. They do go in here. Those little pins right here. They just help keep the pads from rattling. Just sit like that. Unhook the caliper. We sort of had it hooked up here. We didn't want it to fall, but it probably wasn't.
Now, to compress this caliper in, there is a special tool that goes in here to turn it. I'm just going to use some needle nose pliers. Take a little longer, but it should work. Just turning it in clockwise. The reason why you have to turn this one in, you can't just push it in, is because part of it is integrated with the parking brake or emergency brake, and when you pull the emergency brake, it actually ratchets this piston out and holds the brake caliper closed to be used as the emergency brake. So I'll just spin this in. Moving pretty freely. That looks like it's right touching the edge of the seal, so I think that's as far in as it's going to go.
I'm just going to make sure that this faces like that. So with this, I'll make sure I don't loop the hose around. So what's going to happen, there's a pin here at the bottom of the pad. The pin's going to sit in that space here. That's why you have to have this basically up and down vertically. Going to slide it in place. Might have to push the caliper slide pins a little bit. That'll sit in place. I'll get the bolts started. Get the other bolt started. Going to torque the upper and lower caliper slide pin bolts to 25 foot-pounds. Once it clicks, you're all set. If it does spin, you can counter hold that with a 17 mm. We got lucky, these aren't spinning. Torque the top and the bottom. Calipers are reinstalled.
Now you need to reinstall the parking brake cable, so it's going to go up through the bracket and through the clip. Come on. There it is. Need to get it up into this bracket here. All right, so I'm going to have to pull it with some needle nose pliers. I'm going to pull it up and then try to pry it over with my little pry bar. Not quite. Almost there, so I'll pry it over. Being kind of a bear, but once it pops into place, it'll lock in and you're all set. We'll take our lug nut off that we had on here to hold the brake rotor in place.
Now I can reinstall the wheel and tire. Get it up in place. Try to get them centered as best you can. These lug nuts do have a shoulder on them. The wheel is both hub-centric and then lug-centric, so the lug holes are a little bit wider, and as you turn these in, they're going to center themselves, so get them started by hand. Get this one in as far as I can go, and then reinstall the other three. Four. Get these all threaded in by hand, take the socket and just spin them up. We'll put the vehicle on the ground and torque the lug nuts. I'm going to torque the lug nuts to 76 foot-pounds in a cross pattern. Once it clicks, they're all set. Line up the hole for your valve stem. Push your hubcap into place.
Thanks for watching. Visit us at 1AAuto.com for quality auto parts, fast and free shipping, and the best customer service in the industry.