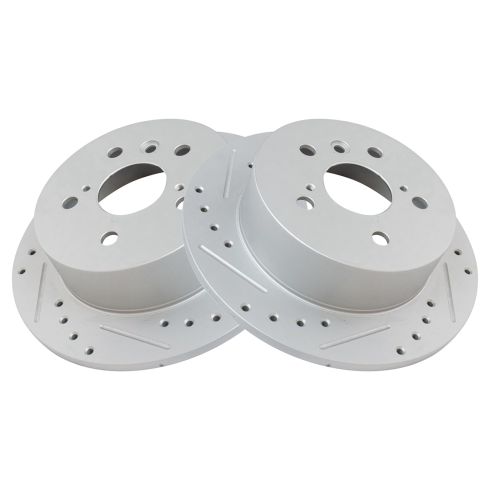
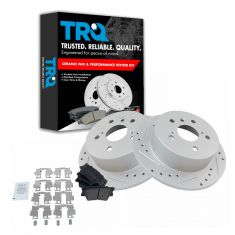
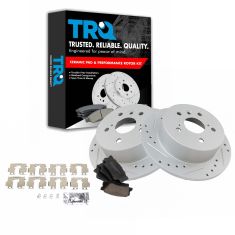
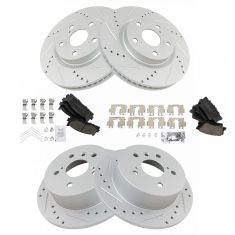
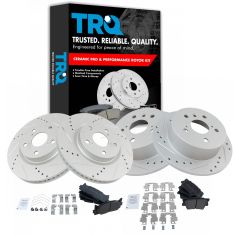
Kit Includes: (1) Passenger Side G-Coated Performance Brake Rotor (1) Driver Side G-Coated Performance Brake Rotor
Stud/Lug Hole Quantity: 5
Nominal Thickness: 10 mm 0.4 in
Grade Type: Performance
Product Line: Performance
Specification
Side Location
Driver & Passenger Side
Location
Rear
Brake Rotor Venting TypeSolid
Item Condition:New
Attention California Customers:
WARNING: This product can expose you to chemicals including Lead and Lead Compounds, which are known to the State of California to cause cancer, and birth defects or other reproductive harm. For more information, go to www.P65Warnings.ca.gov.
Lifetime Warranty
This item is backed by our limited lifetime warranty. In the event that this item should fail due to manufacturing defects during intended use, we will replace the part free of charge. This warranty covers the cost of the part only.
FREE Shipping is standard on orders shipped to the lower 48 States (Contiguous United States). Standard shipping charges apply to Hawaii and Alaska.
Shipping is not available to a P.O. Box, APO/FPO/DPO addresses, US Territories, or Canada for this item.
Expedited is available on checkout to the United States, excluding Alaska, Hawaii.
Final shipping costs are available at checkout.
How to Replace Front Brakes 2008-16 Toyota Camry
Created on:
Tools used
Large C-Clamp
Torque Wrench
14mm Socket
Pry Bar
Jack Stands
19mm Socket
21mm Socket
Rubber Mallet
Dead Blow Hammer
Paper Towels
Bungee Cord
Anti-Seize Grease
Wire Brush
Floor Jack
Cloth Rags
1. Removing the Wheel
Pry off the center cap with a flat blade screwdriver
Loosen the 21mm lug nuts with the vehicle on the ground
Raise the vehicle with a floor jack
Secure the vehicle on jack stands
Remove the lug nuts
Pull off the wheel
2. Removing the Brake Pads
Pry the brake pads into the caliper with a flat blade screwdriver to push in the pistons
Remove 14mm bolts from the brake caliper
Pull the caliper aside and hang it by bungee cord
Remove the wires
Pry the brake pads off with a flat blade screwdriver
3. Removing the Brake Rotor
Remove 17mm bolts from the brake caliper bracket
Pull off the brake caliper bracket
Pull the rotor off
If the rotor will not come off, thread the lug nuts and strike the hub area of the rotor with the ball end of a ball peen hammer
4. Installing the New Brake Rotor
Clean the hub with a wire brush
Clean both sides of the rotor with brake parts cleaner
Slide the rotor on
Thread on one lug nut to hold the rotor in place
5. Installing the New Brake Pads
Put an old pad in the caliper
Use a large C-clamp and the old pad to push the pistons back
Clean the brake pad slides with a wire brush
Apply grease to the caliper slides
Put the caliper bracket back into place
Start the bolts by hand
Apply grease to the brake pad tabs
Install the new brake pads into the bracket
Put the caliper on
Tighten the bolts
Tighten the bracket bolts to 79 foot-pounds of torque
6. Reattaching the Wheel
Slide the wheel into place
Start the lug nuts by hand
Tighten the lug nuts preliminarily
Lower the vehicle to the ground
Tighten the lug nuts to 76 foot-pounds in a crossing or star pattern
Press on the hub cap
7. Testing the Brakes
Pump your brakes repeatedly until they feel firm
Test your brakes at 5 miles per hour and then 10 miles per hour
Road test the vehicle
Hi, I’m Mike from 1A Auto. We’ve been selling auto parts for over 30 years!
Use a large pry bar for a flat-bladed screwdriver to remove the wheel cover. I'm just going to slide it between the wheel and the plastic. Pop it off. These lug nuts are a 21 millimeter socket. I'm going to use that and a breaker bar to loosen them while the vehicle's on the ground. Then, raise and support the vehicle. We're using a two post lift, but you can use a jack and jack stands. The lug nuts are loose. I'm going to take the socket and finish removing them. I'm just going to hold on to the wheel. I'll take the last lug nut off. It's going to be loose. I don't want to drop it. Drop the lug nut. That's okay. I just don't want the wheel to fall.
Before I remove the caliper, I'm just going to pull on it and try to compress the piston. That way, it will slide right off. Take a 14 millimeter wrench to loosen the caliper slide bolts. There's one on the top, one on the bottom. They're pretty tight. If they don't want to budge, you can take a mallet to break them free. Same thing on the bottom one. I've got a bungee cord handy, so when I remove these caliper slide bolts, I could hang the caliper from the strut. Let's loop it around. The caliper should slide right off. See, one of our hardware pieces of hardware is actually broken on here. It should go right in there. The pads will slide right out like this.
Two 17 millimeter bolts that are holding the caliper on. There's one on the top and one on the bottom. To break them free, you can use the box wrench and the mallet. We've got these loose. I'm just going to remove them by hand.
The rotor is very loose. We don't want it to accidentally fall. I'm just going to take one of the lug nuts. Just put it on there so it doesn't fall on my feet. Remove the caliper bracket. So we're pretty lucky. This brake rotor's really loose. I'm going to take the lug nut off that I was using to hold it on, just slide it right off the studs and the hub. If it was rusted on, you could thread a couple of small bolts into here and evenly turn them down or push against the hub and push the rotor off.
These are old pads and rotors for our vehicle. I've got brand new ones from 1AAuto.com. So the pad design is very similar. The rotor design is the same. Five lug holes, two pusher holes. It's a ventilated rotor. This will fit great and help the car stop.
Before you put the rotor back on the hub, make sure it's nice and clean, not too rusty. This one's in good shape. If yours is really rusty around the hub here, take a wire brush and knock some of the rust down, clean it off. We're going to take our new rotor, and we'll install it backwards first. Take our brake parts cleaner, and we're going to clean off the oil that they ship with so they don't rust. Grab it, flip it over, install it the correct way. I'm just going to throw a lug not on here so it's not moving all around on me. Take a brake parts cleaner. Clean the surface. I'm just going to wipe down any excess.
You need to compress the cylinder back into the brake caliper. I'm taking the old brake pad, and I've got a C-clamp, and gently compress it. This way, our new pads that are thicker will fit. We need to clean our hardware so we can reuse it. We'll take some brake parts cleaner and just spray it in there. Get a wire brush. Just repeat for the other side. We're going to reinstall our bracket. Get those started by hand. The top one's usually easier to get done first, and you can move this one in and out to line it up. I'm just going to snug them down. Take some brake parts cleaner to just make sure the pad surface is nice and clean before you install them, and put just a tiny amount of brake caliper grease on the ears of the pad. Don't need to go crazy with this stuff.
The inside and outside pads are identical, so I'm going to start with the inside one. Pop it into the bottom, push it in. Repeat for the other pad. Clean it off. Put a little bit of grease on the ears. Replace the spring hardware, put it in place. It's going to balance the caliper. Swing it down. Get the back part caught first. Push that over. Caliper slide bolts and reinstall those. Get a 14 millimeter ratcheting wrench. Tighten them up, and torque the two caliper bracket mounting bolts to 79 foot-pounds. Don't forget to remove the bungee cord you were using. Make sure the brake rotor is clean. Sometimes, you get dirty fingerprints on it. I'm just going to double check that these are tight.
I'm going to reinstall our wheel. It's important to note these lug nuts have a taper. The taper meets the wheel, matches the inside of the wheel. Don't install them with the flat side like this. That is incorrect. Install them with the taper to the wheel. It helps locate the wheel on the lug nut stud. I'm just using the socket and ratchet to bring these down snug before I put the car on the ground, and torque the lug nuts to 76 foot pounds. I'm going in a cross pattern. We'll reinstall the hubcap. I'm going to line up the opening with the valve stem, with the valve stem on the wheel. Just push it in place.
Before we start the car, I'm just going to gently press the brake pedal down. Not all the way to the floor. You need about a quarter of the way, and just pump it. And this will bring the brake caliper piston out to meet the pads, because we compressed it. And you'll start to feel it get more solid as it pumps out.
Thanks for watching. Visit us at 1AAuto.com for quality auto parts, fast and free shipping, and the best customer service in the industry.
BRA74863
In Stock
Product Reviews
Loading reviews
5.00/ 5.01
1review
5 Stars
4 Stars
3 Stars
2 Stars
1 Star
1
0
0
0
0
Fast shipping, great replacements
Mark
April 11, 2023
Rotors were an identical replacement to the OEM rotors on the car except with the enhancemnt of the drilled holes and slots!
Customer Q&A
No questions have been asked about this item.
Customer service
877-844-3393
Monday - Friday 8:00am - 9:30pm ET Saturday - Sunday 8:00am - 4:30pm ET
Toyota is a registered trademark of Toyota Motor Corporation. 1A Auto is not affiliated with or sponsored by Toyota or Toyota Motor Corporation.See all trademarks.
Enter Vehicle Year Make Model
Specify your vehicle's year, make and model to guarantee fit.
Year
Make
Model
Options
Drivetrain
This part doesn’t fit a . Select from parts that fit.