Hi, I’m Mike from 1A Auto. We’ve been selling auto parts for over 30 years!
With the vehicle still on the ground, going to loosen the lug nuts so the wheel and tire doesn't spin on you when you try to break them free. Use the 21 millimeter deep socket on a breaker bar. Break these all free. Give them a couple turns. Do that the same for all of them. Going to raise and support the vehicle using our two post lift. You can use jack and the jack stands.
With the vehicle raised and supported, I'm just going to use the socket to finish removing the lug nuts. Should be able to remove the wheel now, unless it has seized to the brake rotor. This particular wheel is steel, and it has rusted to the brake rotor. Can't break it free just by wiggling it. I'll take a lug nut. I'll put it on here. Actually, before I do that, remove these center caps. Just find the little slot right here. You can use a flat bladed screwdriver, and it should just pop right off.
You can see the hub. This is partially where the wheel rusts, because it rides on this hub. Let's spray some rust penetrant in here. Spray some in the openings, the wheel studs. Install a lug nut. I actually like to use two, so the wheel doesn't tilt too much, because I'm going to hit it with a mallet to break it free. You want to hit on the tire. It might take one good hit. It might take 10 good hits, but eventually, it should break free. Just make sure that the vehicle is supported securely if you're hitting on this wheel. Take the wheel off and put that aside.
Before I can remove this caliper, I want to make sure that the piston gets compressed so that it'd be easier to slide off. You can take a flat bladed screwdriver and just put it in here. And then just pry gently, and it will compress the piston. You can see it come in. Actually, those slides moved really nicely. So that's nice and loose. You can actually see it moving on the slides. When you step on the brake, the piston comes out, so say the caliper will be over here. Step on the brake. It pushes the piston this way and clamps the brake pads together down on the rotor, and that's what slows you down.
Need to remove the top and bottom slide pin bolts. Use a 14 millimeter box wrench. Break them free. There we go. That one has been rounded. That's a little bit smaller than a 14. 13 doesn't quite fit. Not ideal. Going to have to get new ones. This top caliper slide pin bolt was on the verge of rounding off, and I was the lucky one to get to finish it off. Now I need to use some locking pliers. It does look like it was recently removed, but then not replaced for some reason. Use these locking pliers. See them set up. Remove this bolt hopefully. You don't normally have to use this. This is a bolt extractor. I'm going to hammer it onto this bolt, because it's starting to round off, using a ball-peen hammer. It's got little teeth in it. It's going to grab onto the bolt and hopefully help me remove it. It's slightly smaller than the diameter, and you just hammer it on. It's tapered. It uses a 19 millimeter socket. Let me use this ratchet, and I'm going to remove it. Okay. That's coming free. I'll have to get a new caliper slide bolt. Finish removing the lower one. I'm going to pull the caliper off the bracket. Don't want to let it hang by the rubber brake hose here. I'm going to hang it up with a bungee cord. Go right over the spring. That can sit right there.
Can pull the brake pads out. Just kind of slide them out. If you need to, use a flat bladed screwdriver and just kind of wedge them out. These are in good shape. I'm going to show you how to replace the rear brakes on this vehicle anyways. I'm going to use a 17 millimeter six point socket on these caliper mounting bolts: one on the top and one on the bottom. Using the six point, less of a chance to round these off. Fit nicely on the bolt head. Break this bottom one loose. Before I fully remove it, I'm going to break the top one loose. Make sure it's on there nice. Take my ratchet off. These are pretty loose. I'll just spin them off with my fingers. I'm going to use the smaller ratchet. Might be a little rust on the threads. Hold onto the bracket so it doesn't fall. Take our bracket off and put that aside.
The parking brake assembly is inside of here with the brake shoes. Sometimes these seize up, and it can make it difficult to remove the rotor. You may need to release the tension on the parking brake. This looks to be in fairly good shape. I'm going to see if this comes off without any trouble. Tap around it with a hammer. It's sort of touching the parking brake a little bit. Sometimes a rust ridge builds up on the inside. It gets stuck on the parking brake. Spray some rust penetrant in between the hub and the rotor. There is a little rubber grommet here. Can pull this out using a flat bladed screwdriver.
Now, somebody put this rotor on incorrectly. This should be an opening. There's a corresponding opening in the hub. What would happen if this was open and not blocked is I could spin this rotor around and find the mechanism—the adjuster for the parking brake—and I could thread it back in, and move the shoes in, and help me pull this off. Since somebody has covered that up, incorrectly, I'm going to have to put some bolts in here and try to press this off.
I'm going to spray some rust penetrant in here. Try to get between this and the hub. Actually, right here, you can kind of see the hole that that's supposed to be over. I thread in the appropriately sized bolts. These are M8x1.25. They've got a 13 millimeter head on them. Use this socket and ratchet to evenly push down. See, as soon as you do that, it starts to break it free. That was fairly easy. Sometimes these can really get stuck on there. So got really lucky with that one.
Here we can see there are openings in this hub. As you spin the hub around, for example, right here is the adjuster. That adjusts the parking brake shoes in or out. In the hub are these openings here. These allow you to get to the parking brake shoe adjuster when the rotor is on. The rotor was installed incorrectly, so this normally, so the hub would be like this. You'd have this opening. There's an opening in the rotor, and you'd line it up. See if I can get this back over. But what you'd be able to do—it's probably pretty hard to see. You're going to have to work a flashlight around, but the adjuster is at the bottom.
I can show you this without the rotor on, but you're basically looking for the little wheel that's in here. Take it off. What you're basically doing is working through that opening in the rotor, and you're turning this adjuster wheel. Pushing the screwdriver in like this, and then pulling it down, you are pushing the parking brake shoes outwards, and you'd be making them tighter against the inside of the brake rotor. To release them, you're going to want to push this down.
So you're going to go up here and just flick it down. It's going to thread this adjuster back in. It's right there. You just keep doing that until eventually the rotor will become loose, and you should be able to slide it off. This is also how you'd set your initial parking brake tension, because what happens, as this parking brake wears, this adjuster is an automatic adjuster. It moves out to account for the wear in the brake shoes. Of course, you don't, on an automatic car, you don't use your parking brake very often, so they don't really wear down. Takes a long time for them to wear down. They usually have to be replaced because they seize up. That is threaded all the way in. You don't want to go too far and jam it. The rotor would slide in, on and off, very easily, because it's no longer getting caught on the brake shoes. What happens is a rust ridge will form right here. This one's not too bad, because this rotor's not very old, but if this rotor was on here for a long time, this rust ridge right here can get very tall, and then right here you can see where the brake shoe would be riding. The brake shoe can't get over that rust ridge. That makes it difficult to remove this rotor.
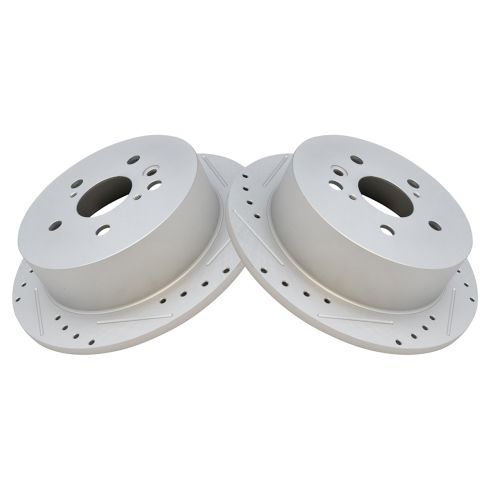
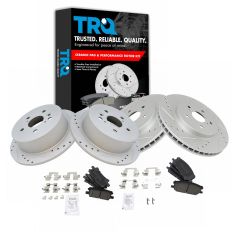
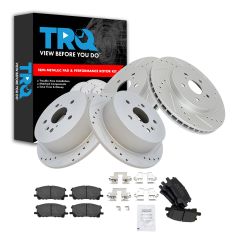
Here's our original brake bad and rotors from our vehicle. Brand new set of brake and rotors from 1AAuto.com. You can see here, this stuff's pretty rusty. They're not really worn down, but somebody did install these incorrectly where they've gotten some grease into the friction area of the pad. That can cause noise. Same over there. Just basically there's too much grease on these pads. You can see the 1A rotor is exact same design as the original. Pads are of the same design. These will work great and fit great in the vehicle.
You can reuse the caliper hardware—they're stainless. You can use a flat bladed screwdriver and just gently pop them out. I don't want to bend them. Before I spray any brake parts cleaner on these, I'm actually going to wipe them down, because these are way over-greased. Don't need to put this much grease. It just gets dirt to stick to it and makes a mess. Wire brush. I also want to clean the surface of the caliper bracket where those clips are going to sit. Use some brake parts cleaner and a wire brush. Those should be nice and clean.
I have a new caliper slide bolt to replace the one I rounded off. I'm just going to check the operation of the slides. Make sure they move in and out freely. They do move pretty freely. See there's a lot of dirty grease in there though. Check the other pin. Yeah, they're pretty gross. What I'm going to do is spray some brake parts cleaner in there. Actually, I'm going to carefully pull these boots out first. They just snap right off.
I'm going to spray some brake parts cleaner in here. Same for both. All right, I pop the rubber boots back on. They should just slide right over. When I install this back on the car and put the slide pin bolts back in. I'll grease those up at that time. Going to reinstall the clips. Just push them back into place. Do the same for both sides, and just clip them back into place. Then spray some rust penetrant on this hub. I want to break up some of that rust.
Take a wire brush, and I'll clean it. This way the rotor will sit nice and flat. Now we're just going to clean it up with some brake parts cleaner. While I've got this apart, now's a good time to inspect your parking brake shoes. These are in good shape. They're thick enough. It really only gets used for parking. What I'm going to do is just spray it down with some brake parts cleaner. There's nothing leaking in here. And just any oil that I may have gotten in there, and dust and dirt will come out with the brake parts cleaner. Take some copper anti-seize, and put it around the hub surface where the rotor will sit. Hopefully this will prevent it from seizing in the future. Make your life a little easier if you need to service these brakes again. Just going to spray the inside of the brake rotor with the brake parts cleaner to remove the oil that it's shipped it to prevent flash rust. Mostly I want to clean the inside where the parking brake rides. Now we can install it.
That doesn't quite line up with the opening. Let me turn it and try this way. That lines up with the opening there. So now, when I need to adjust the parking brake, I can actually reach it through the rotor. I'm going to put a lug nut on here to hold the rotor down so it doesn't move around while I'm trying to install the caliper bracket. Just going to clean the outside surface to get rid of the oil that it's shipped in to prevent flash rust. Then I found the adjustment wheel. I'm going to adjust the parking brake drag, so I'm flicking it up. The other thing to remember too is that this is an automatic adjustment, so once you get it kind of close, you can pull the parking brake inside the vehicle, and as you pull it up and release it, the shoes will move out and adjust. It might take a bunch of pulls, but I like where this is, so I'm going to leave it just like this.
Now I'm going to reinstall this little rubber dust cap. Reinstall caliper bracket. Get it lined up. I might have to move it around. Get it threaded in by hand. I'm going to snug these up using the ratchet, and torque these to 58 foot-pounds. Once it clicks, then you can stop. We need to retract this piston into the caliper so that we can slide it over the new pads. So we're going to take our old pad, put it in there, and we'll use a C-clamp, line it up. It's a little tricky. Then we'll gently and slowly push it in. Should go on with a little resistance, but not too much. That way we know the caliper's not seized. That went in real nicely. The pad's going to stop on the outer edge of the caliper, keep me from going too far. When you do this, you don't need to open the bleed screw. What you're doing is pushing the fluid back into the caliper, and it's going all the way back into the reservoir.
You might end up actually, when you put in new brakes, if they're really worn out, your brake cylinder in the caliper will move out to make up for the worn down pads, therefore more fluid will flow down and will fill in that void. So when you retract these, that extra fluid will push back up in the reservoir, and you may get some brake fluid leaking out of the reservoir if your brakes were really low. These weren't too bad, so the brake fluid will probably be higher, but it won't be overflowing. If you've got really worn down brakes, you should take some of the brake fluid out of the reservoir, and then when you push these back in, you won't have it overflow and go everywhere.
If you do have it overflow and go everywhere, you should clean it up right away. Brake fluid can harm paint, and it will just generally wreak havoc to stuff. It can ruin plastic. So you don't want to let that stuff sit around. Just clean it up if it spills. You don't need to open the reservoir cap on the master cylinder. Even if it overflows, it will just, there's an air release in the cap. It will just push out. Otherwise, you really don't need to take it off. You can if you want, but it's not a big deal if you don't.
We're going to install the pads. I'm just going to take some brake parts cleaner and just quickly clean them off. Don't need to soak them with brake parts cleaner, because they are porous. They can soak it up. That should be good. Just take a little bit of caliper grease and put it on the ears. The pad sometimes has a little curve to it, so the wider part of the curve is going to go towards the outside of the rotor. We don't want to try to install them backwards. Install them in the correct direction. Slide them into the clips, and then just push them up against the rotor. That's the inside one. Do the same for the outside. Put a little bit of grease on the ears. I don't like to put too much, because it attracts dust and dirt, but you do want them to be able to move. I'm just going to start them, and kind of roll them in.
I'm going to take our caliper down. Don't forget to take the bungee cord out of your suspension. Get rid of that. There's a bunch of grease on the back here. I'm just going to wipe it out of where the caliper slide bolts go. Put the caliper right back on there. Be careful not to rip the boots. That will sit there for now. I'm going to take some caliper grease and grease up these slide pins. Just get it all over it. Get this one started. Might need to move the caliper around. We'll do the same for the other one.
Notice I didn't put any on the threads yet, because I'm not going to use this on the threads. Now I can take some copper anti-seize and just put it right on the threads of both of these. It's easier than trying to do this after greasing them and just holding them by the right end. Put those in like that. Start to thread these in using a ratcheting wrench. This caliper moves nice and freely in and out. I'm going to torque these to 32 foot-pounds. Once it clicks, you just stop.
Remove the lug nut I installed. You can see inside this steel wheel where it was rusty and touching the rotor. I cleaned it up as best I could. It's really just going to rust again, but take some copper anti-seize, put it on here. It's easier to put it on the wheel than on the rotor, because you don't know where the rotor's going to land, but the wheel will land exactly where it needs to.
Reinstall the wheel. Put the lug nuts on by hand. Just going to use the socket and get these seated. Lug nuts have a cone seat that matches with the wheel. It'll sort of align itself. Now you lower the vehicle to the ground and torque the wheel. Torque the lug nuts to 76 foot-pounds in a cross pattern. Reinstall the center cap. It just pushes in place.
Before we start and drive the car, we going to gently press on the brake pedal. Not all the way to the floor at first. We need to pump it up and let the pistons come out to meet the pads, because we compressed them into the caliper. You'll feel the pedal start to get harder as the pistons come out to meet the pads. That's nice and hard. Now we can check the fluid level and top off as necessary.
This fluid is just below maximum. Minimum would be down here. We can add a little bit of fluid to bring it up, and we'll be done with the brake job. I'm going to remove the cap. Just pops right off. I'll put a funnel in there. Just add our brake fluid. It won't take too much. Watch that level come up. Once the fluid's at the right level, remove your funnel and wipe it down. Wipe up any spilled fluid. Reinstall your cap.
Thanks for watching. Visit us at 1AAuto.com for quality auto parts, fast and free shipping, and the best customer service in the industry.
